Art in Bloom

Imagine a work of art that’s come to life…in flowers.  The colors, textures, lines, and emotional energy of the painting or sculpture are all interpreted in the floral design, displayed next to the artwork itself.

Warning by Jimmy Ernst, 1960

A spot-on floral translation of the painting Warning by Jimmy Ernst, 1960                                 Photo by Laura Blanchard

That was the challenge for 45 national floral designers and 15 garden clubs during the first weekend in April at the Pennsylvania Academy of Fine Arts – and I was lucky enough to be one of them.

This floral designer showed unbelievable mastery over her material.

This floral designer showed unbelievable mastery over her material.

With the inaugural PAFA in Bloom event, a breath of fresh air blew into the 138-year old Historic Landmark Building.  Sixty diverse floral designs, from the diminutive to the dominating, were placed carefully throughout the building, and an echo was sounded between paint and bloom.  (Or in some cases, marble.)

Nydia, the Blind Girl of Pompeii

One of my favorite floral designs, depicting Nydia, the Blind Girl of Pompeii by Randolph Rogers c.1853 – Marble

So, how does one go about tackling a floral interpretation?  This was the question I asked myself months before the exhibit.  It was my first time doing something like this and I was more than a little intimidated by the scope of the project.  First I had to study the work of art, which in my case was a portrait of the poet Walt Whitman done by Thomas Eakins in 1887.  

My lovely sister-in-law Juliet and I took a trip to PAFA to get an idea of how large a space I'd have to fill and see Walt close up.

My lovely sister-in-law Juliet and I took a trip to PAFA to get an idea of how large a space I’d have to fill and see Walt close up.  Here, she shows how large the pedestal will be.

I started thinking about colors: brown, sage, slate; white, grey; peach. I decided I wanted the container to represent his body, and the design to be symbolic of the painting’s content rather than a recreation.  There were some very specific rules about what materials we could and could not use, with the emphasis on using fresh material as opposed to wood and fabrics like wool which could harbor damaging insects.  You could still use those items, if you fumigated and/or dry-cleaned them, but I didn’t really want to add any steps to the process, and wanted to keep my design as simple as possible.  To me, the energy of the painting is male, vital, and merry; and with that white collar my mind went instantly to calla lilies; a perfect representation of Walt’s joie de vivre.  His gnarled quality might be echoed by a branch of some kind.  The greys and whites of his beard could be items like spanish moss, dusty miller, and I loved the idea of using a big air plant – Tillandsia xerographica – as a focal point.

I ended up picking out my Calla lilies personally at Del Val Wholesale, with the help of Carol Taylor. These were locally grown and the most deliciously huge callas you will ever find!!

I ended up picking out my Calla lilies personally at Del Val Wholesale, with the help of Carol Taylor. These were locally grown and the most deliciously huge callas you will ever find!!

Picking up materials from DV Flora was an exciting part of the process, because I got to see behind-the-scenes of the largest wholesale floral operation in our area, and meet some of the friendly and helpful staff who were topnotch to work with. Thanks, DV! After gathering all my materials, I did a mock design first; borrowing the perfect container from my friend Jane (her basement is a designer’s dream come true)! I was really happy with the outcome, but could I replicate my design on the spot, at PAFA, on the day of the installation? I was incredibly nervous about that part, but luckily I had a huge help from my sister-in-law Juliet (who is a talented architect.)  This short video shot by Juliet shows the scene at PAFA the morning of the preview party.  There was also a cameraman from FOX news there, to add to the excitement!  

Then it was time to place the design upstairs on the pedestal.  We wheeled Walt’s floral counterpart up to see if it stacked up next to the real Walt.

Making some last minute tweaks to my design...having trouble 'walking away'...photo by Juliet

Making some last minute tweaks to my design…having trouble ‘walking away’…photo by Juliet

In the end, I was pleased with our efficiency in getting in and out of PAFA, because my design really only had a few materials in it (I had created the base of galax and some spanish moss the day before.)  Thank you Juliet for rocking this day with me!  

Getting friendly with Walt

Getting friendly with Walt

Then, it was on to the Preview Party, a gala affair attended by those in support of PAFA in Bloom.  It was so exciting to see all the fresh faced designers and my floral friends Peicha, Valerie and Jane in one place..and to watch people looking at my design!  Here are some photos from the evening:

Jane takes a closer look at an intriguing design

Jane takes a closer look at an intriguing design

Peicha is in the house! With Naima, quite a masterpiece herself.

Peicha is in the house! With Naima, quite a masterpiece herself.

Ariadne Asleep on the Island of Naxos as interpreted by Peicha Chang of falls flowers

Ariadne Asleep on the Island of Naxos as interpreted by Peicha Chang of falls flowers.  Simply sensual!

Valerie's magnificent "hand-tied" bouquet

Valerie McLaughlin’s magnificent “hand-tied” bouquet.  Thanks Valerie, for making me aware of this event!

Take a look at Death on the Pale Horse, a Benjamin West painting, which at 176 x 301 inches is one of the largest oil paintings in PAFA’s collection.  The floral designer who interpreted this one was a genius in my opinion…

Benjamin West's Death on The Pale Horse 1817

Benjamin West’s Death on the Pale Horse 1817

This floral translation of Death on The Pale Horse knocked our socks off!

This floral translation of Death on the Pale Horse was astounding.

It was intimidating to be in the same room with the works of so many great artists, and then great floral designers as well, but it was an experience I will never forget. Thanks to Schaffer Designs for including me and for organizing this very successful event, and for maintaining my design over the course of the exhibit…I hope this will be the first of many!

Walt and my design

After the show, I got some great feedback from George Hubner, right here in Swarthmore:  “I saw the PAFA in Bloom exhibit this afternoon, and your arrangement stood out in particular among the 60 others! I didn’t go around paying any attention to the names of the arrangers, but I noted yours. I have noticed that in the US when someone makes a flower arrangement, the more flowers they can cram in the better. Why use just three flowers then you can stuff in 30 in the bowl instead. The Japanese will use three to great effect, but in the US more is preferred (or as Mae West is supposed to have said “too much is not enough”).  Your arrangement stood out for your use of only three flowers. It looks like a Sogetsu to me. And it seems to me that your using calla lilies was referencing Whitman’s calamus poems too. There must have been thousands of flowers used in the arrangements!  The masses were impressive, but your arrangement was simplicity itself and refreshing to see in the middle of all the other over-the-top arrangements.”  Thanks, George!

intro to ikebana – longwood – day two

Midori Tanimune, Longwood Ikebana Instructor, Sogetsu School

Instructor Midori Tanimune, a diminutive and ageless Japanese woman with twinkling eyes, begins the class with a story about herself.  When she was 11, living in Japan with her family, her father tragically passed away.  She had spent every day talking to her father in the fields, and they were very close, so when he died she didn’t know what to do with her grief.  Her mother, having no other answers, sent her to tea ceremonies and Ikebana class once a week after school.  Midori would listen to her Ikebana teacher, and talk about herself, and as long as she came home with a flower in her hand her mother did not question her.  “Ikebana saved my life,” she whispers, but through a smile.  It will teach you to “clean up your soul” and respect nature, respect silence.  I look around at my classmates in surprise at this raw emotion I did not expect to feel at 9am in the Acer Room at Longwood.  There are some other watery eyes too.

Poem by Midori

Midori is in the Sogetsu School, the newest Ikebana school founded in 1927.  In this school, they use unconventional materials alongside fresh flowers.   Their philosophy of Ikebana is that “it can be created anytime, anywhere, by anyone in any part of the world and with any kind of material.”

one of Midori's designs courtesy of epochtimes.com

Also, the teacher must make the arrangement towards the student, which I imagine might be difficult, given all the precise angles, etc.  Midori explains that if we see something we want her to do or to change, to speak up.  I know I certainly don’t feel qualified to do that at this point!   As she creates several different designs for us, none of which I got very good pictures of I’m sorry to say, certain words of wisdom pop out at me.

  • The moment you’re making it is the most important.
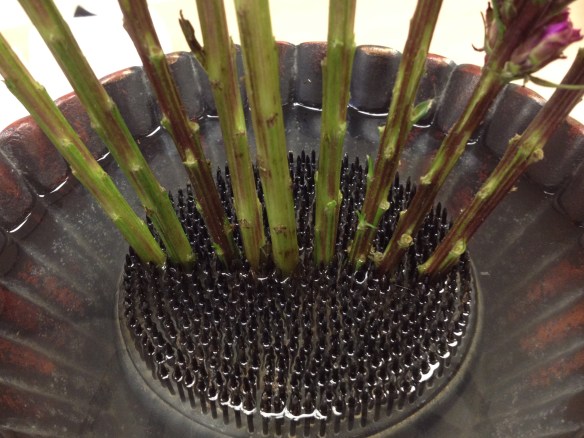
  • Never put the kenzan in the middle of the container in Moribana. (Kenzan is the device with points meant to hold the stems.)
  • Use a cutting bowl to cut stems underwater especially for spring flowers.
  • There are 3 main elements when creating an arrangement in Sogetsu Ikebana: Line, Color and Mass.  Line = Space.

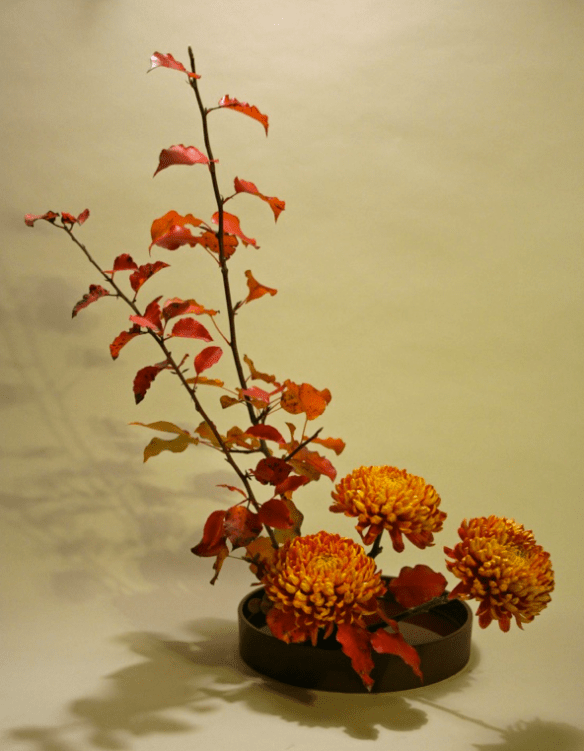
Basic Upright Moribana photo courtesy of http://keithstanley.com - 365 days of ikebana

Our first lesson is to create a Basic Upright Moribana Arrangement. Moribana, as you may recall from Day 1, means “piled up flowers.”  And the basic upright arrangement is the most important, “because all freestyle comes from this.”  There are 3 main stems and specific rules about how long they should be and at what angle they are placed in the kenzan.  We’re using a long low container for this.

Julie's moribana design - beautiful

Shin is the First Main Stem, and Midori calls this stem “the husband.”  The measurement of this stem is the most important, as the other stems will be fractions of it.  The shin should be 1 1/2 times (the depth of the container + the diameter of the container.)  The Shin stem goes in first, in the back center position, placed straight into the kenzan and then turned slightly to the left, as if bowing.  In the arrangements we’re doing, the Shin is a Willow stem.  Choose a side of the stem that will create depth, and trim the stem accordingly to create the strongest line.

Soe is the Second Main Stem, and Midori calls this stem “the wife.”  The Soe is 3/4 the size of the Shin, and goes in second in the left front position.  She is placed straight into the kenzan, then pushed to a 45 degree angle towards the arranger’s left shoulder. The Soe is also a Willow stem.  In choosing how to place the stem visually, don’t think radially.  Think about the stems ‘conversing’ with themselves.  (This was not a natural thing for me to do! I’m so radially oriented!)

Hikae is the Third Main Stem, and Midori calls this stem “the child.”  The Hikae is the shortest stem, and 3/4 the size of the Soe, and goes in the right front position. She should be placed straight into the kenzan, then pushed to a 75 degree angle towards the arranger’s right shoulder and opposite from the mother or Soe. We used a Lily for this stem.

my Moribana with diagram

Next, you should “invite all your friends to the house,” by placing in other supporting stems of the same material – lilies and willow.  But these supporting stems, or Jushi, must never compete with the main stems for line or space.  Always keep the spaces between the main stems open.  And when placing the supplemental “friends” in, make sure some of them are angled towards the main action of the house, so they’re all having a conversation with each other, rather than angling them radially.  Make sure they create movement.  Also, remember that smaller blooms are placed higher in an arrangement, and larger ones LOWER.  Then, place one main flower at the center to “close the door,” and add some greens or pittosporum in our case, to hide the mechanics of the kenzan (not too much but just enough).

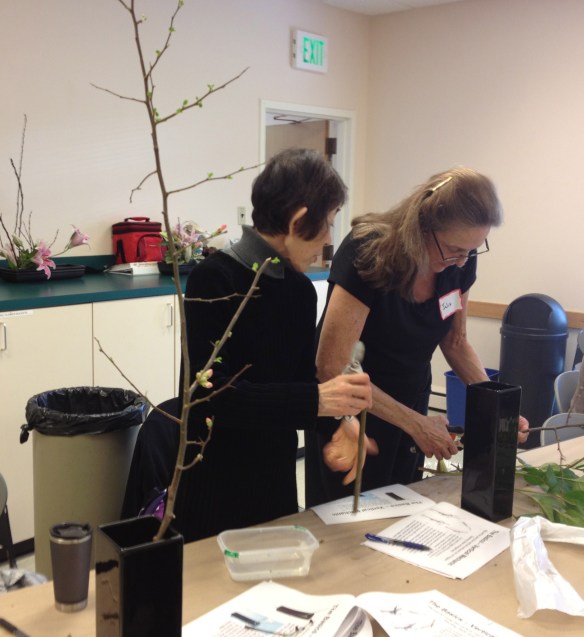
Midori helps us get our moribanas right

After a nice long lunch break, we’re back to create the Basic Upright Variation No 4 – Nageire Arrangement in a Tall Vase.

Midori with Upright Nageire Design we are to make

Nageire is Japanese for “thrown in” and usually utilizes a single long branch with shorter branches and flowers at the base arranged in a tall upright vase. And while there are only 2 main stems (the Shin and the Hikae,) there is NO KENZAN, or device to hold the stems in place, so the mechanics of this will be a little tricky.

Create a supporting branch in the shape of a Y for your Shin stem

The first order of business is to cut a supporting branch that will hold the Shin, making sure there is water in the vase first.  Once you place your stems in, that’s it, it’s really hard to move the container without displacing the stems!  So, your supporting branch will be a few inches lower than the container’s depth – and where it touches the bottom of the container, it will be cut straight, not on a slant.  Cut a slit in the top side and widen it out – this will create a Y for the Shin to sit in.  The Shin stem, a flowering Quince branch, should be as straight as the material will allow, and should be cut up the center so that it can connect strongly with the supporting branch.  The end of the Shin should be cut on a slant and touch the side of the container for support.  Actually there are some rules about the stems and where they can touch, that are basically all about how to anchor things so they stay in place best.

rules about stem placement in nageire

Getting the Shin in right is easier said than done! Midori has to help all of us with this.  We are not used to working with this mechanic but it’s SO cool once you learn it!

Julie trims the Shin stem to create an even straighter line

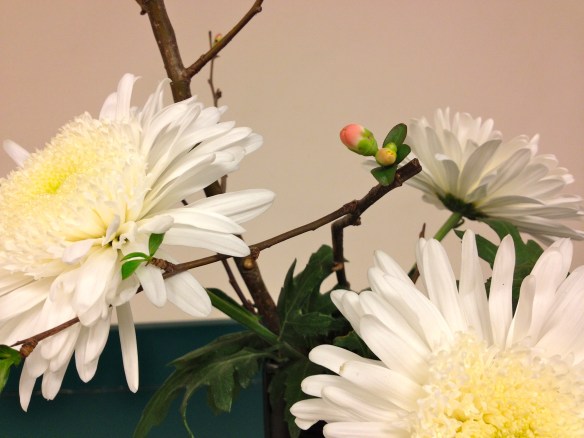
Then you will add the Hikae stem – in this case a big white Chrysanthemum.  The Hikae must be placed at a 75 degree angle towards the arranger’s right shoulder, just like in the Basic Moribana arrangement.  But in this design, there is no Soe.  The Hikae stem should be against the back wall of the container to get the proper angle away from the Shin, and you can gently bend your stems to fit them in.  Then place some supporting mums in, and then take a little left over mum foliage to hide the mechanics.  Nothing in this design should be hanging over the back edge of the container!

Midori helped my design by pruning back the quince branch to reveal the buds that were popping - so they became more evident

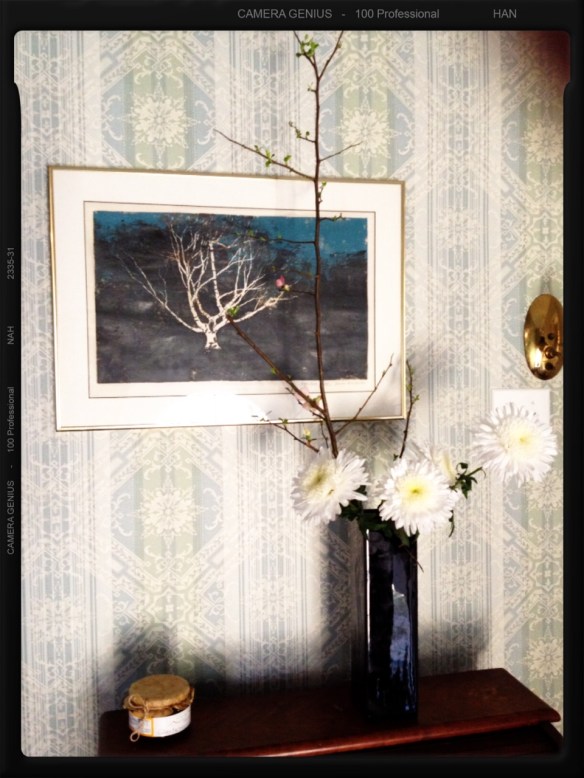
I recreated my Nageire when I got home, placing it in front of my sister's art called 'Night Birch'

I loved this class and I loved Midori.  She is such a special person and made all of us feel like we deserved an A+ for our designs.  I learned a lot this day, and also felt spiritually connected to what I was doing. Thanks, Midori!

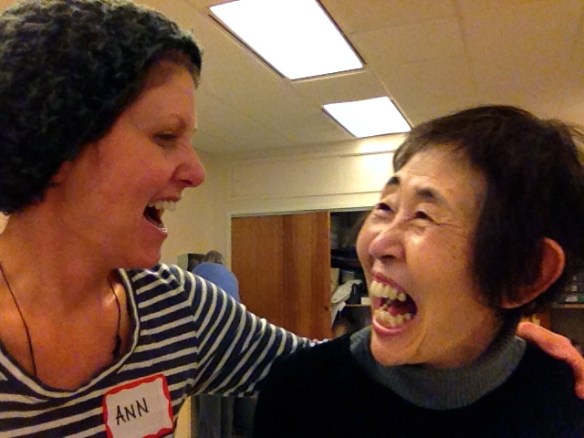
Midori and I laughing about how hard taking a picture seems to be

Photo of Midori at beginning of post courtesy of – New Castle Delaware – Arasapha May Market 2011’s Facebook page

intro to ikebana class – longwood – day one

“Clear your mind.  Relax.  Let the plants speak to you,” says instructor Janet Solomon, during day one of Intro to Ikebana at Longwood Gardens.  Ikebana means “living flowers,” is nature focused and is a ‘do’ or way of life in Japan that’s considered a lifelong journey.  So, in other words, don’t expect to really know much after two days.  But after two days, Janet says, “your designs will be affected.  Number one, you’ll stop picking large bouquets and start using space differently.”  The biggest lesson here: less is more.  In Western arranging, we’re taught to use mass – building tightly packed, dense designs – and our emphasis is on color.  In Ikebana, the emphasis is on the line (and sometimes you must trim your plant material a lot to attain the lines you’re seeking.)  The asymmetry creates open spaces which invite the eye to explore.  The beauty is in the form and growth of a plant rather than the color.  The composition communicates the feelings of the arranger, and if you’re really doing Ikebana correctly, you might say something like: “the flowers just wanted to be arranged that way.  I listened to them, and that’s what they told me to do.”

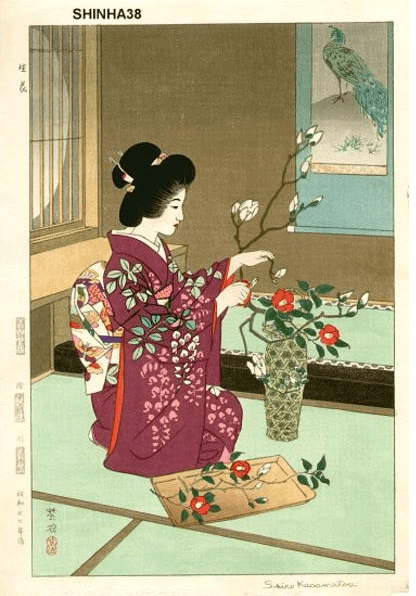
Ikebana Woodblock by Kasamatsu Shiro 1954

In Western arranging, we’re also focused on blooms rather than leaves and branches (though in our Basic class Jane uses plenty of branches and foliage.)  And not just blooms, but the perfection of blooms at their most perfectly open moment.  In Ikebana, imperfection is embraced.  A holey leaf is holy.  And the flowers are shown in different stages to represent the passage of time:  a fully open flower = the past; partially open flower =present; and a bud = the future.  Thus the choice in Western arranging of fully opened blossoms is considered “pitiable” in Ikebana, because these forms only represent Death.  “Not a pretty thing,” says Janet.  But in Ikebana, using seasonal items that are not “perfect” brings nature into the house and allows us to reflect on the concept of time.

Ikebana arrangement at Philly Flower show - plenty of buds - photo by Amy Kane

As you can see, there is a lot of symbolism, and a reverence towards nature.  That’s because Ikebana’s genesis was religious, synthesizing elements of Shintoism and Buddhism.  This is cool stuff:  in Shintoism, the indigenous religion of Japan, nature is sacred, and contact with nature is a way of being close to the gods.  The monks would offer entire plants – root and all – to the gods. This is the basis of arranging at its most primitive.  In the 6th century, Buddhist monks gathered flowers and branches left after storms and arranged them at the foot of Buddha statues.  And that was where Ikebana sprang from.  I love these ideas because they express some of my own feelings about nature/plants.  I’m not religious, but I do hold nature sacred.  Gathering plant material from the outside, and putting it in a container in a design that enables me to connect with the material is an offering of sorts.  To Mother Nature, as I call her.

another Ikebana from Philly Flower show - photo by Amy Kane

Then Ikebana took off, and evolved into many styles.  These many styles include  (short-hand of my notes from class not meant to be exhaustive by any means): Rikka – 10-20′ high, these designs were microcosms representing mini landscapes complete with hills rivers and towns. Chabana – 17th century, these accompanied the tea ceremony (cha = “tea”) and held one branch and small flower.  Shoka – late 17th century, Shoka answered the need for something between Chabana and Rikka that could be ‘for everyone.’  These designs are asymmetrical triangles with open spaces.  Stems are tightly bundled at base to resemble single growing plant.  More on this, we made one!  Nageire – chabana “on steroids.” Tall narrow container.  More on this later, we made one!  Moribana – “piled up flowers” from the late 19th century.  Low rectangular container. More on this later, we made one!  Free style – these designs use the same design principles as Western arranging but still represent nature.

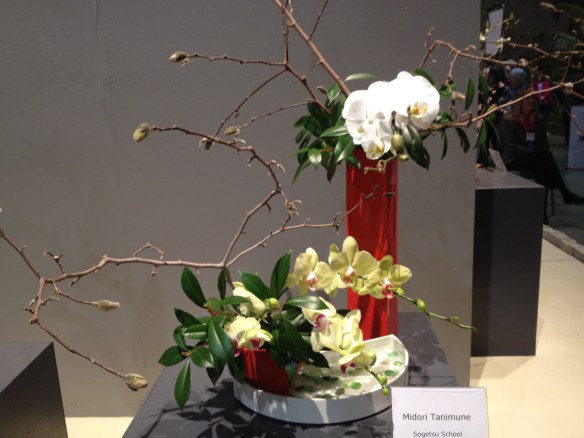
Ikebana arrangements at Philly flower show by Midori Tanimune, Sogetsu School

And just to make things more confusing, there are a bunch of different ‘schools’ of Ikebana that all have different rules about how to create these various styles.  Janet studied at the Ikenobo school, the oldest school with the most traditional styles. But there is no competitive spirit in Ikebana – unlike Western flower arranging where a blue ribbon won at the Flower show is the ultimate.  “Japanese flower arrangements are for pure enjoyment and never judged,” says the Ikebana International brochure.  But honestly I do detect a tiny hint of condescension from Janet that her way is the better way of doing things, that us poor Western saps are lost in our notions of perfectly rounded radial designs when we could be communing with nature and really doing something of spiritual weight.  I’m trying, okay?  That’s the point of all of this floral design stuff for me, actually: to find something that fulfills me, and balances me.  Where I use my head, heart and hands.  So far, so good.

Shoka rules - straight line, center of kenzan, fanned out, clean above water line

Okay, now we are to make a Shoka Shimputai.  That’s a straight line arrangement.  The Shoka rules: all the stems must be placed vertically and in a straight line centered in the kenzan (the spiky frog or “sword mountain” that holds stems in place – watch out, very sharp!) and the materials must be free of leaves measured in a fist height above the container (the mizugiwa – edge of water.) Then the materials are fanned out to “let the materials breathe.”  The Shoka will be viewed from the front, so if you’re using any big leaves, be sure to angle them so that they’re not too overwhelming and to create more depth.  Depth is a big thing in Ikebana.

Shoka Demos by Instructor Janet Solomon - from the side to show fanning out

There are only 3 types of materials being used in the Shoka Shimputai.  We are using Bird of Paradise, Aster, and Willow (some of us have fasciated willow – oh baby!)   First you must choose your Shu, or the main actor in the play, the dominant force.  Obviously the Bird of Paradise here.  Janet shows us how to coax the flowers out of the triangular buds by digging our thumbs in and gently pulling the blooms out (there are up to 3 ‘birds’ inside.)

emerging bird - you can gently dig out the blooms with your thumb!

Then the Yo or supporting actor, which is meant to contrast with the Shu but be subservient.  This is the Willow for me.

Fasciated willow - Yo; purple aster - Ashirai

After that, the Ashirai goes in, which is the helper that fills in if seasonal materials are needed (there always must be something seasonal.)  The Ashirai balances things, can supply color, and ties things together.  The Aster.  I found this arrangement pretty easy, but this was my first time working with a kenzan, so I had to master that.  Once a big branch of willow goes in, it’s pretty hard to get out, so it’s a good idea to hold things in place where you intend to put them before sinking the stems in.

my completed Shoka shimputai (should be sitting on a 'base' - protects from drips)

So you see how the Bird of Paradise is dominant, the willow supporting, and the aster a touch of helping color.  And though she has stressed the fact that Ikebana is not competitive, there is a right and wrong way of addressing the basic rules, so she goes around and modifies some of our arrangements – to get a better line, to keep the stems straighter, or more fanned out.  Wrestling with the stems being straight is definitely difficult.

Janet modifies Julie's arrangement, whose feeling towards this first stab at Ikebana was "survival" which she more than achieved

In this Shoka, the Aster is the Yo and the leaf is the Ashirai..I think

Pat's Shoka uses Bird of Paradise foliage, which still counts as the Shu. She clipped off the stems, wanting her design to be simple and clean to help offset the complexity of her life. Beautiful.

All in all I really enjoyed Day 1 of this class, though I did feel like despite it being emphasized that Ikebana is supposed to be non-judgmental, the instructor was actually very judgmental towards all of our designs and was not effective at communicating her thoughts in a gentle constructive way.   Day 2 was different in this regard…so stay tuned, there’s more Ikebana to come!