Jane’s New Floral Design Book! (featuring some of my photos)

cover photo by Tom Weishaar (all other photos in this post by me, most of which appear in the book)

Jane Godshalk, AIFD floral designer and instructor at Longwood Gardens, is now also an author!  Her new book, titled Flower Arranging Secrets: Natural Designs for Everyday Living, offers tips and tricks acquired throughout Jane’s decades of floral design experience. Some of my photographs are featured throughout the book, and I feel lucky to have been a small part of Jane’s incredible floral world.

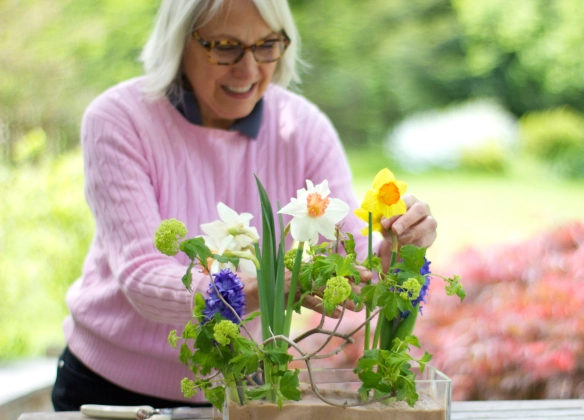
Jane makes it look easy.

Jane makes it look easy. Buy her book, and it will be easy for you too! Here she is making an early spring parallel design using sand to hold the stems in place.

Jane has studied floral design internationally, is a longtime faculty member at Longwood Gardens, and is an award-winning floral designer whose work has been featured in publications such as the Pennsylvania Horticultural Society’s Green Scene magazine.

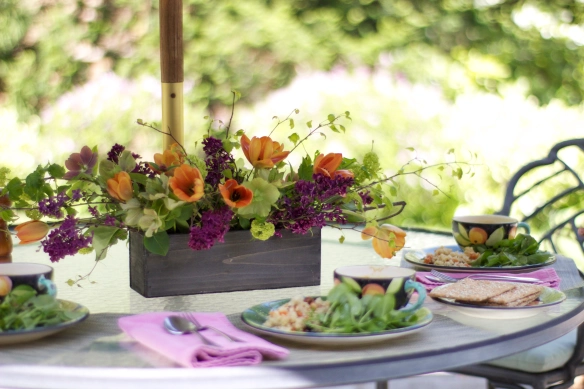
A lunchtime spring flower fiesta

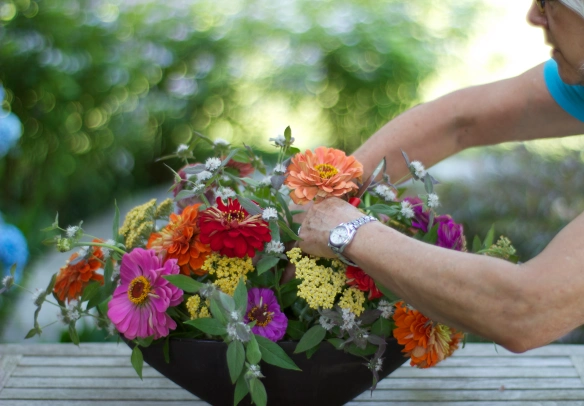
A lunchtime spring flower fiesta Jane created using chicken wire to secure stems

At the heart of Jane’s book is the idea that floral design is for everyone, and the book aims to “demystify the process of arranging flowers for your home.”  Jane gives advice on how to select material and where to find it, how to care for stems once you’ve purchased them, which vases and containers to use, and design tactics such as color, stem placement, and rules of proportion.

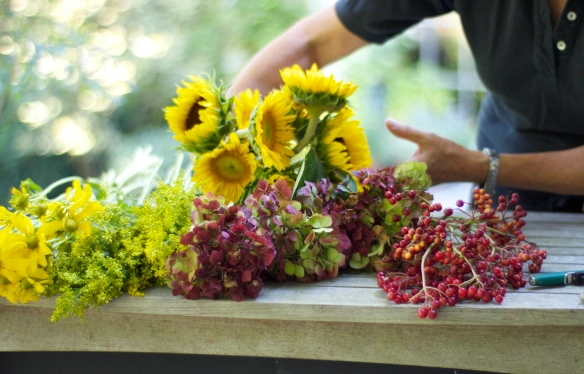
Jane shows you where to find materials and how to prepare them for arranging

Jane shows you where to find materials and how to prepare them for arranging

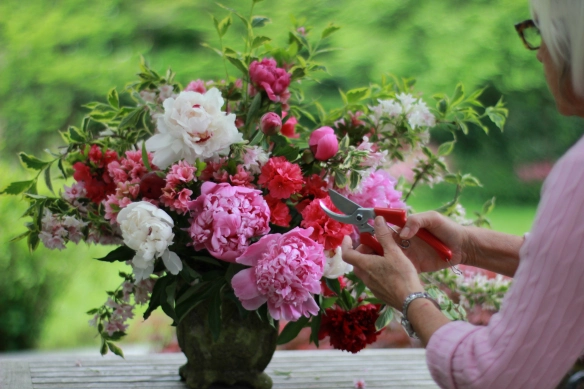
Spring Design by Jane using chicken wire for mechanic, featuring peonies and materials from her garden

Spring Design by Jane using chicken wire for mechanic, featuring peonies and materials from her garden. Behind the scenes shot.

Jane empowers everyday floral designers by giving us the “how to” in a clear, simple fashion – and all the design mechanics she uses in the book are sustainable (can be reused or recycled.) In other words, no floral foam!  One of her tried-and-true methods of anchoring flowers is by using chicken wire. She also shows us how to use branches, bark, grapevine, and even sand as the mechanic for holding stems in place.

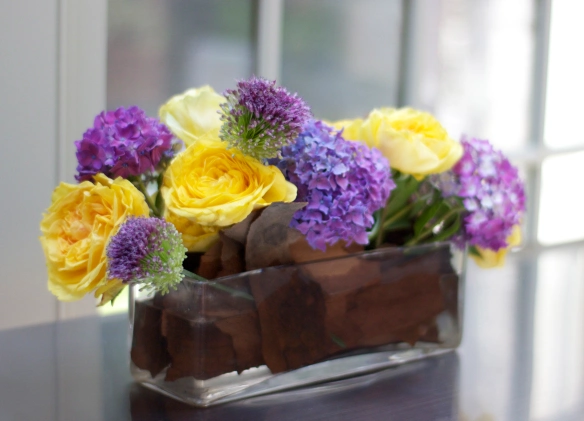
Using bark and branches to hold stems in place

Using bark and branches to secure stems

Jane shares many other secrets, such as the proper use of a kenzan or frog, how to create a hand-tied bouquet (a personal favorite!) and how to successfully incorporate fruits and vegetables into your design.  There is also a handy flower identification chart included. Jane’s new book showcases beautiful, eco-friendly and easy floral designs for everyone from beginners to experts. I highly recommend it. Congratulations, Jane.  It was so thrilling to work with you, and I am continually inspired by your knowledge and talent.

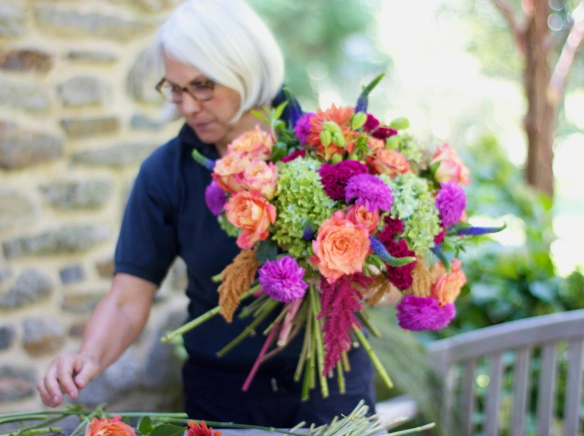
Jane's hand-tied bouquets are to die for! (photo not featured in book but concept is)

Jane’s hand-tied bouquets are to die for! (photo not featured in book but concept is)

Want the book? Buy it from Jane’s website for $24.99. Or, take a class from Jane at Longwood Gardens!

Art in Bloom

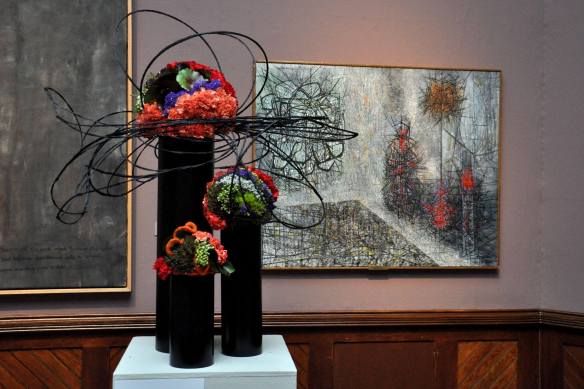
Imagine a work of art that’s come to life…in flowers.  The colors, textures, lines, and emotional energy of the painting or sculpture are all interpreted in the floral design, displayed next to the artwork itself.

Warning by Jimmy Ernst, 1960

A spot-on floral translation of the painting Warning by Jimmy Ernst, 1960                                 Photo by Laura Blanchard

That was the challenge for 45 national floral designers and 15 garden clubs during the first weekend in April at the Pennsylvania Academy of Fine Arts – and I was lucky enough to be one of them.

This floral designer showed unbelievable mastery over her material.

This floral designer showed unbelievable mastery over her material.

With the inaugural PAFA in Bloom event, a breath of fresh air blew into the 138-year old Historic Landmark Building.  Sixty diverse floral designs, from the diminutive to the dominating, were placed carefully throughout the building, and an echo was sounded between paint and bloom.  (Or in some cases, marble.)

Nydia, the Blind Girl of Pompeii

One of my favorite floral designs, depicting Nydia, the Blind Girl of Pompeii by Randolph Rogers c.1853 – Marble

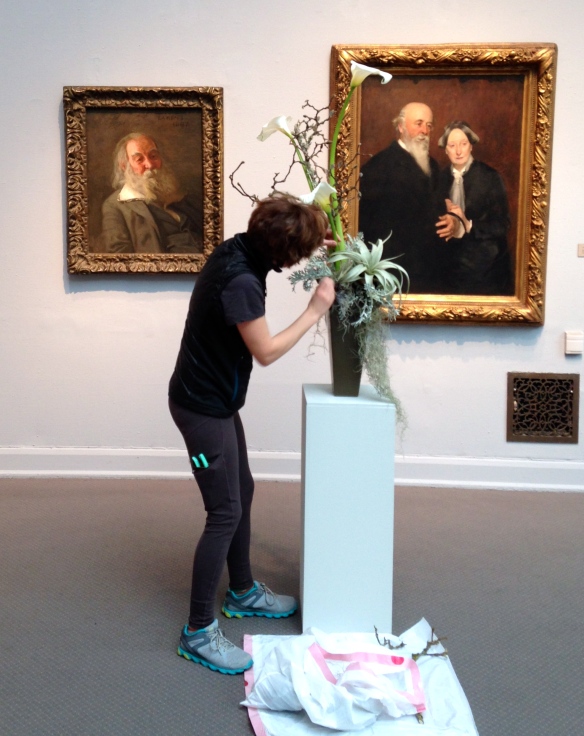
So, how does one go about tackling a floral interpretation?  This was the question I asked myself months before the exhibit.  It was my first time doing something like this and I was more than a little intimidated by the scope of the project.  First I had to study the work of art, which in my case was a portrait of the poet Walt Whitman done by Thomas Eakins in 1887.  

My lovely sister-in-law Juliet and I took a trip to PAFA to get an idea of how large a space I'd have to fill and see Walt close up.

My lovely sister-in-law Juliet and I took a trip to PAFA to get an idea of how large a space I’d have to fill and see Walt close up.  Here, she shows how large the pedestal will be.

I started thinking about colors: brown, sage, slate; white, grey; peach. I decided I wanted the container to represent his body, and the design to be symbolic of the painting’s content rather than a recreation.  There were some very specific rules about what materials we could and could not use, with the emphasis on using fresh material as opposed to wood and fabrics like wool which could harbor damaging insects.  You could still use those items, if you fumigated and/or dry-cleaned them, but I didn’t really want to add any steps to the process, and wanted to keep my design as simple as possible.  To me, the energy of the painting is male, vital, and merry; and with that white collar my mind went instantly to calla lilies; a perfect representation of Walt’s joie de vivre.  His gnarled quality might be echoed by a branch of some kind.  The greys and whites of his beard could be items like spanish moss, dusty miller, and I loved the idea of using a big air plant – Tillandsia xerographica – as a focal point.

I ended up picking out my Calla lilies personally at Del Val Wholesale, with the help of Carol Taylor. These were locally grown and the most deliciously huge callas you will ever find!!

I ended up picking out my Calla lilies personally at Del Val Wholesale, with the help of Carol Taylor. These were locally grown and the most deliciously huge callas you will ever find!!

Picking up materials from DV Flora was an exciting part of the process, because I got to see behind-the-scenes of the largest wholesale floral operation in our area, and meet some of the friendly and helpful staff who were topnotch to work with. Thanks, DV! After gathering all my materials, I did a mock design first; borrowing the perfect container from my friend Jane (her basement is a designer’s dream come true)! I was really happy with the outcome, but could I replicate my design on the spot, at PAFA, on the day of the installation? I was incredibly nervous about that part, but luckily I had a huge help from my sister-in-law Juliet (who is a talented architect.)  This short video shot by Juliet shows the scene at PAFA the morning of the preview party.  There was also a cameraman from FOX news there, to add to the excitement!  

Then it was time to place the design upstairs on the pedestal.  We wheeled Walt’s floral counterpart up to see if it stacked up next to the real Walt.

Making some last minute tweaks to my design...having trouble 'walking away'...photo by Juliet

Making some last minute tweaks to my design…having trouble ‘walking away’…photo by Juliet

In the end, I was pleased with our efficiency in getting in and out of PAFA, because my design really only had a few materials in it (I had created the base of galax and some spanish moss the day before.)  Thank you Juliet for rocking this day with me!  

Getting friendly with Walt

Getting friendly with Walt

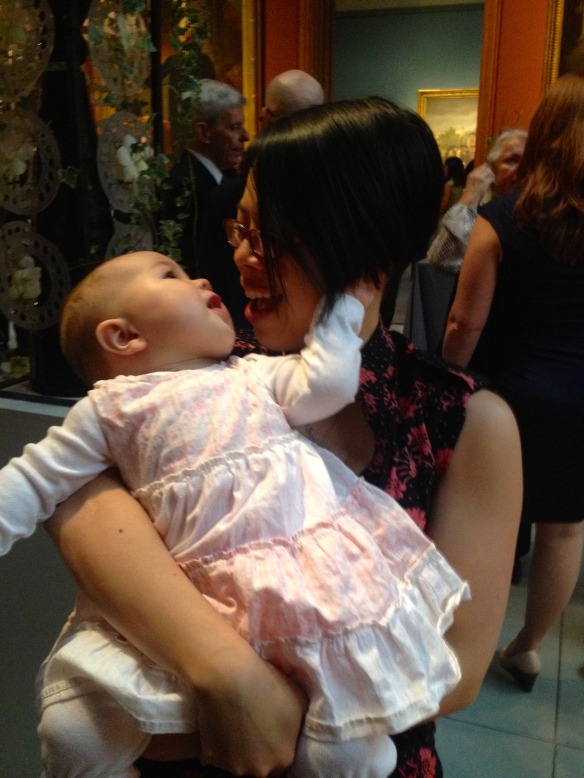
Then, it was on to the Preview Party, a gala affair attended by those in support of PAFA in Bloom.  It was so exciting to see all the fresh faced designers and my floral friends Peicha, Valerie and Jane in one place..and to watch people looking at my design!  Here are some photos from the evening:

Jane takes a closer look at an intriguing design

Jane takes a closer look at an intriguing design

Peicha is in the house! With Naima, quite a masterpiece herself.

Peicha is in the house! With Naima, quite a masterpiece herself.

Ariadne Asleep on the Island of Naxos as interpreted by Peicha Chang of falls flowers

Ariadne Asleep on the Island of Naxos as interpreted by Peicha Chang of falls flowers.  Simply sensual!

Valerie's magnificent "hand-tied" bouquet

Valerie McLaughlin’s magnificent “hand-tied” bouquet.  Thanks Valerie, for making me aware of this event!

Take a look at Death on the Pale Horse, a Benjamin West painting, which at 176 x 301 inches is one of the largest oil paintings in PAFA’s collection.  The floral designer who interpreted this one was a genius in my opinion…

Benjamin West's Death on The Pale Horse 1817

Benjamin West’s Death on the Pale Horse 1817

This floral translation of Death on The Pale Horse knocked our socks off!

This floral translation of Death on the Pale Horse was astounding.

It was intimidating to be in the same room with the works of so many great artists, and then great floral designers as well, but it was an experience I will never forget. Thanks to Schaffer Designs for including me and for organizing this very successful event, and for maintaining my design over the course of the exhibit…I hope this will be the first of many!

Walt and my design

After the show, I got some great feedback from George Hubner, right here in Swarthmore:  “I saw the PAFA in Bloom exhibit this afternoon, and your arrangement stood out in particular among the 60 others! I didn’t go around paying any attention to the names of the arrangers, but I noted yours. I have noticed that in the US when someone makes a flower arrangement, the more flowers they can cram in the better. Why use just three flowers then you can stuff in 30 in the bowl instead. The Japanese will use three to great effect, but in the US more is preferred (or as Mae West is supposed to have said “too much is not enough”).  Your arrangement stood out for your use of only three flowers. It looks like a Sogetsu to me. And it seems to me that your using calla lilies was referencing Whitman’s calamus poems too. There must have been thousands of flowers used in the arrangements!  The masses were impressive, but your arrangement was simplicity itself and refreshing to see in the middle of all the other over-the-top arrangements.”  Thanks, George!

fall table design

I’m back at Longwood, taking floral design electives until some of the meatier courses resume in October.  Everything is happening in October.  Well, and November too.

Anyway, it was so nice to be back in Jane Godshalk’s classroom, where everything is right with the world.  Jane is a phenomenal teacher, and I can’t say enough lovely things about her without seeming like a gushing fool…but really.  Jane does it right.  Her ability to select materials that create foolproof combinations is spot on, and her directions are easy to follow and inspiring.  It’s not just “boom, put it in the container, you’re done.” There is a thoughtfulness and precision to floral design; and if your materials become unwieldy, Jane will help you tame them with such a grace, you almost want to simply watch her do all the floral design. But, it is too fun not to play yourself, especially with all the Fall Bounty in front of us!

Wire each leaf onto two wires which will become a garland that you drape throughout the design

For this class, we’re creating a natural table design in a woven basket with a plastic liner.  One of the main ingredients is a garland made of preserved oak leaves that we wire together ourselves while Jane shows us the rest.  It’s busy work you can do while you’re watching TV, and it gets my creative juices flowing, thinking about all the cool autumn possibilities (can you say: Thanksgiving table-scaping?!) We have our choice with the mechanics – either use floral foam (no thanks) or balled up chicken wire in which the stems will rest. While the floral foam is easier to work with – you just stick your stem in and you’re done – the chicken wire is re-usable.  It’s worth the extra effort in my opinion. Just be sure to fill it up with water!

Jane begins by adding greens – I have to apologize for my bad camerawork during this class, I was too mesmerized by all the floral treasures.

Jane starts by adding greens, making a nice, natural base, using Italian ruscus, olive and even some fragrant bay leaf if you like.  (Note to self: I love bay.  Maybe this is something I could use for the NAOC award head garlands.  More on this later!!)  She then adds the bigger flowers like hydrangeas.  Some of our hydrangeas are so huge, we can divide them and have more.  Hydrangeas are a really important flower in floral design, I’m learning, because not only do they come in such great colors (and change color as well,) they help take up some real estate while actually adding a certain lightness to your design.  They really help tie everything together, especially this variety in the light green color with some muted rose to the edges of it, it’s just delicious.

She adds ‘Coffee Break’ Roses, ‘Red Rover’ mums, and then it’s time for the sunflowers.  Sunflowers are hard to work with – they are just so singular, they pop out so much, that they really need to be placed just perfectly.  If you put them side by side, and they have the dark centers, they look like eyes staring out of your design.  Not good.  So play with the way you angle them, group them together but have the heads pointing slightly different directions…or just watch Jane and learn from the master.  We also have millet, amaranth, broom corn, bittersweet, and asclepias to play with!  Our designs are overflowing with possibility, and the colors are so autumnal.

Hey! Isn’t that Kate Sparks from Lilies and Lavender?? Yes it is…and she’s a natural at this…

Patti’s design incorporates bittersweet vine beautifully

A newcomer to the floral design world leaves with a smile on her face

I was a little out of practice, I’ll admit! It took me a little while to get going.  I ended up giving this natural fall table design to my brother and sister-in-law for a party they were hosting, so it went to good use.  However I neglected to get pictures with my ‘good camera.’

My fall table design

My fall table design at home

It’s so great to be back in class!

lilies and lavender

A little while back, I visited a very unique flower farm in Doylestown, PA called Lilies and Lavender. The head honcho, Kate Sparks, gave my friend Jane and I a tour of her four acre sustainable farm.

Kate Sparks, the cowgirl of cut flowers, amongst the zinnias

Here, Kate and her team grow many types of cut flowers using only organic fertilizers and the least harmful pesticides. Black plastic mulch is used to prevent weeds from growing. I saw many bees buzzing and birds flying, and it seemed to me a very happy place where the circle of life remains unbroken.

Snapdragons growing like gangbusters in the hoop house

Kitchen scraps are fed to worms, creating worm compost that is used to add organic matter to the growing medium

Delicious dark purple calla lily has a happy home

The acreage is long and narrow, but goes on and on. Each time we passed one section, I thought we’d reached the end, only to find there was more around the corner. While the farm is not weeded in a pristine way, each group of plants is clearly thriving under the Kate’s green thumb. She has more energy and works harder than most human beings, you can tell, and I think it comes from the fact that she’s doing something that she loves.

Calendula – an herb for healing but also a beautiful cut flower!

Cerinthe is one of the more unusual selections you”ll find here – I love it.

Bouquet of goodness from L&L contains huge dill flower heads!

Lilies and Lavender sells their flowers at both the Doylestown and Rittenhouse farmers markets, at their farm stand out front, and to select local florists. That’s us, we’re the lucky local designers today!

Melissa, Kate, Jane and Christine after our tour of Lilies and Lavender farm

Jane Godshalk, my wonderful teacher from Longwood Gardens and mentor extraordinaire, took some beautiful bouquets home to create rectangular table centerpieces for an upcoming event. Inspired by Kate’s commitment to sustainability, Jane wanted to keep this design as eco-friendly as possible. She used Excelsior, the non-toxic, biodegradable wood packaging product as the mechanic for stabilizing the stems, wetted down with a fair amount of water. Sure beats using the non-biodegradable, formaldehyde-laden floral foam!

Jane packs the containers with excelsior, then adds water. She begins her design with hosta greens from her own garden

VOILA – Jane Godshalk’s designs using locally grown flowers from Lilies and Lavender

Thanks, Kate Sparks! I know I only scratched the surface of your operation here, but that’s because I already desperately want to come back. PS You could be a jeans model.

Shucks, here’s one more lavender/bee shot for Kate:

flowers by valerie

Last week I had the pleasure of helping a friend out with her Prom Flower orders.  Since I’ve never really done bouquets and boutonnieres in the traditional sense I wanted to see how they’re created firsthand, and so Valerie let me observe (and play a little) in exchange for some pictures of her designs, which we hope someday grace her glorious website.

Valerie McLaughlin, in her floral studio

Valerie McLaughlin is a freelance floral designer working out of her home in Wallingford, PA, where she lives with her five sons and husband.  The flower business suits her, adding a bit of femininity to an otherwise masculine household.  Even Rudy the dog is a boy.  Her home is a friendly, warm place, where neighbors and friends constantly stop by, and everyone knows each other.  And when it comes to pricing, there really is no such thing as a ‘stranger rate’ with her.

Bouquet with bling and matching boutonniere

Valerie creates custom arrangements within a budget.  Sometimes the only direction given is the color of the dress the bouquet is to match, and that can be a challenge.  Her designs reflect her own joy and passion for living.

A successful pairing, don’t you think? – photo courtesy of Jackie Massey Cormican

Gerber Bouquet with Bling

Matching cute boutonniere

One of my favorites, love the ribbon color (it’s the Martha in me)

When the kids start stopping by to pick up their flowers for the big night, that’s when Valerie really shines, instructing them on floral details and cautioning them to have a good time but to ‘be careful.’

Boys get special instruction on how to present flowers to their dates.

Valerie is also preparing for her AIFD test this summer in Miami.  The American Institute of Floral Designers is a “non-profit organization dedicated to promoting the art of floral design as a professional career,” and once you’re a member, you belong to an elite group of talented people who are devoted to the industry (membership also costs a pretty penny.) Lucky for Valerie, she knows AIFD members like Jane Godshalk and Tim Farrell, of Farrell’s Florist, who are willing to judge her test designs and coach her for the big day.  I wish her all the best of luck this July as she heads to Miami to spend 4 hours creating 5 designs. You can do it, Val!

a peony garden

I was never very good at keeping secrets.  So, for those of you that wanted A Peony Garden, in Glen Mills, PA to remain a secret, I’m terribly sorry.  This place is just too amazing not to share with everyone!

A Peony Garden is four acres of heaven on earth during the month of May, planted with 250 different cultivars of tree, garden, and intersectional peonies of all colors shapes and sizes.  Peony fans can buy peony plants, but the bulk of the business done here is cut flowers, and that’s what I’m interested in.  Prices vary throughout the season between $1 and $1.50 per stem, which in the floral world is absolutely unbeatable. And you can feel good about buying from a local grower – you’re not flying peonies from halfway around the world, there’s no excessive packaging – just bring your own bucket!  How sustainable is that!

Picking peonies with Valerie, Jane and volunteer Sandy Papa

Freelance floral designer Valerie McLaughlin stops to smell the peonies

But beware that you don’t succumb to peony mania, like we did.  There’s just something about all those fragrant blooms, and their silken petals worn like party dresses, that makes you simply swoon.  You will want more, more, more!!

Eleanor Tickner, head gardener

The woman behind it all, Eleanor Tickner, has her own secrets to growing peonies, which she downplays.  “Sunshine, of course.  And you go out and talk to them, you pray over them.”  Eleanor and her husband Bill have been growing peonies here for around 15 years.   It’s a family affair – her two daughters sometimes help out, and the Great Danes are not guard dogs but more like the official greeters of the place.

Riddler greets my Dad

Eleanor with head of the PR department, Great Dane Riddler

Eleanor began growing as a way to keep busy after retirement, because as she says, “you don’t stop working and all of a sudden eat bon bons and chase dust bunnies.” Accustomed to working hard and seeing results, Eleanor wanted to do something exciting with the four acres of sunny land, which she says is “just enough to get me in trouble.”   She chose to plant peonies, because they don’t need a lot of water (they only have well water on their property,) and because they’re “satisfying to the soul.”  Peonies reminded Eleanor of her adopted grandmother from next door, who grew a row of peonies she believed kept the evil spirits away.   After spending an hour at A Peony Garden, I begin to think that myth is true, because I just feel so darned good.

Eleanor swears that growing peonies is just a hobby, but from the glint in her eye, and the fact that she’s out in her garden until dusk every day, I believe she’s passed into the realm of obsession.  While she has no horticulture degree, she’s the President and co-founder of the Mid Atlantic Peony Society, and serves on the Board of Directors at The American Peony Society. She’s also written articles on peonies – for Philly News, and for The Hardy Plant Society, to name a few.  She’s referred to as a “promoter” of peonies, by Don Hollingsworth, of Hollingsworth Nursery in Missouri, one of the top growers of peonies in the country.  Holllingsworth, along with Adelman Peony Gardens in Oregon, and Hidden Springs Flower Farm in Minnesota, are the main sources for her plants.

It’s clear that Eleanor has more than just a love for peonies; she’s adopted a scientific approach to growing them, evaluating cultivars for reliability, consistent bloom, and the ability to grow without staking.  She is always willing to share her knowledge with others, and her humility is unparalleled.  “As far as I’m concerned, every person is replaceable on this earth.  But my job needs to be done, so that’s what I’m doing out here – educating.”

Eleanor gives a tour to the Scattered Seeds Garden Club

Through the American Peony Society, she judges plants worthy of the APS Award of Landscape Merit, and grows a few of these recipients on her property, such as ‘Do Tell,’ a pink anemone form peony, and one of my favorites of the day.

‘Do Tell’ peony – I mean, amazing, right??

If you’re a peony lover looking to grow some reliable favorites for cutting, Eleanor recommends varieties like ‘Festiva Maxima,’ a huge fragrant double variety whose frilly white petals are edged with red flares.

‘Festiva Maxima’ has been around for 150 years

If you like big pink peonies, try growing ‘President Taft’ or ‘Walter Faxon;’ but for a glorious red peony Eleanor suggests ‘The Mackinac Grand’ (pronounced mackin-AW,) whose brilliant fiery red hues could literally stop traffic.

‘The Mackinac Grand’ – also an APS Award of Landscape Merit winner

There are many unnamed varieties here too, gotten ‘over the garden gate’ or at an end of season sale. “It’s a gardener’s dream, to have this much land available to play in – and that’s what I do – play,” says Eleanor.  If you go for cut flowers, bring a bucket and expect to spend some time combing the gardens for your favorites.  Either Eleanor or her volunteer, Sandy, will walk you through the fields and cut the blooms you desire.  She doesn’t let the public cut her peonies, spritzing alcohol on the pruners between each plant to stop any diseases from spreading.

Sandy Papa, volunteer, cuts ‘The Mackinac Grand’ for me to bring home

Jane Godshalk hides behind a peony bloom

Jane counting peonies.

For floral fanatics, Eleanor shares her special recipe for prolonging a peony’s vase life:  1 tablespoon lemon juice or vinegar (to fight bacterial growth) and 1 tablespoon sugar (food for bloom) to one quart of water.  It really works!  The blooms at A Peony Garden should last through Memorial Day Weekend, so hurry to get a glimpse of these old fashioned beauties, and be sure to take some home with you.  Thanks to my Dad and stepmom Julie for sharing their secret peony source with me!

A Peony Garden address: 1739 Middletown Rd. Glen Mills, PA 19342 – about 20 miles SW of Philadelphia.  4.6 miles NW of route 1 on 352.  tel 610.358.1321 call ahead for large orders

unbridled bouquets – a longwood elective course

“Go beyond traditional bridal bouquets and expand your repertoire to the cutting edge,” promises the Longwood Continuing Education Course Catalog when describing Unbridled Bouquets.  Today’s class is another taught by Jane Godshalk  (and I realize it may seem like I’m stalking her, but she just happens to be a great teacher and one of the main floral instructors at Longwood, okay?)  All materials including containers are covered in the fee for this class, but we were told to bring wire cutters, a stapler, and a box to bring our stuff home in.

Students including Delphine from Belgium prep carnations for bouquet making. I'm thinking, 'carnations, boring,' but wait til you see what we made!!

There are design basics to cover in any bouquet, but since I’ve never created any type of bouquet other than hand-tied ones at the shop, I’m a clean slate for learning.  First, consider what type of style you’d like:  Decorative, Vegetative, or Form and Line.  Your typical bridal bouquet of tightly packed white roses would be considered Decorative, it’s controlled and uses a mass of materials. Something that’s more naturalistic, with a variety of material and height is Vegetative.  And then Form and Line will use less material, have strong lines, and be more dramatic.  Most of the bouquets I like seem to be a combination of styles, but I do tend to favor the vegetative look – something fresh from the garden.  At least that’s what I thought at the beginning of the class!

Decorative/Vegetative bouquet I could just die for by lovenfreshflowers.com, photo by wrenandfield.com, Aug 2011 cover of Philly's Grid magazine - gridphilly.com

Think about where this bouquet is going to live:  is it a bridal bouquet? Not today, people.  We’re going where no bouquets have gone before, because we’re unbridled.  These bouquets are for the home;  these you can bring to a wedding shower, dinner party, or birthday bash that the hostess can then just plop into their own container.  Good idea, no?

Bouquet elements to consider:

  • Balance:  Symmetrical or Asymmetrical
  • Binding Point:  it’s either high, medium, or low.
  • Stem Placement: stem can be arranged in a Radial/Spiral pattern, in a Parallel fashion, or in an Alternate pattern.
  • Flower Level: flowers are all on the same plane, or they are varied from a little to a lot.
  • Open or closed: flowers form a ring that’s open in the center, or entire bouquet is full. At least I think that’s what it means.

We each have a bunch of 20 carnations, which we’ve mostly removed the foliage from.  Next, Jane shows us how to pierce the calyxes of each flower with wire that will connect them all together. We trade a few stems with each other here and there  to get some alternate colors. (Thanks Trish!)

Piercing the carnation calyxes with copper wire

Delphine and Pat pulling their wired carnations together in hand

As we gather the wired bunches into our hands, we decide where the binding point will land.  With these long stems, I’m thinking medium to high binding point.  I am going radial, all the way, because I want my carnations to go in a spiral of varying heights; and then I’ll tuck stems of Dianthus ‘Green Trick’ and some pink rice flower within that spiral.   But other students have done many other things with theirs.  The carnations, being wired, can pretty much hold their shape exactly where you want them – imagine trying to do this with free-standing stems, how would you do it without totally losing your mind?  And carnations are one of the few flowers with a big enough calyx to pierce without destroying the whole thing.

The ever-delightful Afeefa and her more open bouquet using birch branches, tied with raffia, high binding point

Then we can choose to add a little plumosus (Asparagus fern) or bear grass depending on whether we’re feeling lacy or more formal. We also have some hypericum berry we can string through if we like.  Then we’ll twist the bunch with some chenille wire, adding whatever ribbon adornment we prefer.

Megan, who wants to go into event design, added bear grass threaded with purple bling to her bouquet

My carnation bouquet, thanks to Pat for taking the pic

Spiraling IN control - my bouquet at home

detail of my bouquet at home: Hypericum strung with copper wire separates carnation from Dianthus 'Green Trick'. A whole unnatural little world made of natural elements. Neat.

Next up, we create a bouquet that starts with a handful of Equisetum, cut to mostly the same length, and held together with a rubber band (which will eventually get covered up by something prettier.)  The stems will be arranged in a Parallel pattern, so choose stems that are straight!  Hey, did you know Equisetum is basically a living fossil? Missouri Botanical Garden says:  “Equisetum is the single surviving genus of a class of primitive vascular plants that dates back to the mid-Devonian period (350 + million years ago).” It’s not a rush, or a fern, it’s in a class of it’s own, literally.  Cool!

Equisetum bunched together will be the structure that holds the stems together for this lil bouquet

Then, simply pop stems inside the Equisetum structure and BAM! instant modern bouquet.

My bouquet with equisetum base (wrapped with copper wire)

My parallel bouquet from above: bear grass loops out of lisianthus, green eyed rose, ranunculus, freesia, and white allium

Here’s the next little cutie we did.  In this ‘bouquet’ we threaded wire through carnations again, this time to achieve stems with an Alternating pattern.  I’m sorry I didn’t get pics of what’s underneath, but I actually ended up doing most of this during lunch, since we were really packing the learning in.

My Alternate-stemmed bouquet, now on my bedside stand. Love the little green vase.

After a lunch break, we came back to find a lot of lovely colors to choose from, along with some big birch branches. Get in line for your materials and don’t be shy now!

Trish looks like a kid in a candy store!

Then we created some bouquets using Birch branches as a structure.  Those of us that were doing the more Vegetative design started by created a base structure out of wire covered in brown floral tape.   Wrap two 18 gauge flat wires to form a circle, and then attach four more wires to the circle, which then meet in the center under the hoop to form a sort of holder.  From there, add birch branches, even binding them to the wire form to get the branches to got out horizontally.

Jane shows us the birch and wire structure technique. I'm taking notes so I didn't get too many pics of this. And the drawings in my notes are incomprehensible.

For the more modern Birch bouquet, we created a structure using “Sickles” – which are bundles of birch wrapped with wire to form little crescent shapes, or sickles.   This is a technique that Jane learned from designer Gregor Lersh…who has some upcoming workshops in Germany, if you’re interested. You can make sickles out of anything that would look good bunched together – straw, bear grass, pine needles, etc.

Jane shows how to create little sickles out of birch, then shapes them into a bouquet structure, attaching them together with wire. Wire is also added to form a holder of sorts.

For both of the branch structures, greens and then flowers are simply added within the form.  My hand got way tired holding all my materials in place while I created my Vegetative bouquet. Guess I’ve got to do some hand strengthening exercises!

Here, Jane adds materials to the sickle form

My completed birch bouquet in container. Very rustic.

So you see you probably could not achieve the same effect with the branches if you had just placed them into the container without foam.   The wire structure made it easy to just poke stuff in, and then you hold it in place with your hand.  At the end, it’s very important to finish it off with greens in order to cover the wire mechanic.  Then, wire with chenille wire to wrap it all together at the end.

Jane shows us another bouquet that utilizes straws - very colorful! Great for a baby shower??

Did you think we were done yet? No, this is Unbridled Bouquets, we still have one more bouquet to make! We were at a breakneck speed at this point, and the creative juices were flowing.  Jane showed us how to staple straws onto a wire, then create a structure like the birch branch one for this fun bouquet.  Then poke your materials in, with hydrangea using up a lot of real estate it’s a quick one!

Stephanie's straw bouquet...cool!

Isn't the Anthurium lovely in this student's creation?

I, unfortunately, had a terrible stapler (was it made for Barbie?) whose staples were ill-fitting, so I didn’t create the straw hedgehog.  Instead I wired bits of light green straw onto copper wire, which I then attached to a wire bouquet structure.  I then added a bunch of Apidistra leaf (folded and stapled,) Hydrangea, Anthurium, and Dianthus ‘Green Trick’ for a little Tim-Burton-meets-Martha-Stewart action.

I'm calling this my "East Hampton" bouquet.

At home.

After a day of making bouquets (five in total!) our cheeks are flushed with productivity and pride; and maybe, just maybe, we feel a little on the unbridled side.   We have boxes full of beauty to take home!

Stephanie on her way home. Hope to see you soon!

garden club ladies to the rescue

Last week, I had the good fortune of being invited to attend the Four Counties Garden Club meeting and flower show at Cathedral Village, as a guest of Longwood instructor Jane Godshalk.  Decades ago, Jane got into floral design “through the back door;” by entering floral competitions held by this local garden club (a Garden Club of America organization.) Originally she thought she’d be more into the horticulture side of the club, but found she had a knack for floral design, and the rest is history.  Although she started later in life (in her early 40s) she finally found something she was good at and went with it.  You can see why I relate to Jane as a mentor, right?

Here Jane has created "a sculptural design in which the color green dominates" using Bells of Ireland, Bird's Nest Fern, Hellebores, Calla, Flexigrass, Green ranunculus, Mums, and equisetum

Look at this cool green Ranunculus Jane is using

There are three classes to compete in:

1- “Transformation” – a challenge class for novices working in pairs ( a novice has not won more than 1 blue ribbon in a Club show.)  For this class, you show up with clippers only, the rest is provided, and you have an hour to put it together. Your finished design will be viewed from 3 sides and should be no wider than 26″.

the "novices" work in pairs to create their designs of transformation

detail of vertical transformation design: i just loved the way this one spiraled upwards

2- “A Fresh Perspective” – a sculptural design in which the color green dominates, to be staged on a pedestal, viewed from 3 sides and not exceed 24″ width.  You do as much as you can before you arrive and complete the rest on site.  This is the class Jane is entered in.

Margo puts the finishing touches on her 'Fresh Perspective' Design

Jane makes sure everything is rock solid structurally and the mechanics are all covered up with plant material

3- “Spring Sizzle” – A polychromatic design to be staged in a Medium niche; background required.  You do as much as you can before you arrive and complete the rest on site.

A Spring Sizzle design, incorporating all plant material from the designers garden

a Spring Sizzle design where the sizzle is represented by copper wire spirals

The feeling in the room is somewhat frenetic, but I sense a connectedness between the women – they are working together to complete their designs, one helping the other if she needs it, giving feedback to each other about the small details of their designs.

Then it’s time for the “passers” to come around and make sure the designs follow the rules outlined.  A Passer will make sure none of the mechanics are showing – a bit of floral foam here, a wire there; and she will also measure the design. Though it may seem otherwise, the Passer is your friend.  She will catch little things before the judges see your design.

The Passer measures a design's width

Here the Passer has determined that the design is too wide, so Jane helps the novices decide what to cut to make it to the proper width. This is a team sport.

Then it’s time for the judges!! All the participants leave the room to attend their meeting, while three judges look at the 12 total designs in the room.  This is not a task for the faint-hearted:  they will spend an hour and a half critiquing 12 designs, with a clerk standing by to take notes on what they say (sometime I’d like to be the clerk – you could learn so much that way! but I wasn’t ready for this post on this day, just wanting to observe the whole thing.)

Judges discussing designs

Discussing proportion of material to container

They look at each class, deciding on first, second, third, and honorable mention, and dole out ribbons accordingly.  Judges leave comments to help designers improve their skills.  Then the ladies come back to see how they did.

Marty is positively radiant about her blue ribbon win for her Spring Sizzle design

And she should be...it really is stunning!

third place in the Fresh Perspective class

Judges comment for Third Place above references Biedermeier design, something I haven't done yet at Longwood but will learn - concentric circles of plant material

Jane's design got 2nd place

and this is a detail of first place in the Fresh Perspective class

first place and best in show by margo

As I drive home from this lovely event with these lovely women, I am struck by how cool it is that they’ve all gathered to spend this time together, creating beauty in their corner of the world.  They look closely at each other’s work, they take each other seriously, they learn from each other.   They are there for each other, support one another.   And they are really talented at floral design.  So why do I feel so sad as I drive away? I guess it’s because I wish I had my own garden club ladies, I wish I belonged to something.  I’ve had my nose to the grindstone for so long, I looked up one day and realized I had no balance in my life – no time for friends even.  Since I left my too stressful career back in August 2011, my life is starting to even out again.  My priorities are shifting.  I’ve found other things besides making television that are important.  And I’m so thankful to have been shown this part of the floral design world, where ladies rescue other ladies in distress!

day three part one – advanced floral design I at longwood

There is a lot of oohing and ahhing at the beginning of today’s class, for the counter is covered in a array of bright tropical flowers and lush foliage, the likes of which many of us have never seen before. These are for us! To use! In an abstract design!

King Protea

Cibotium Kakuma Curl Fern

Heliconia hanging 'Sexy Pink'

Zingiber 'Chocolate Ball'

Tropical flowers work great in modern and abstract designs. But they do require special care – remember, they’re from a warmer, more humid environment and often cannot survive in a cold climate or standard floral refrigerator. Use room temperature water when working with tropicals – most love to be misted on a daily basis!

Anthurium 'Obaki,' I love you

Anthurium – called Flamingoblumen in German- come in many shades and sizes, and because they drink from that pointy thing or spadex, they should be submerged under fresh water for 10-20 minutes before using them, and misted daily in an arrangement.

Jane's winning design using Heliconia Torch 'Emerald Forest'

The Philly flower show this year was full of tropicals (obviously, with the theme being Hawaii!) Our teacher Jane loves using Heliconia Torch ‘Emerald Forest’ and won a blue and gold ribbon with them in her design at the flower show this year. Here they are in another Jane design that shows you that modern/abstract design can look good in a home setting:

Jane's design - the tops are not chopped, off that's how Heliconia really are!

Then we talked about Abstraction, which in the art world indicates a departure from reality. This departure from accurate representation can be only slight, or it can be partial, or it can be complete. Jane brought up the Tree series by Piet Mondrian as an example of varying degrees of abstraction.

Piet Mondrian, Avond (Evening), Red Tree, 1908. Collection of Gemeentemuseum, The Hague.

Piet Mondrian, Gray Tree, 1911. Collection of Gemeentemuseum, The Hague.

Piet Mondrian, Flowering Apple Tree, 1912. Collection of Gemeentemuseum, The Hague.

The essence of the last Mondrian tree is distilled into lines, forms, color, space. In abstract floral design, some of the same principles apply. “Abstract floral design: A contemporary design style in which plant material and other components are used for their intrinsic qualities of line, form, color, and texture.”

Eleanor creates an abstract design - sphere of mums, heliconia hanging 'sexy pink' - container is part of design

So how does one go about creating an abstract floral design? These qualities are important to consider:

  1. Bold, high impact
  2. An emphasis on space
  3. Dynamic tension
  4. RESTRAINT! in use of plant material, often no transitional material
  5. Interest distributed throughout the design
  6. MORE THAN ONE POINT OF EMERGENCE for plant material, often unconventional placements
  7. Container (if used) is part of the design
  8. Non-naturalistic use of plant material
  9. MINIMALISM

Jim uses all green tones. His grassy sphere creates TENSION by looking like it might roll away

And the RESTRAINT award goes to....Jenny! This design was probably one of my favorites today. One colocasia leaf, one driftwood stick, one black container. Some glue. Gorgeous.

I'm breathless. Jean's design uses heliconia, carnation, and monstera leaf, plus bear grass bundled together with silver wire. It's like that CONTAINER would be lost without exactly what's inside it.

Weren't you wondering what someone would do with the 'Chocolate Balls?' Here Parul schools us in abstract design! Talk about NON NATURALISTIC use of plant material!

Rosemary the volunteer helps out with some words of encouragement.

For my design, I used the two Protea ‘Van Rooys White’ which I had been eyeing from the beginning of class since they matched the container I brought so perfectly. In these Advanced classes, it’s BYOC! There are many many Protea species, South African flowering plants that I would love to see growing in the wild. In fact, Protea was named for the god Proteus, who could change his form at will – because Proteas have such variety of form. Tim Snyder, a graduate of the Professional Gardener program at Longwood, now gainfully employed at Chanticleer, recently visited South Africa with a group of students. Here’s a really cute video with great music that Tim and his wife made of his trip — keep your eyes peeled for Pincushion Protea growing in the wild!

my abstract design uses two protea 'van rooys white,' one hanging in mid-air

I wanted to do something playful with one of them hanging in space unrealistically. You have to think long and hard about how to have more than one point of emergence, and this seemed like an easy way to achieve that. I wired the stem using fairly heavy wire, sticking it into the floral foam inside the container. Then I covered the wiring mechanic with brown paper packing material. The apidistra leaf stem pokes right through and with the remaining space I poked in a few yellow pom pom mums to peek out.

other side of my abstract design, pom pom mums peeking out

This class was totally mind-bending. It really makes you throw away a lot of the rules to see that anything’s possible in the world of floral design!

day six – basic floral design I at longwood – last day of basic!

There was overlap with Advanced and Basic this past week.  But this was the last Basic class, boo hoo! I never wanted it to end.   In today’s class we reviewed the principles and elements of design, and then did 2 arrangements.  The first was a simple market bouquet in glass, taken apart and re-designed with added greens and a few extra flowers.  I think we’ve all had experience with this- you bring home a bouquet from the grocery store and you can’t just stick it into a vase “as-is.” You need to break all the stems into groups and analyze what you have.  Often the bouquet from the market has the different flowers placed in a very regular pattern all around – but maybe you’d like it better and there would be more impact if some of the flowers were grouped together.  This was quick and easy but important as it was our first design in glass with water – no Oasis!  So how will the stems stay in place? We had a few options for the mechanics – the first was to create a grid out of clear tape, creating 1″ holes on a dry vase and running tape all around the rim once finished.

clear tape grid method for designing in glass

The second, and the one I went for as it would create interest in the lower half of the arrangement, was the branch structure with willow.  Wrap a stem of curly willow around your hand and smush it into the glass, adding a few big stems in a criss cross pattern for more support, and 2-4 more wrapped stems as needed. You could use any other flexible stems for this, like red stemmed dogwood for example.  Just make sure they’re pretty bendy.

using natural stems to create supporting mechanic for arrangement

Personally I know I will use this method again, it was really easy to work with – the stems stayed put – and I really liked the way it looked especially after you put water into the design.  Of course there are many other ways to support stems in water – by using kenzans/frogs/pin holders, or using foliage or large flowers at the base to keep other flowers stable.

my market bouquet in glass - curly willow added last to reflect the basing stems

isn't this tulip delicious?

branch structure looks even cooler when you add water!

Next up, the one flower/one foliage stem design in glass.  We were given a glass cylinder vase and a quick demo from instructor Jane on some unique things you can do to various foliage stems to create drama.  Here she’s wired Equisetum to get it to conform to the shape she wants – a long rectangle – that will contain the single lily flower like a frame.   She’s also revealed a very important trick of the trade – called U-Glu dashes which are tiny dots of clear tacky glue that can help stems stay put and so much more.

Jane explaining that the level of the water is part of the design

In a flower show competition, none of the mechanics should be visible unless they are purposefully part of the design, like using bind wire repetitively around a wrapped stem.  As she’s doing her demo, I already have an idea for what I want to do, using Phormium or Flax, and one single Anthurium.   And because the practice of sketching has been pressed into my brain from the Advanced class, I do a quick sketch of a possible arrangement.

my sketch idea for the one flower/one leaf design

Of course, once you start working with the plant material, it might tell you it wants to do something else, which it did in my design.  First I wound the phormium leaf in a spiral around my hand, and sunk it into the container.  I fussed with the spacing and at the top used a bit of U-Glu to adhere it to the vase.  Then, I tried wiring the anthurium because I wanted to to be taller and I wanted to play with it’s form, but that was harder than it looked and I couldn’t get the wire all the way up the stem, so to disguise the wire sticking out at the bottom, I wrapped another phormium leaf around the stem and then bound the whole thing with bind wire in a hopefully decorative way.

bind wire holds the anthurium stem inside the phormium leaf

my one flower/one leaf design after i got it home - had to rejigger things a bit

What was so amazing about this class was again the hugely varied results given that we all had similar material to work with, and all the same vase.  Jane gave us big kudos and we all felt very good about ourselves!

Jane lined up all our designs and had fun playing flower show judge

here all the lily designs are grouped together, giving us the idea that you could create sets of these designs for an event - getting a lot of 'bang for your buck'

this very simple design using a mum and an aralia leaf reminds me of a lotus

one tulip, poked through a flax leaf. i also loved jenny's design using willow and a tulip but didn't get a good pic. sorry!

Mary Jo always has a smile! Love what she did with her flax leaf.

I will miss all the great students of this class! Hope to see you in Basic II in the fall. And thanks, Jane, for getting me hooked on Floral Design.