Jane’s New Floral Design Book! (featuring some of my photos)

cover photo by Tom Weishaar (all other photos in this post by me, most of which appear in the book)

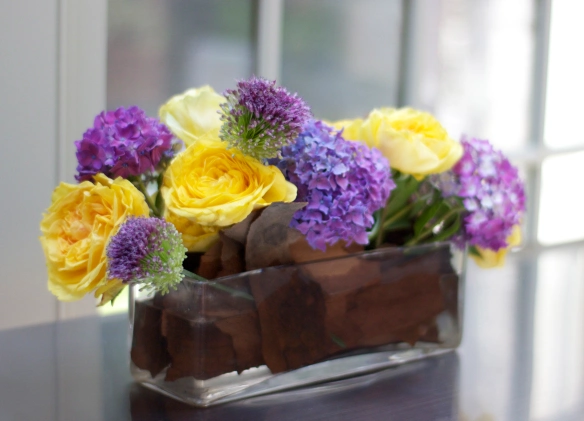
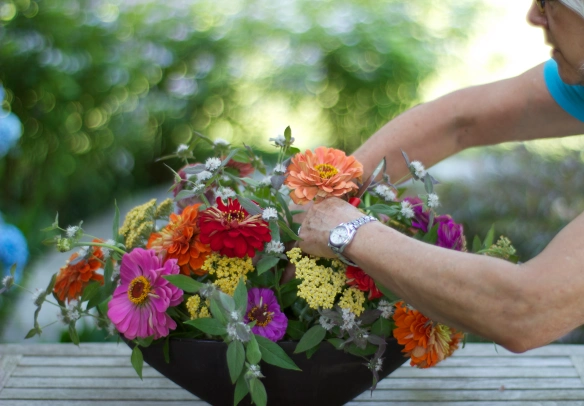
Jane Godshalk, AIFD floral designer and instructor at Longwood Gardens, is now also an author!  Her new book, titled Flower Arranging Secrets: Natural Designs for Everyday Living, offers tips and tricks acquired throughout Jane’s decades of floral design experience. Some of my photographs are featured throughout the book, and I feel lucky to have been a small part of Jane’s incredible floral world.

Jane makes it look easy.

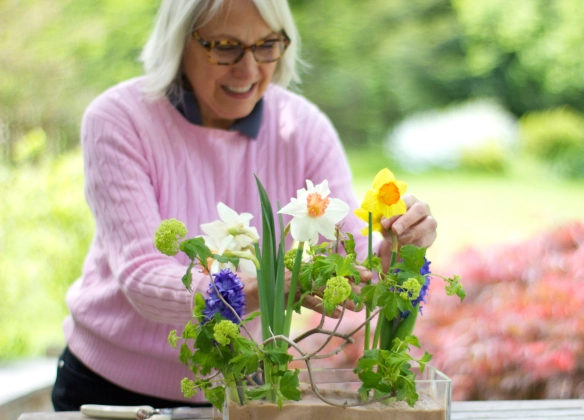
Jane makes it look easy. Buy her book, and it will be easy for you too! Here she is making an early spring parallel design using sand to hold the stems in place.

Jane has studied floral design internationally, is a longtime faculty member at Longwood Gardens, and is an award-winning floral designer whose work has been featured in publications such as the Pennsylvania Horticultural Society’s Green Scene magazine.

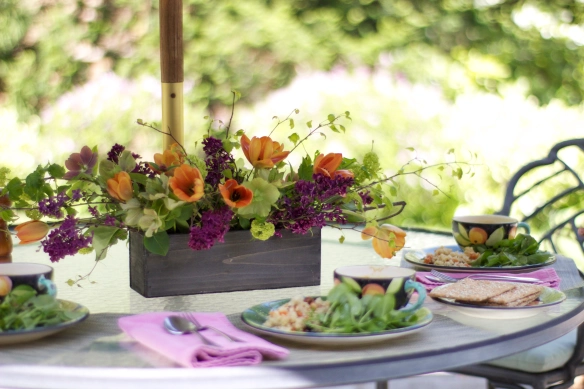
A lunchtime spring flower fiesta

A lunchtime spring flower fiesta Jane created using chicken wire to secure stems

At the heart of Jane’s book is the idea that floral design is for everyone, and the book aims to “demystify the process of arranging flowers for your home.”  Jane gives advice on how to select material and where to find it, how to care for stems once you’ve purchased them, which vases and containers to use, and design tactics such as color, stem placement, and rules of proportion.

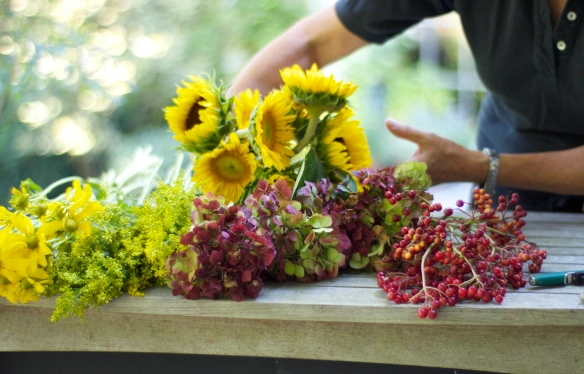
Jane shows you where to find materials and how to prepare them for arranging

Jane shows you where to find materials and how to prepare them for arranging

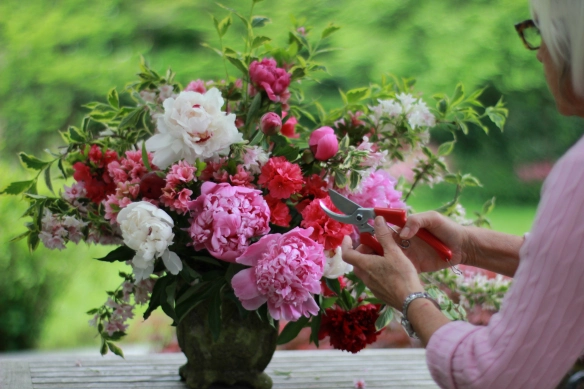
Spring Design by Jane using chicken wire for mechanic, featuring peonies and materials from her garden

Spring Design by Jane using chicken wire for mechanic, featuring peonies and materials from her garden. Behind the scenes shot.

Jane empowers everyday floral designers by giving us the “how to” in a clear, simple fashion – and all the design mechanics she uses in the book are sustainable (can be reused or recycled.) In other words, no floral foam!  One of her tried-and-true methods of anchoring flowers is by using chicken wire. She also shows us how to use branches, bark, grapevine, and even sand as the mechanic for holding stems in place.

Using bark and branches to hold stems in place

Using bark and branches to secure stems

Jane shares many other secrets, such as the proper use of a kenzan or frog, how to create a hand-tied bouquet (a personal favorite!) and how to successfully incorporate fruits and vegetables into your design.  There is also a handy flower identification chart included. Jane’s new book showcases beautiful, eco-friendly and easy floral designs for everyone from beginners to experts. I highly recommend it. Congratulations, Jane.  It was so thrilling to work with you, and I am continually inspired by your knowledge and talent.

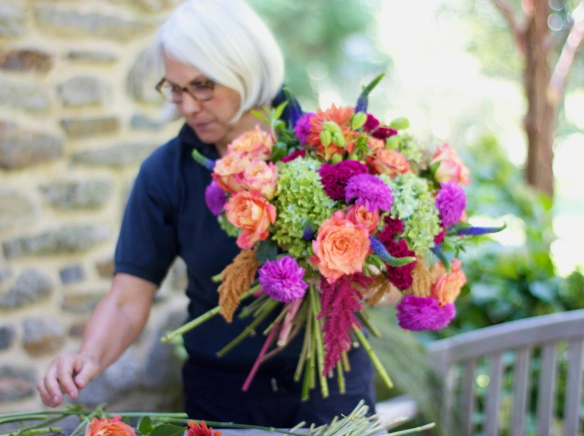
Jane's hand-tied bouquets are to die for! (photo not featured in book but concept is)

Jane’s hand-tied bouquets are to die for! (photo not featured in book but concept is)

Want the book? Buy it from Jane’s website for $24.99. Or, take a class from Jane at Longwood Gardens!

how to create a hand-wired bouquet

During Longwood’s Comprehensive Wedding Design class we made boutonnieres, corsages, and flower girl pomanders…but it was the bouquets, oh the bouquets, that were the best and most rewarding to create.  I’ve made my fair share of bouquets of course, but had never learned to do a hand-wired one.   The hand-wiring technique is the “gold standard” for creating a bridal bouquet, according to teacher Nancy Gingrich Shenk, an old pro in the wedding biz.  Hand wiring the stem of each flower allows you almost perfect control over stem placement and makes the bouquet lighter and easier to handle.  Creating a symmetrical and rounded bouquet is that much simpler using this technique.  I found myself enjoying this new skill and the resulting design very much!

the lovely juliet with hand wired bouquet

the lovely Juliet models my hand wired bouquet- isn’t she a gorgeous bride?

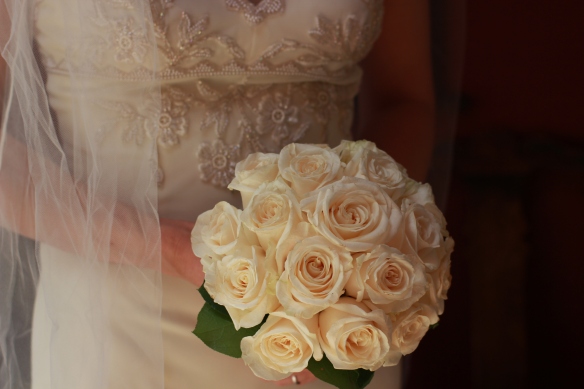
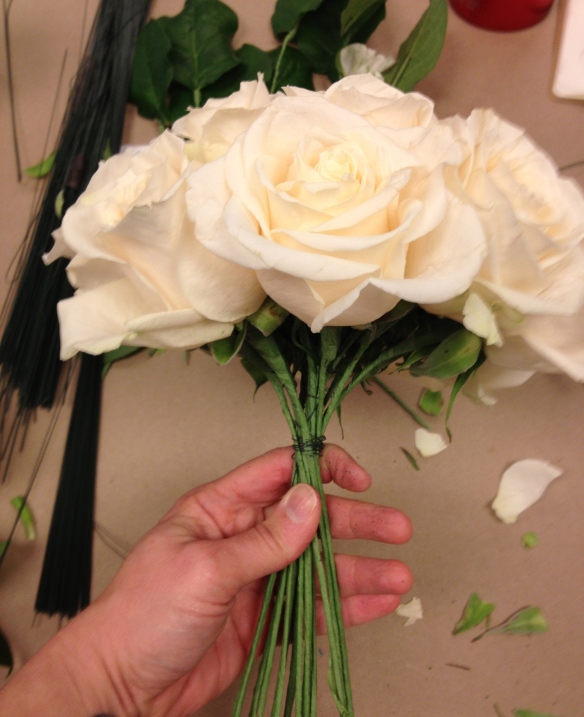
My 'gold standard' hand-wired bouquet with cream roses at the peak of their perfection

My ‘gold standard’ hand-wired bouquet with cream colored roses at the peak of their perfection

To create a hand-wired bouquet like the one above, start with the proper materials and tools, including wire, floral tape, about 20 roses, some lemon leaf or other foliage, ribbon and pins (for the handle,) pruners or snips, wire cutters and scissors.

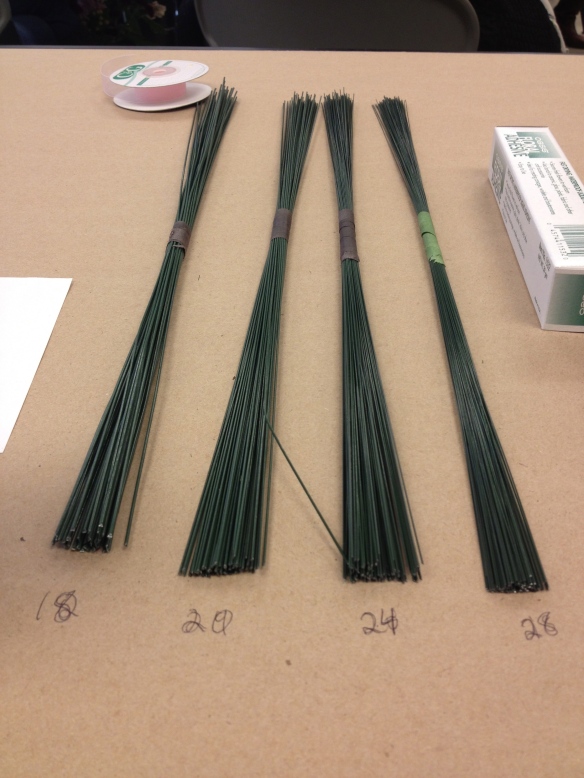
18-28 gauge wire, 18 is the largest diameter, 28 the smallest.  24 is the workhorse in floral design

18-28 gauge wire, 18 is the largest diameter, 28 the smallest. 24 is the workhorse in floral design

The correct gauge wire to use is heavy enough to replace the natural stem and hold the head upright, but not too heavy to add extra weight to the finished design.  (So as you do your wiring, hold the flower just by the wire, and if the whole thing falls over, your wire is too light!) 24 gauge is the “workhorse” in floral design, but for this bouquet I used 20 gauge, just a little thicker.

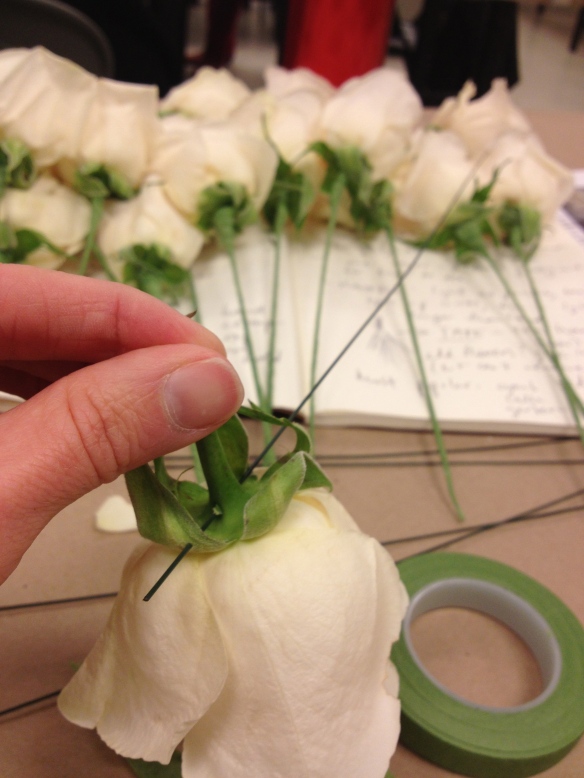
Pass the wire through the calyx, fold over and wrap in floral tape

Pass the wire through the calyx, fold over and wrap in floral tape

To wire a flower, start by breaking off it’s stem, leaving only on inch.  Insert the wire through the flower’s calyx, the green bulbous part that meets the bottom of the flower, pull the wire through a bit, and then fold it over.  Then wrap the whole new wired stem in light green floral tape.  (Take the end of the floral tape in your left hand, attach it to the top of the stem and wind it down on a diagonal with your right hand. Floral tape is not sticky on it’s own, but it sticks to itself when pressure is applied.)  During the wiring/taping process, be careful to handle the actual flower as little as possible to avoid bruising. TIP: White flowers bruise more easily

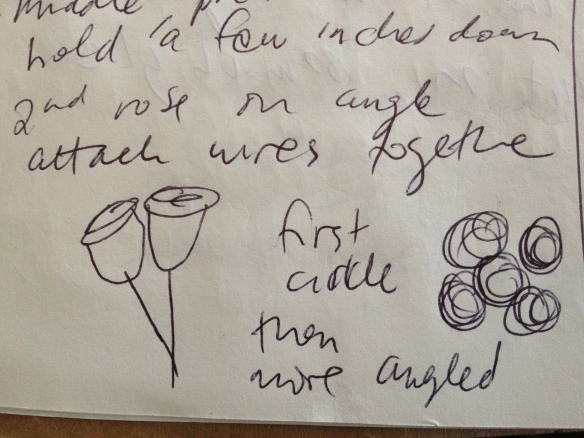
notes on angling stems

Wiring and taping is a laborious and time consuming process, but it makes the next step easier.  Select your most beautiful flower – this will be at the very center of your bouquet.  Hold it by the stem a few inches down, and so the flower is facing the ceiling.  Take your second flower and angle it’s face towards the wall, snugging it up against the first flower.  Bend the wires so they are both in the same line, pinched together by your fingers a few inches down from the calyxes.  Then turn the whole thing (I went clockwise,) put your third flower on an angle facing the wall again, bend the wire, turn again.  Do this until you have that first circle of flowers around flower number one.

Place each stem at an angle to the center flower and turn.  Wire as you go to give your hand a break.

Place each stem at an angle to the center flower and turn. Wire as you go to give your hand a break.

If your hand is tired, wrap the stems with wire at the pinch point.  The next set of flowers will be even more angled away from flower number one, so that if you left them when placed, the wire stems would almost be perpendicular to flower number one.  But you are tucking each wire stem straight down to be with the rest of the bunch.  As you place flowers, you can use a mirror to make sure your bouquet is symmetrical.  It’s important to remember that this bouquet must look good from every angle!

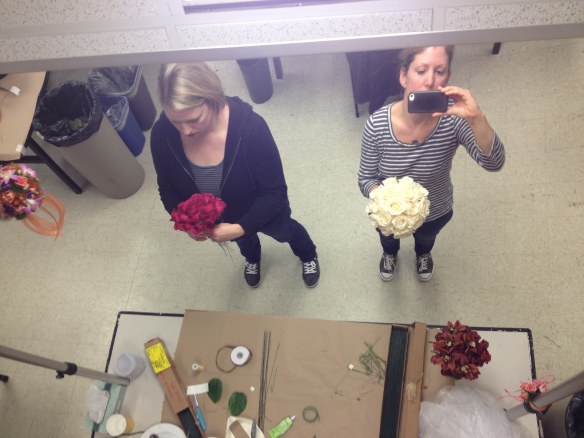
Here a fellow classmate and I check to see if our bouquets are symmetrical in the mirror

Here a fellow classmate and I check to see if our bouquets are symmetrical in the mirror

After you’ve secured your wires together with another wire, add some wired and taped lemon leaf to the bottom of the bouquet.  One layer of leaves will be ‘shiny side up’ so that it looks good from above, and the next layer will be ‘shiny side down’ so that the bride sees the prettiest part as she holds the back of the bouquet.  Then, cut out some of the tape-covered wires with your wirecutters.  This will minimize the weight of the finished design.  Wrap the whole thing in another layer of floral tape, add a ribbon and pins and voila!

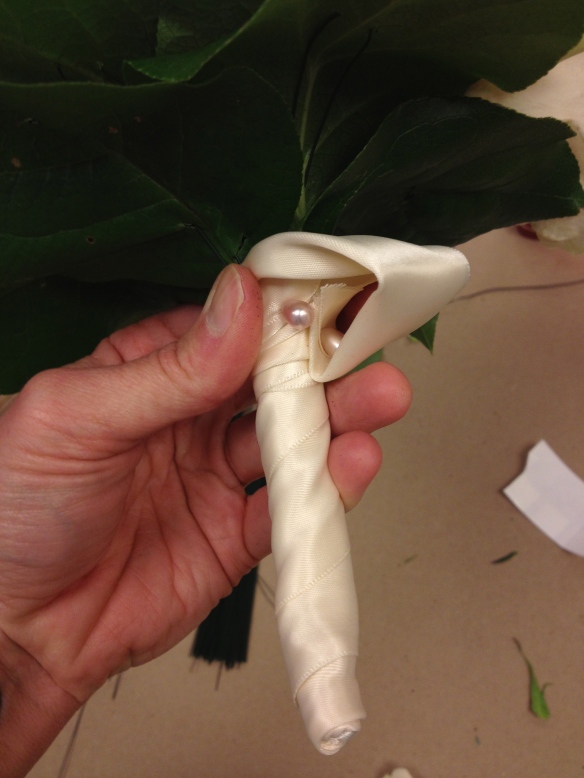
Add a layer of leaves and a pretty ribbon to finish off the underside of the bouquet.

Add a layer of leaves and a pretty ribbon to finish off the underside of the bouquet.  The “thumbholder” here is for the bride to tuck her ‘something old’ hankie into!

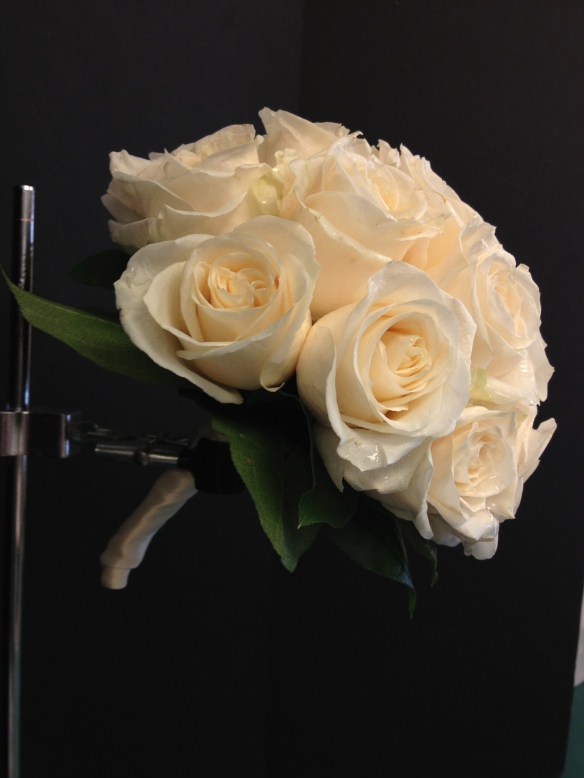
My hand wired bouquet displayed in an old chemistry holder to see the form

My hand wired bouquet displayed in an old chemistry holder to see the form

Some of the other students in the class made excellent bouquets.  I regret not having taken more pictures!

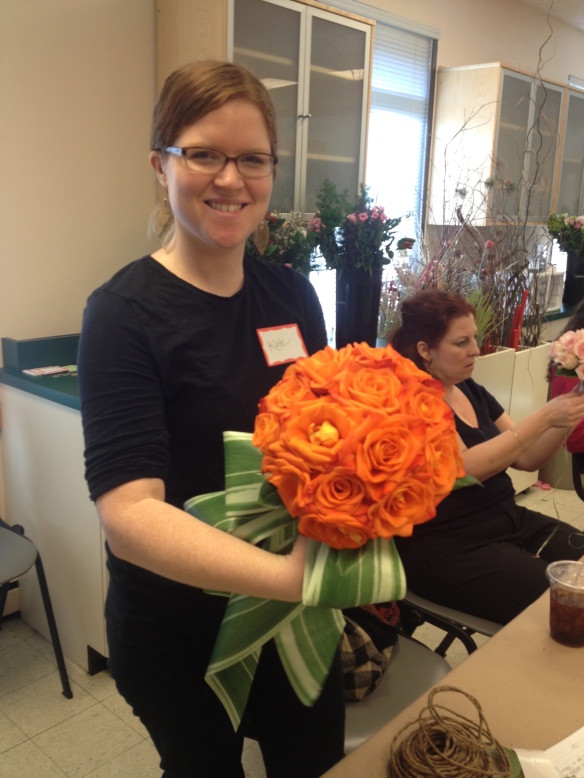
Kate's bouquet was bold and modern with a touch of a garden feel

Kate’s bouquet was bold and modern with a touch of a garden feel

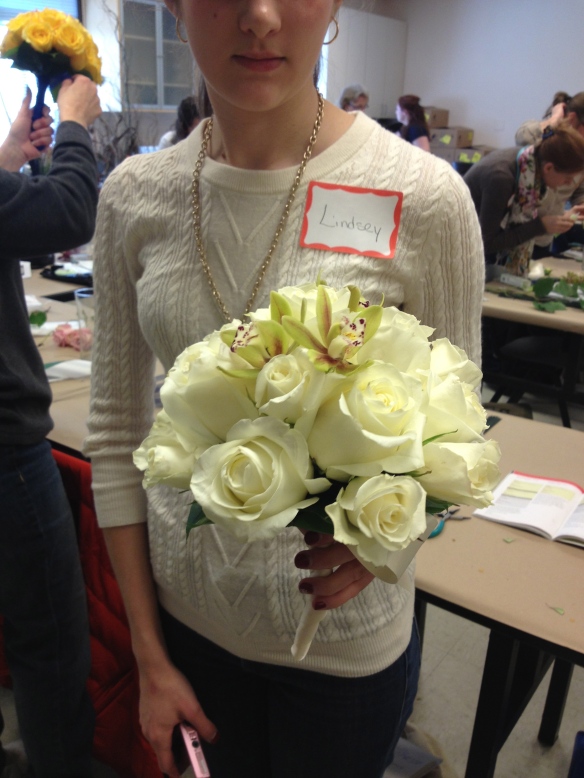
Lindsey tucked a few cymbidium orchids into her bouquet.  Her roses were of different sizes, creating a romantic 'fresh from the garden' feel.

Lindsey tucked a few cymbidium orchids into her bouquet. Her roses were of different sizes, creating a romantic ‘fresh from the garden’ feel.

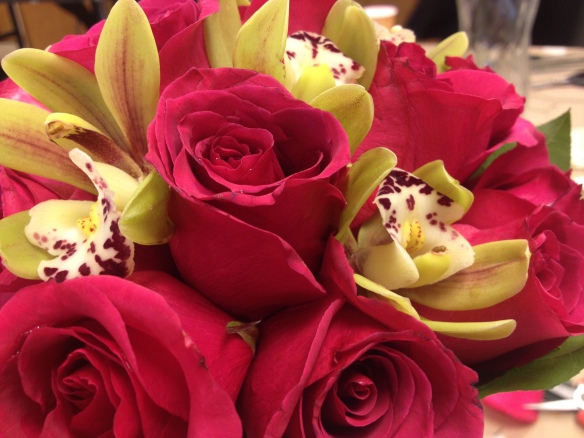
Fuschia roses combined with chartreuse cymbidium orchids - wild and modern!

Fuschia roses combined with chartreuse cymbidium orchids – wild and modern!

There was so much presented in this course, I couldn’t possibly cover it in one blog post.  All in all it was one of the best courses I’ve had at Longwood, infused with the personality of our teacher, who really has “seen it all” when it comes to the wedding business.  She told us countless stories of brides and their families gone wild, and when we got into discussing the business side of things, revealed that when she worked with some particularly difficult clients, she slapped on a “10% Bitch Charge” to the bill!

Coming up soon- hand tied and cascading bouquets!

spread the love

I’m referring to Jennie Love, of course! She’s the Eco-Queen of cut flowers, and the owner of Love ‘n Fresh Flowers – “a petite, sustainably managed, urban flower farm and full service event floral design studio in Philadelphia dedicated to creating fresh textural arrangements exclusively with locally grown flowers.” She is really doing it right, growing everything herself and utilizing those organically grown materials to create stunning designs! Please read her page on “Why Local,” it explains why sourcing local floral materials is the right choice in this global trade, and she says it better than I could…

I’ve been dying to meet Jennie for some time. Here she finally is in her cute vintage apron! I’m holding the hand-tied bouquet I made in class.

Today, she is our teacher for a Floral Fun class at Longwood Gardens, where we’ll be creating a hand-tied bouquet; and she should feel right at home here because Jennie got her training in both growing and floral design at Longwood.

hand tied bouquets from spring months – Jennie Love’s designs – photo courtesy of Love ‘n Fresh Flowers

Jennie Love spring design, photo courtesy of Love ‘n Fresh Flowers

Why create a hand-tied bouquet? They are very fast to make, they eliminate the need for carcinogenic floral foam, and they’re lovely in their loose, organic, country garden feel. They make a great simple gift, too, and it’s easy to create one out of the flowers right from your own garden, especially when you have great plants to work with and a teacher like Jennie to show you how.

Marigold ‘Jedi Orange’ gets very tall

Jennie has brought freshly harvested materials from her farm, and as you can see, these flowers are vibrating with health and beauty. She has two acres in the Roxborough section of Philly, where everything is grown organically – no chemical ever touches her sweet blooms. “But watch out for bugs and spiders,” she warns.

Jennie’s buckets of goodness

Here’s our plant list for the class – it’s also a good guide for easy to grow cut flowers. Jennie uses Renee’s Garden seeds and Johnny’s Selected Seeds in her garden. (And then I bet she saves seeds – I didn’t ask, but she just seems like a seedsaver to me!)

  • Hydrangea ‘Little Lamb’ a Pee Gee Hydrangea to be cut within the first year
  • Zinnia ‘Benary Series’ – easy to direct sow
  • Marigold ‘Jedi Orange’ – good variety for cutting, get very tall (6′!!)
  • Celosia or Cockscomb- small light purple variety…can’t remember name
  • Foxtail Grass or Setaria – grows by roadside, don’t be shy to collect it yourself, it will lend great drama to your bouquet
  • Baptisia – perennial shrub – great texture, blue-green foliage can add tendril effect, this time of year nice pods too
  • Caryopteris ‘Longwood Blue’ – perennial shrub – how appropriate, and gorgeous
  • Queen Anne’s Lace, Ammi majus ‘Green Mist’
  • Dill ‘Bouquet’ – grows extra big flower heads – I love this!
  • Gomphrena ‘Audray Series’ – cute cute cute little strawberry heads “like twinkling stars” within the framework of a bouquet
  • Bronze fennel
  • False sunflower, Heliopsis helianthoides

Snow-on-the-Mountain, or Euphorbia marginata, emits a milky sap that when cut can cause dermatitis. We are given gloves in case we want to work with this – so gorgeous!

We begin by stripping the leaves and side stems off of all our materials, and making neat, organized piles of each material. To start the hand-tied bouquet, Jennie recommends taking foliage/flower that will create the inner column – in this case we use hydrangea. The first set of stems is to be kept straight, but as you add to your hand-tied, you should be constantly turning the whole bouquet and then adding your sets of stems at an angle, and it will eventually look like a spiral of stems, beautiful. We hold the stems in a relaxed manner in our non-dominant hands, pinching the index or middle finger and thumb together loosely to keep our angles intact.

As you build your hand-tied bouquet, keep turning and adding stems at an angle. As you build bigger, the angles will get more dramatic!

After the first set of stems, add sets of stems to develop texture and contrast. A zinnia or two here, some filler flower or foliage there. Do a 1/4 turn after each set of stems to create fullness and a balanced design. Here, Jennie apologizes for sounding like a hippy, as she advises us to really just “let the flowers speak to you.” You can add things to the center by dropping them down into the bouquet if you feel it needs more of something. “Don’t be afraid to get wild,” she imparts, adding her foxtail grass which erupts in green flame from the bouquet, which is growing ever larger, fuller, and more beautiful by the minute. Yes, she makes it look easy. That’s because hand-tieds are the bulk of what she does. She does many, many weddings (I think she said she’s already done 72 in this year alone?!) and these bouquets are central to her work. She’s developed the hand strength to whip right through them, and her eye guides the design as she goes.

Hand tied bouquets look good in round mouthed containers. No square vases please.

Then, when you’re all done, take the rubber band you have cleverly put around your wrist and work it around your stems. Cut stems evenly and at the height you want – measure against your container before you cut, and leave a bit longer so you can always cut more. Once inside the container, you can fuss and let things breathe a bit. So, how did we do?

Julie’s design is gorgeous and sits upright on it’s own after completion! Balance is perfection!

Kevin had no problem with his design, great job!

The next morning, I find a container for mine and a little patch of morning light to set it in.

My hand tied bouquet loosened up in a metal pitcher. Zinnia, baptisia foliage and pod, dill, foxtail grass, gomphrena, celosia, hydrangea, caroypteris, fennel, queen anne’s lace…

Thanks, Jennie Love. I really enjoyed meeting you! And I feel really good about this Philly-grown bouquet – no packaging, no shipping, no floral foam – spread the love!

unbridled bouquets – a longwood elective course

“Go beyond traditional bridal bouquets and expand your repertoire to the cutting edge,” promises the Longwood Continuing Education Course Catalog when describing Unbridled Bouquets.  Today’s class is another taught by Jane Godshalk  (and I realize it may seem like I’m stalking her, but she just happens to be a great teacher and one of the main floral instructors at Longwood, okay?)  All materials including containers are covered in the fee for this class, but we were told to bring wire cutters, a stapler, and a box to bring our stuff home in.

Students including Delphine from Belgium prep carnations for bouquet making. I'm thinking, 'carnations, boring,' but wait til you see what we made!!

There are design basics to cover in any bouquet, but since I’ve never created any type of bouquet other than hand-tied ones at the shop, I’m a clean slate for learning.  First, consider what type of style you’d like:  Decorative, Vegetative, or Form and Line.  Your typical bridal bouquet of tightly packed white roses would be considered Decorative, it’s controlled and uses a mass of materials. Something that’s more naturalistic, with a variety of material and height is Vegetative.  And then Form and Line will use less material, have strong lines, and be more dramatic.  Most of the bouquets I like seem to be a combination of styles, but I do tend to favor the vegetative look – something fresh from the garden.  At least that’s what I thought at the beginning of the class!

Decorative/Vegetative bouquet I could just die for by lovenfreshflowers.com, photo by wrenandfield.com, Aug 2011 cover of Philly's Grid magazine - gridphilly.com

Think about where this bouquet is going to live:  is it a bridal bouquet? Not today, people.  We’re going where no bouquets have gone before, because we’re unbridled.  These bouquets are for the home;  these you can bring to a wedding shower, dinner party, or birthday bash that the hostess can then just plop into their own container.  Good idea, no?

Bouquet elements to consider:

  • Balance:  Symmetrical or Asymmetrical
  • Binding Point:  it’s either high, medium, or low.
  • Stem Placement: stem can be arranged in a Radial/Spiral pattern, in a Parallel fashion, or in an Alternate pattern.
  • Flower Level: flowers are all on the same plane, or they are varied from a little to a lot.
  • Open or closed: flowers form a ring that’s open in the center, or entire bouquet is full. At least I think that’s what it means.

We each have a bunch of 20 carnations, which we’ve mostly removed the foliage from.  Next, Jane shows us how to pierce the calyxes of each flower with wire that will connect them all together. We trade a few stems with each other here and there  to get some alternate colors. (Thanks Trish!)

Piercing the carnation calyxes with copper wire

Delphine and Pat pulling their wired carnations together in hand

As we gather the wired bunches into our hands, we decide where the binding point will land.  With these long stems, I’m thinking medium to high binding point.  I am going radial, all the way, because I want my carnations to go in a spiral of varying heights; and then I’ll tuck stems of Dianthus ‘Green Trick’ and some pink rice flower within that spiral.   But other students have done many other things with theirs.  The carnations, being wired, can pretty much hold their shape exactly where you want them – imagine trying to do this with free-standing stems, how would you do it without totally losing your mind?  And carnations are one of the few flowers with a big enough calyx to pierce without destroying the whole thing.

The ever-delightful Afeefa and her more open bouquet using birch branches, tied with raffia, high binding point

Then we can choose to add a little plumosus (Asparagus fern) or bear grass depending on whether we’re feeling lacy or more formal. We also have some hypericum berry we can string through if we like.  Then we’ll twist the bunch with some chenille wire, adding whatever ribbon adornment we prefer.

Megan, who wants to go into event design, added bear grass threaded with purple bling to her bouquet

My carnation bouquet, thanks to Pat for taking the pic

Spiraling IN control - my bouquet at home

detail of my bouquet at home: Hypericum strung with copper wire separates carnation from Dianthus 'Green Trick'. A whole unnatural little world made of natural elements. Neat.

Next up, we create a bouquet that starts with a handful of Equisetum, cut to mostly the same length, and held together with a rubber band (which will eventually get covered up by something prettier.)  The stems will be arranged in a Parallel pattern, so choose stems that are straight!  Hey, did you know Equisetum is basically a living fossil? Missouri Botanical Garden says:  “Equisetum is the single surviving genus of a class of primitive vascular plants that dates back to the mid-Devonian period (350 + million years ago).” It’s not a rush, or a fern, it’s in a class of it’s own, literally.  Cool!

Equisetum bunched together will be the structure that holds the stems together for this lil bouquet

Then, simply pop stems inside the Equisetum structure and BAM! instant modern bouquet.

My bouquet with equisetum base (wrapped with copper wire)

My parallel bouquet from above: bear grass loops out of lisianthus, green eyed rose, ranunculus, freesia, and white allium

Here’s the next little cutie we did.  In this ‘bouquet’ we threaded wire through carnations again, this time to achieve stems with an Alternating pattern.  I’m sorry I didn’t get pics of what’s underneath, but I actually ended up doing most of this during lunch, since we were really packing the learning in.

My Alternate-stemmed bouquet, now on my bedside stand. Love the little green vase.

After a lunch break, we came back to find a lot of lovely colors to choose from, along with some big birch branches. Get in line for your materials and don’t be shy now!

Trish looks like a kid in a candy store!

Then we created some bouquets using Birch branches as a structure.  Those of us that were doing the more Vegetative design started by created a base structure out of wire covered in brown floral tape.   Wrap two 18 gauge flat wires to form a circle, and then attach four more wires to the circle, which then meet in the center under the hoop to form a sort of holder.  From there, add birch branches, even binding them to the wire form to get the branches to got out horizontally.

Jane shows us the birch and wire structure technique. I'm taking notes so I didn't get too many pics of this. And the drawings in my notes are incomprehensible.

For the more modern Birch bouquet, we created a structure using “Sickles” – which are bundles of birch wrapped with wire to form little crescent shapes, or sickles.   This is a technique that Jane learned from designer Gregor Lersh…who has some upcoming workshops in Germany, if you’re interested. You can make sickles out of anything that would look good bunched together – straw, bear grass, pine needles, etc.

Jane shows how to create little sickles out of birch, then shapes them into a bouquet structure, attaching them together with wire. Wire is also added to form a holder of sorts.

For both of the branch structures, greens and then flowers are simply added within the form.  My hand got way tired holding all my materials in place while I created my Vegetative bouquet. Guess I’ve got to do some hand strengthening exercises!

Here, Jane adds materials to the sickle form

My completed birch bouquet in container. Very rustic.

So you see you probably could not achieve the same effect with the branches if you had just placed them into the container without foam.   The wire structure made it easy to just poke stuff in, and then you hold it in place with your hand.  At the end, it’s very important to finish it off with greens in order to cover the wire mechanic.  Then, wire with chenille wire to wrap it all together at the end.

Jane shows us another bouquet that utilizes straws - very colorful! Great for a baby shower??

Did you think we were done yet? No, this is Unbridled Bouquets, we still have one more bouquet to make! We were at a breakneck speed at this point, and the creative juices were flowing.  Jane showed us how to staple straws onto a wire, then create a structure like the birch branch one for this fun bouquet.  Then poke your materials in, with hydrangea using up a lot of real estate it’s a quick one!

Stephanie's straw bouquet...cool!

Isn't the Anthurium lovely in this student's creation?

I, unfortunately, had a terrible stapler (was it made for Barbie?) whose staples were ill-fitting, so I didn’t create the straw hedgehog.  Instead I wired bits of light green straw onto copper wire, which I then attached to a wire bouquet structure.  I then added a bunch of Apidistra leaf (folded and stapled,) Hydrangea, Anthurium, and Dianthus ‘Green Trick’ for a little Tim-Burton-meets-Martha-Stewart action.

I'm calling this my "East Hampton" bouquet.

At home.

After a day of making bouquets (five in total!) our cheeks are flushed with productivity and pride; and maybe, just maybe, we feel a little on the unbridled side.   We have boxes full of beauty to take home!

Stephanie on her way home. Hope to see you soon!

day three part two – advanced floral design I at longwood

After our lunch break, we came back to a lecture on the History of Floral Design.  This is too big a topic to blog all at once, but it’s fascinating to think of borrowing from the past and really knowing the era you’re trying to reflect.  Our parallel designs are inspired by the Egyptian period, our garlands a toast to the Greeks and Romans, our Roundy Moundies mirror the tightly massed, garden-inspired designs of the Victorian era.   And now that I’ve been studying floral design, I’ve been noticing floral arrangements in movies and television – and just like everyone else, I’m in love with the PBS Masterpiece Classic Downton Abbey.  In the scene pictured, we are in a late Edwardian time period, but the flowers behind poor Edith Crawley (who has just not been proposed to, alas) are Victorian in style – packed to the gills with flowers, softened with greens, spherical and opulent. I think a whole blog entry at a later date on the flowers of D.A. is in order, don’t you?

Edith Crawley from Downton Abbey with Victorian style arrangements behind her - when more was more

Sigh.  In today’s class we created an arrangement from the Art Nouveau period, which lasted from the 1880’s to around 1920 and slightly beyond, and was defined by it’s sinuous whiplash curves and highly stylized yet organic look. Look at Hector Guimard’s subway station designs he did for the Paris Metro – (transportation built to accommodate the many visitors for the Paris World Fair in 1900.)

Guimard's Art Nouveau Metro entrance courtesy of lartnouveau.com

Alphonse Mucha turned advertising into miniature Art Nouveau romantic masterpieces.

poster by Alphonse Mucha 1896

So how do you translate the stylized, curvy look of Art Nouveau into floral design?  I think choosing flowers that already have that look is a start – like the calla lily.  Calla lilies, with their sensuous curves and lines, could just be the perfect representation of the Art Nouveau period.  They probably also work with the Art Deco period too.  Then there’s the overall shape of the design itself.  In today’s class, we’re creating Jane’s very favorite design, the Cascade Design.

Modern cascading bouquet from Jane's slideshow

The Cascade or Waterfall design is characterized by a steep flow of materials in an extended cascade.  Alternating layers of flowers and foliage of delicate textures creates depth and a flowing effect.  Non-floral, reflective materials like metallic thread are often used to capture the splashing light of a waterfall.

the cascade starts with a lot of greens for layering

Jane begins with a tall vase containing floral foam held in by a chicken wire cage (lashed on with waterproof tape.) One side of the floral foam is a little chunkier to accommodate for more hanging plant material.  She creates a base of greens to cover some of the foam at the top, using Apidistra leaf pinned in on themselves to create a bullkier look for the front, and the ever useful Galax leaf at the back.  Then the fun begins – using long flowing greens like Springeri Fern (prickly!) and Italian ruscus to start the cascade effect.  She also scores some Apidistra so it seems like it has many long thin leaves.   The cascade should go “out and down.” The key here is layering.

jane adds line flowers, focal flowers, and lightens with a string of roses

Jane then adds the line flowers – Calla lilies in this case – which she coaxes into a bendier shape and wires the end of each stem to help it stick in easier.  Callas don’t need too much water.  She adds focal flowers, like mums and carnations, and then some lisianthus.  Don’t forget, not all the stems need to point down, because “Water falls down, then splashes up,” she says, quoting a favorite designer of hers, Gregor Lersch.  Gregor Lersh is amazing! More on him later.

string wire through rose's calyx

To create a string of roses, just thread wire through the rose head’s base (calyx) – the first one will have the wire closed off as seen above.  Then just add more and more and more rose heads and you can adjust where they sit by sliding them up and down, and they’ll stay there pretty well.  Wrap the end of the wire around a floral pick, and boom, insert it right into the foam at the top.  The silver of the wire adds the splashing light effect and lightens the density of the design.  Lighten further with other lacy plant material like Genista, and voila! Cascade design is done.

Jim's design uses anthurium as a focal flower, and because he used a glass container, he filled it with fishtail fern - a lovely effect!!

another student's cascade design - pure flowing movement!

My cascade design also used Anthurium as a focal flower – some of the ‘Obaki’ left over from our Abstract design class.  I chose the smaller white Calla lilies and bound them together with bindwire to achieve length (since they can survive out of water for a while.) Purple lisianthus was pushed into the greenery, and I accented with some light purple Genista and strings of roses on silver wire on both sides.

My cascade design on the mantel

another shot of my cascade

To water this beast, use a thin spouted watering can to get the floral foam at the center.  Mist the rest.  Mine lasted about a week, with Obaki drooping and roses withering, but that just “added to the cascading effect,” or so my family told me – I think they were just being nice.  I LOVED this assignment, and so did most everyone else in the class.  I will certainly repeat the Cascade again, and would love to see a Cascade or Waterfall design on the set of Downton Abbey in Season 3…wouldn’t you?

day three part one – advanced floral design I at longwood

There is a lot of oohing and ahhing at the beginning of today’s class, for the counter is covered in a array of bright tropical flowers and lush foliage, the likes of which many of us have never seen before. These are for us! To use! In an abstract design!

King Protea

Cibotium Kakuma Curl Fern

Heliconia hanging 'Sexy Pink'

Zingiber 'Chocolate Ball'

Tropical flowers work great in modern and abstract designs. But they do require special care – remember, they’re from a warmer, more humid environment and often cannot survive in a cold climate or standard floral refrigerator. Use room temperature water when working with tropicals – most love to be misted on a daily basis!

Anthurium 'Obaki,' I love you

Anthurium – called Flamingoblumen in German- come in many shades and sizes, and because they drink from that pointy thing or spadex, they should be submerged under fresh water for 10-20 minutes before using them, and misted daily in an arrangement.

Jane's winning design using Heliconia Torch 'Emerald Forest'

The Philly flower show this year was full of tropicals (obviously, with the theme being Hawaii!) Our teacher Jane loves using Heliconia Torch ‘Emerald Forest’ and won a blue and gold ribbon with them in her design at the flower show this year. Here they are in another Jane design that shows you that modern/abstract design can look good in a home setting:

Jane's design - the tops are not chopped, off that's how Heliconia really are!

Then we talked about Abstraction, which in the art world indicates a departure from reality. This departure from accurate representation can be only slight, or it can be partial, or it can be complete. Jane brought up the Tree series by Piet Mondrian as an example of varying degrees of abstraction.

Piet Mondrian, Avond (Evening), Red Tree, 1908. Collection of Gemeentemuseum, The Hague.

Piet Mondrian, Gray Tree, 1911. Collection of Gemeentemuseum, The Hague.

Piet Mondrian, Flowering Apple Tree, 1912. Collection of Gemeentemuseum, The Hague.

The essence of the last Mondrian tree is distilled into lines, forms, color, space. In abstract floral design, some of the same principles apply. “Abstract floral design: A contemporary design style in which plant material and other components are used for their intrinsic qualities of line, form, color, and texture.”

Eleanor creates an abstract design - sphere of mums, heliconia hanging 'sexy pink' - container is part of design

So how does one go about creating an abstract floral design? These qualities are important to consider:

  1. Bold, high impact
  2. An emphasis on space
  3. Dynamic tension
  4. RESTRAINT! in use of plant material, often no transitional material
  5. Interest distributed throughout the design
  6. MORE THAN ONE POINT OF EMERGENCE for plant material, often unconventional placements
  7. Container (if used) is part of the design
  8. Non-naturalistic use of plant material
  9. MINIMALISM

Jim uses all green tones. His grassy sphere creates TENSION by looking like it might roll away

And the RESTRAINT award goes to....Jenny! This design was probably one of my favorites today. One colocasia leaf, one driftwood stick, one black container. Some glue. Gorgeous.

I'm breathless. Jean's design uses heliconia, carnation, and monstera leaf, plus bear grass bundled together with silver wire. It's like that CONTAINER would be lost without exactly what's inside it.

Weren't you wondering what someone would do with the 'Chocolate Balls?' Here Parul schools us in abstract design! Talk about NON NATURALISTIC use of plant material!

Rosemary the volunteer helps out with some words of encouragement.

For my design, I used the two Protea ‘Van Rooys White’ which I had been eyeing from the beginning of class since they matched the container I brought so perfectly. In these Advanced classes, it’s BYOC! There are many many Protea species, South African flowering plants that I would love to see growing in the wild. In fact, Protea was named for the god Proteus, who could change his form at will – because Proteas have such variety of form. Tim Snyder, a graduate of the Professional Gardener program at Longwood, now gainfully employed at Chanticleer, recently visited South Africa with a group of students. Here’s a really cute video with great music that Tim and his wife made of his trip — keep your eyes peeled for Pincushion Protea growing in the wild!

my abstract design uses two protea 'van rooys white,' one hanging in mid-air

I wanted to do something playful with one of them hanging in space unrealistically. You have to think long and hard about how to have more than one point of emergence, and this seemed like an easy way to achieve that. I wired the stem using fairly heavy wire, sticking it into the floral foam inside the container. Then I covered the wiring mechanic with brown paper packing material. The apidistra leaf stem pokes right through and with the remaining space I poked in a few yellow pom pom mums to peek out.

other side of my abstract design, pom pom mums peeking out

This class was totally mind-bending. It really makes you throw away a lot of the rules to see that anything’s possible in the world of floral design!

day 2a – advanced floral design I – longwood at home

A nasty stomach bug prevented me from attending a day of classes, so I attempted to do the first design we learned this day at home, following directions from the book The Art of Floral Design by Norah Hunter (with Jane’s blessing, of course.) My teacher was very understanding about me missing the class, and I’ll be able to attend at least the lecture portions during the class held this fall.

First stop - PRODUCE JUNCTION - I wanted it all!

Here’s what I’m making: the New Convention design, which is a structured, linear-style design. It’s like the parallel design on steroids – with the addition of horizontal materials. Vertical lines are reflected at sharp right angles forward, backward and to the side using identical materials. Contrasting textures are used at the design’s base where all the lines converge. The book gives you a pretty good how-to diagram.

new convention diagram from book

To begin, select a low rectangular container. Cut floral foam to extend above the rim of the container (to allow the horizontal placement of materials) and secure with tape. Plan your design by placing stakes in areas where flowers will be grouped. I wanted my end geometric form to be triangular, with the top point in the center.

foam, in retrospect, perhaps a little too high above edge.

What’s really exciting is that I bought a cake decorating spinny thing which makes floral design so much easier.! (Purchased on Amazon for $18) Maybe that’s only exciting to me. Anyway – next, add your vertical materials. I chose snapdragons, agapanthus, and tulips which I bound together with a little wire. I thought it might be neat to see how the tulips keep growing while confined in a bunch.

add vertical materials

Part of this assignment was learning to unite materials, something our class handout talked about. But the book didn’t really mention these techniques as part of the New Convention design, so I didn’t go overboard on it. However, I think I probably should have done a little more of the following:

methods for uniting materials

Banding: Tying materials for purely decorative purposes.

Binding: Tying materials for functional purposes, physically joining the materials together.

Bundling: Tying or wrapping similar materials together into one unit, such as sheaves of wheat or a bundle of sticks. The bundle may then be placed in the floral design.

Wrapping: A technique in which fabric, ribbon, raffia, cord or wire are used to cover, coil, or twine a single stem or group of stems to achieve a decorative look.

Add horizontal groupings that reflect vertical ones

Next, insert stems into sides of foam at right angles to the vertical groups. Horizontal lines are shorter than vertical groups. I used the exact same material to reflect the vertical groupings. Then, complete the base of the design with short flower heads, mosses and leaves using basing techniques (remember pave, clustering, tufting, terracing, etc from the parallel design?) I went totally crazy here, but I wanted it to look full and I had tons of material to work with. I wasn’t sure about ‘point of emergence’ for this one, so I just did my best. I think my foam was too high and we have a lot of competing elements here because I needed to fill up the space…

after basing added - in basement - hours have transpired - i'm in trance

from a carpet of gerber daisies springs white ornithogalum, eryngium, and some euphorbia x martinii 'ascot rainbow' (euphorbia from my cutting garden, yew foliage from parent's yard)

new convention design in a diningroom

Our handout talked about dominance – which is the greater effect of an element – it must be clear in a design and imply subordination.

Linear Dominance – a certain type of lines take the role of importance by either quantity or size (for my design, I think the agapanthus wins because of size and rhythm of lines)

Color Dominance – one hue or strong colors (the purple of the agapanthus draws your eye, but the orange gerber daisy is a dominant focal point I think)

Form Dominance – clearly developed

Textural Dominance – one type of texture (my design has lots of textures and I don’t think one dominates – do you?)

Space dominance – either very full or very open space (it’s pretty full eh?)

And as far as the focal area goes – the dominant place within a design which has the strongest visual impact – I think there are multiple focal areas in this one.

why is this one so hard to photograph?

other side - roses are pave-d

An accent is a subordinate element that contrasts or complements the dominant element – the accent is often connected to the focal area of a design. Here, the ivy is the accent to the roses.

from above

I sent some pics to my teacher Jane and I’m waiting to hear back on whether I’m anywhere in the ballpark here. (Maybe she’ll comment right here on my blog! Wouldn’t that be something?) I welcome any comments and criticism on this design – advanced Longwood students, I would really like to know what you thought of this assignment.

Stay tuned for more adventures in floral design!

ADDENDUM: I talked to Jane over the phone and she gave me a thumbs up on my design. We got to talking about all the foam used for this particular bad boy, and she’s thinking the New Convention won’t be taught in next year’s Advanced I class in order to conserve the use of Oasis to a minimum. I really enjoyed making this design, but I can see how 24 students x 2 blocks of foam starts to add up!

day six – basic floral design I at longwood – last day of basic!

There was overlap with Advanced and Basic this past week.  But this was the last Basic class, boo hoo! I never wanted it to end.   In today’s class we reviewed the principles and elements of design, and then did 2 arrangements.  The first was a simple market bouquet in glass, taken apart and re-designed with added greens and a few extra flowers.  I think we’ve all had experience with this- you bring home a bouquet from the grocery store and you can’t just stick it into a vase “as-is.” You need to break all the stems into groups and analyze what you have.  Often the bouquet from the market has the different flowers placed in a very regular pattern all around – but maybe you’d like it better and there would be more impact if some of the flowers were grouped together.  This was quick and easy but important as it was our first design in glass with water – no Oasis!  So how will the stems stay in place? We had a few options for the mechanics – the first was to create a grid out of clear tape, creating 1″ holes on a dry vase and running tape all around the rim once finished.

clear tape grid method for designing in glass

The second, and the one I went for as it would create interest in the lower half of the arrangement, was the branch structure with willow.  Wrap a stem of curly willow around your hand and smush it into the glass, adding a few big stems in a criss cross pattern for more support, and 2-4 more wrapped stems as needed. You could use any other flexible stems for this, like red stemmed dogwood for example.  Just make sure they’re pretty bendy.

using natural stems to create supporting mechanic for arrangement

Personally I know I will use this method again, it was really easy to work with – the stems stayed put – and I really liked the way it looked especially after you put water into the design.  Of course there are many other ways to support stems in water – by using kenzans/frogs/pin holders, or using foliage or large flowers at the base to keep other flowers stable.

my market bouquet in glass - curly willow added last to reflect the basing stems

isn't this tulip delicious?

branch structure looks even cooler when you add water!

Next up, the one flower/one foliage stem design in glass.  We were given a glass cylinder vase and a quick demo from instructor Jane on some unique things you can do to various foliage stems to create drama.  Here she’s wired Equisetum to get it to conform to the shape she wants – a long rectangle – that will contain the single lily flower like a frame.   She’s also revealed a very important trick of the trade – called U-Glu dashes which are tiny dots of clear tacky glue that can help stems stay put and so much more.

Jane explaining that the level of the water is part of the design

In a flower show competition, none of the mechanics should be visible unless they are purposefully part of the design, like using bind wire repetitively around a wrapped stem.  As she’s doing her demo, I already have an idea for what I want to do, using Phormium or Flax, and one single Anthurium.   And because the practice of sketching has been pressed into my brain from the Advanced class, I do a quick sketch of a possible arrangement.

my sketch idea for the one flower/one leaf design

Of course, once you start working with the plant material, it might tell you it wants to do something else, which it did in my design.  First I wound the phormium leaf in a spiral around my hand, and sunk it into the container.  I fussed with the spacing and at the top used a bit of U-Glu to adhere it to the vase.  Then, I tried wiring the anthurium because I wanted to to be taller and I wanted to play with it’s form, but that was harder than it looked and I couldn’t get the wire all the way up the stem, so to disguise the wire sticking out at the bottom, I wrapped another phormium leaf around the stem and then bound the whole thing with bind wire in a hopefully decorative way.

bind wire holds the anthurium stem inside the phormium leaf

my one flower/one leaf design after i got it home - had to rejigger things a bit

What was so amazing about this class was again the hugely varied results given that we all had similar material to work with, and all the same vase.  Jane gave us big kudos and we all felt very good about ourselves!

Jane lined up all our designs and had fun playing flower show judge

here all the lily designs are grouped together, giving us the idea that you could create sets of these designs for an event - getting a lot of 'bang for your buck'

this very simple design using a mum and an aralia leaf reminds me of a lotus

one tulip, poked through a flax leaf. i also loved jenny's design using willow and a tulip but didn't get a good pic. sorry!

Mary Jo always has a smile! Love what she did with her flax leaf.

I will miss all the great students of this class! Hope to see you in Basic II in the fall. And thanks, Jane, for getting me hooked on Floral Design.

day one – advanced floral design I at longwood

I was on the waiting list for this class, and at the last minute I got in! It’s a Saturday class that meets from 9-4, an all day affair, and was actually a bit intense, because we squeeze two classes into one day. The teacher is the same as my Basic class, Jane Godshalk, thankfully, but there were only a few students that I recognized. The rest seemed to be on some other plane of advanced floral design! I felt as if I were coming from the minor leagues to the big time, looking around at all the creative touches I never would have thought of going on around me. Jane kept saying, “you’re in Advanced now, people…”

Instructor Jane Godshalk's Linear Design

We started by discussing Linear Qualities in Design. Line can be static or dynamic; there are both primary and secondary lines. Here are some of the many line types:

Linear Qualities in Design

In a Linear Design the line is dominant – the negative space powerful. The lines can become a geometric form – circle, square, triangle and every combination of those forms.

All geometric shapes are some variation of circle, square or triangle (the fundamental forms of nature)

There are a few really important ideas to consider when conceiving of a design plan: the vertical axis, which may be visible or invisible in the design; the binding point (the central binding point) and the point of emergence (the point from which lines of a design begin, also usually the binding point. confusing.)

think about the vertical axis and binding point!

Also, consider the focal point or focal area – this is the area of greatest impact in a design – to which the eye is naturally drawn. It’s usually close to the binding point. There are many ways to achieve focal interest:

  1. Color – darker flowers have more visual weight than lighter colors
  2. Size – larger, more open blooms have more visual weight
  3. Shape and Pattern – form flowers have greater interest
  4. Spacing – closer spacing makes flower appear heavier
  5. Texture – contrasting textures create visual interest – Shiny foliage is focal
  6. Line Direction – radiating lines attract interest to center of design

Here are some basic flower arrangement designs. This gets you thinking that there’s no end to what you could do!

This morning we do two linear designs. Jane recommends really planning out your design – choosing your style (decorative, vegetative, form+ line, abstract,) choosing the dominant element, flower forms, color palette, and planning your vertical axis. Make a sketch before you begin! The first design we do will have a visible axis and will incorporate some techniques from Basic like pave and terracing.

my sketch, vertical axis will be off to the left. all i know at this point is that snapdragons will be my line flower and a lily will be the form flower and focal point.

My linear design with visible axis. Jane had to help me remember about point of emergence!

another student's linear design with visible axis

Moving on, we are to create Design 2 – a Linear design with an invisible/imaginary axis. We have a nice white Ikea vase to play with. Again, we make a sketch and plan all the elements: dominant element, flower forms, palette, and where is the imaginary vertical axis. All I know is, I’m using those Bells of Ireland (I will have to wire them to make them the shape I want) and green mums, and my imaginary axis will be in the center. I want to do something curvy.

my sketch for design #2

My linear design with imaginary axis - Jane says "it's almost a Hogarth Curve!" I think the imaginary axis ended up being slightly left of center.

After lunch break, it’s time to tackle the Phoenix Design, for which we’ve brought containers from home. I was lent a beautiful silver Revere bowl by Juliet. The Phoenix Design, interestingly, is the only design we’ll be learning that is attributed to American designers. And yes, it is inspired by the mythological bird that cyclically sets itself on fire and rises from it’s own ashes to begin another long life. So the design is all about renewal and rebirth.

Phoenix depicted in the book of mythological creatures by F.J. Bertuch (1747-1822)

The Phoenix design is a composition in which tall materials burst from the center of a round arrangement in a radial fashion with a triangular shape.

slideshow - one of Jane's Phoenix designs she created for a party

Our mechanics for this arrangement, which is great for big parties, begin with a block of soaked Grande oasis put into a liner and then into the container. Others had varying shaped containers and needed to secure the foam with chicken wire and tape – mine was steady so I didn’t need to do that. Start by grouping various foliage at the base, leaving a hole in the center for the fireworks. Remember the base is to be a round shape. We used Ruscus, Ming Fern, and Apidistra leaf (Jane’s fave,) which she showed us how to bend in on itself, and poke the stem through the leaf to create a bulkier shape. Then put in your line flowers, in this case Gladiolas, using radial lines. These tall line flowers should create an upside down triangle from all sides (easier said than done!)

Jane demonstrates the Phoenix design

We did create a sketch first but I think you get the picture here. After a mad rush to get our flowers, we spend an hour or so making this one. The person next to me seems to require a lot of space so I move to the counter space behind me – it’s really hard to see your line and form with so much happening visually in the room. After putting in the line flowers, we fill in the rounded form at the base with roses, alstromeria, carnation, waxflower, etc. I end up using more roses instead of carnations, because there are some left over. In these classes, you try to play by the rules regarding how much plant material you’re allowed, but if you pay attention you can often grab some extras after everyone has taken what they need.

Sisters with their Phoenix designs

my phoenix design with a few extra glads and roses thanks to jane

In choosing the colors, I started with the green glads and wanted pink roses to complement them, especially because the intended location for this guy was June’s house (June is 2) and her favorite color is pink. I accidentally cut my glads too short and ended up putting a bunch of myrtle in to compensate – which during our evaluation in front of class, Jane took out, leaving just the curly willow. I’m glad she did this, I think in Basic she doesn’t critique our designs quite as much but how are you going to learn, right? Anyway, this design is very big and didn’t end up fitting at the intended location! So it’s up at the ‘big house’ lasting quite well though because of it’s size it’s a bit thirstier than other arrangements I’ve made.

my Phoenix design in a home setting


After a long day in Advanced I’m pretty fried- in a good way. I made it!

day five – basic floral design I at longwood

Roman fresco with garland of laurel leaves, pomegranates, sheaths of wheat, and pine cones - photo courtesy of metmuseum.org

In today’s class we talked about garlands, which were popularized during the Greek and Roman Periods.   “Garland:  a wreath or festoon of flowers, leaves, or other material, worn for ornament as an honor or hung on something as a decoration.”  Personally, I like the idea of festooning long garlands all around the house and wearing a head garland at the same time.  In ancient Greece, head garlands (also called chaplets) were made of predominately foliage, and were awarded to honor athletes and heroes as symbols of allegiance and dedication.

Apollo crowned with a laurel wreath / photo courtesy of http://www.theoi.com

During the Roman period, garlands and wreaths were heavy and elaborate with fragrant and colorful blooms.  An abundance of lavish flowers was seen as a sign of opulence and wealth.  According to our teacher Jane Godshalk, there’s a story of one rich Roman Emperor who had a dinner party with a fragrant surprise: ceiling panels full of roses and other flowers. The idea was to let the canvases fall deliciously over the heads of his guests.  But it didn’t go like that –  a few of his guests were in fact smothered by his fabulous flowers.

party gone wrong at Elagabalus the Roman Emperor's place

There are a few ways of going about making a garland, and though we weren’t able to cover actually doing them all in this class, we were given a quick demo on how to make a wire garland, using pre-soaked Oasis blocks wrapped in plastic wrap and enclosed in chicken wire.  You just stick the materials into that, careful of the dripping.  A rope or twine based garland seems easy enough – just wire bundles of flowers/foliage around a stretch of rope or twine, making a loop with the twine on either end to hang it easily.  Work from one end to the middle, and then the other end to the middle. These are good for wrapping around pillars or poles, hanging swags on a table, or framing a window or door.

small garland of purple limonium, seeded eucalyptus, and bupleurum made by Jenny in class

And then there’s the table garland – essentially a wreath formed out of Oasis that you poke your plant materials into. Start with a basing of greens – in this case we used Ruscus, Myrtle, Galax and Seeded Eucalyptus.  Place them inside and out of the ring at varying angles.

my table garland/wreath in action - dinner courtesy of Dad and Julie with the wonderful company of Meg

Then add your main flowers – in this case spray roses and carnations.  Group them evenly throughout.  I used the seeded Eucalyptus as a filler flower really, but Limonium or I hate to say it Gypsophila also work well as a filler.  All of these items except the carnations (these were left over from another class) will dry pretty well and therefore this table garland borders on everlasting.

my first table garland/wreath - put a candle in the center and call it a day

All of these garlands are quite labor intensive and therefore should be done the day before an event.  That goes for head garlands too. In fact, I had just enough time in class to squeeze out a quickie for my niece June.

Niece June modeling the head garland I made

This was super fun to make and not too hard at all.  I measured out a piece of honeysuckle wire (just a wire with a brown wrapping, also comes in green,) making one end into a loop.  Then I made small bunches of daisy mums, Bupleurum, and Gypsophila or Baby’s Breath in my hand, which I then wired onto the main wire using bind wire.  Many mini bundles later the garland was filled, and I added some white ribbon on.

Head garland of Bupleurum, daisy mums and gypsophila on June

I really, really liked making the head garland.  I love the idea of wearable flowers – this might be a niche for me.  And when you put them on you feel like a total princess! (Or Greek goddess!)

Despite it's small size, I couldn't resist putting on the garland myself. photo courtesy of Juliet