fall table design

I’m back at Longwood, taking floral design electives until some of the meatier courses resume in October.  Everything is happening in October.  Well, and November too.

Anyway, it was so nice to be back in Jane Godshalk’s classroom, where everything is right with the world.  Jane is a phenomenal teacher, and I can’t say enough lovely things about her without seeming like a gushing fool…but really.  Jane does it right.  Her ability to select materials that create foolproof combinations is spot on, and her directions are easy to follow and inspiring.  It’s not just “boom, put it in the container, you’re done.” There is a thoughtfulness and precision to floral design; and if your materials become unwieldy, Jane will help you tame them with such a grace, you almost want to simply watch her do all the floral design. But, it is too fun not to play yourself, especially with all the Fall Bounty in front of us!

Wire each leaf onto two wires which will become a garland that you drape throughout the design

For this class, we’re creating a natural table design in a woven basket with a plastic liner.  One of the main ingredients is a garland made of preserved oak leaves that we wire together ourselves while Jane shows us the rest.  It’s busy work you can do while you’re watching TV, and it gets my creative juices flowing, thinking about all the cool autumn possibilities (can you say: Thanksgiving table-scaping?!) We have our choice with the mechanics – either use floral foam (no thanks) or balled up chicken wire in which the stems will rest. While the floral foam is easier to work with – you just stick your stem in and you’re done – the chicken wire is re-usable.  It’s worth the extra effort in my opinion. Just be sure to fill it up with water!

Jane begins by adding greens – I have to apologize for my bad camerawork during this class, I was too mesmerized by all the floral treasures.

Jane starts by adding greens, making a nice, natural base, using Italian ruscus, olive and even some fragrant bay leaf if you like.  (Note to self: I love bay.  Maybe this is something I could use for the NAOC award head garlands.  More on this later!!)  She then adds the bigger flowers like hydrangeas.  Some of our hydrangeas are so huge, we can divide them and have more.  Hydrangeas are a really important flower in floral design, I’m learning, because not only do they come in such great colors (and change color as well,) they help take up some real estate while actually adding a certain lightness to your design.  They really help tie everything together, especially this variety in the light green color with some muted rose to the edges of it, it’s just delicious.

She adds ‘Coffee Break’ Roses, ‘Red Rover’ mums, and then it’s time for the sunflowers.  Sunflowers are hard to work with – they are just so singular, they pop out so much, that they really need to be placed just perfectly.  If you put them side by side, and they have the dark centers, they look like eyes staring out of your design.  Not good.  So play with the way you angle them, group them together but have the heads pointing slightly different directions…or just watch Jane and learn from the master.  We also have millet, amaranth, broom corn, bittersweet, and asclepias to play with!  Our designs are overflowing with possibility, and the colors are so autumnal.

Hey! Isn’t that Kate Sparks from Lilies and Lavender?? Yes it is…and she’s a natural at this…

Patti’s design incorporates bittersweet vine beautifully

A newcomer to the floral design world leaves with a smile on her face

I was a little out of practice, I’ll admit! It took me a little while to get going.  I ended up giving this natural fall table design to my brother and sister-in-law for a party they were hosting, so it went to good use.  However I neglected to get pictures with my ‘good camera.’

My fall table design

My fall table design at home

It’s so great to be back in class!

spread the love

I’m referring to Jennie Love, of course! She’s the Eco-Queen of cut flowers, and the owner of Love ‘n Fresh Flowers – “a petite, sustainably managed, urban flower farm and full service event floral design studio in Philadelphia dedicated to creating fresh textural arrangements exclusively with locally grown flowers.” She is really doing it right, growing everything herself and utilizing those organically grown materials to create stunning designs! Please read her page on “Why Local,” it explains why sourcing local floral materials is the right choice in this global trade, and she says it better than I could…

I’ve been dying to meet Jennie for some time. Here she finally is in her cute vintage apron! I’m holding the hand-tied bouquet I made in class.

Today, she is our teacher for a Floral Fun class at Longwood Gardens, where we’ll be creating a hand-tied bouquet; and she should feel right at home here because Jennie got her training in both growing and floral design at Longwood.

hand tied bouquets from spring months – Jennie Love’s designs – photo courtesy of Love ‘n Fresh Flowers

Jennie Love spring design, photo courtesy of Love ‘n Fresh Flowers

Why create a hand-tied bouquet? They are very fast to make, they eliminate the need for carcinogenic floral foam, and they’re lovely in their loose, organic, country garden feel. They make a great simple gift, too, and it’s easy to create one out of the flowers right from your own garden, especially when you have great plants to work with and a teacher like Jennie to show you how.

Marigold ‘Jedi Orange’ gets very tall

Jennie has brought freshly harvested materials from her farm, and as you can see, these flowers are vibrating with health and beauty. She has two acres in the Roxborough section of Philly, where everything is grown organically – no chemical ever touches her sweet blooms. “But watch out for bugs and spiders,” she warns.

Jennie’s buckets of goodness

Here’s our plant list for the class – it’s also a good guide for easy to grow cut flowers. Jennie uses Renee’s Garden seeds and Johnny’s Selected Seeds in her garden. (And then I bet she saves seeds – I didn’t ask, but she just seems like a seedsaver to me!)

  • Hydrangea ‘Little Lamb’ a Pee Gee Hydrangea to be cut within the first year
  • Zinnia ‘Benary Series’ – easy to direct sow
  • Marigold ‘Jedi Orange’ – good variety for cutting, get very tall (6′!!)
  • Celosia or Cockscomb- small light purple variety…can’t remember name
  • Foxtail Grass or Setaria – grows by roadside, don’t be shy to collect it yourself, it will lend great drama to your bouquet
  • Baptisia – perennial shrub – great texture, blue-green foliage can add tendril effect, this time of year nice pods too
  • Caryopteris ‘Longwood Blue’ – perennial shrub – how appropriate, and gorgeous
  • Queen Anne’s Lace, Ammi majus ‘Green Mist’
  • Dill ‘Bouquet’ – grows extra big flower heads – I love this!
  • Gomphrena ‘Audray Series’ – cute cute cute little strawberry heads “like twinkling stars” within the framework of a bouquet
  • Bronze fennel
  • False sunflower, Heliopsis helianthoides

Snow-on-the-Mountain, or Euphorbia marginata, emits a milky sap that when cut can cause dermatitis. We are given gloves in case we want to work with this – so gorgeous!

We begin by stripping the leaves and side stems off of all our materials, and making neat, organized piles of each material. To start the hand-tied bouquet, Jennie recommends taking foliage/flower that will create the inner column – in this case we use hydrangea. The first set of stems is to be kept straight, but as you add to your hand-tied, you should be constantly turning the whole bouquet and then adding your sets of stems at an angle, and it will eventually look like a spiral of stems, beautiful. We hold the stems in a relaxed manner in our non-dominant hands, pinching the index or middle finger and thumb together loosely to keep our angles intact.

As you build your hand-tied bouquet, keep turning and adding stems at an angle. As you build bigger, the angles will get more dramatic!

After the first set of stems, add sets of stems to develop texture and contrast. A zinnia or two here, some filler flower or foliage there. Do a 1/4 turn after each set of stems to create fullness and a balanced design. Here, Jennie apologizes for sounding like a hippy, as she advises us to really just “let the flowers speak to you.” You can add things to the center by dropping them down into the bouquet if you feel it needs more of something. “Don’t be afraid to get wild,” she imparts, adding her foxtail grass which erupts in green flame from the bouquet, which is growing ever larger, fuller, and more beautiful by the minute. Yes, she makes it look easy. That’s because hand-tieds are the bulk of what she does. She does many, many weddings (I think she said she’s already done 72 in this year alone?!) and these bouquets are central to her work. She’s developed the hand strength to whip right through them, and her eye guides the design as she goes.

Hand tied bouquets look good in round mouthed containers. No square vases please.

Then, when you’re all done, take the rubber band you have cleverly put around your wrist and work it around your stems. Cut stems evenly and at the height you want – measure against your container before you cut, and leave a bit longer so you can always cut more. Once inside the container, you can fuss and let things breathe a bit. So, how did we do?

Julie’s design is gorgeous and sits upright on it’s own after completion! Balance is perfection!

Kevin had no problem with his design, great job!

The next morning, I find a container for mine and a little patch of morning light to set it in.

My hand tied bouquet loosened up in a metal pitcher. Zinnia, baptisia foliage and pod, dill, foxtail grass, gomphrena, celosia, hydrangea, caroypteris, fennel, queen anne’s lace…

Thanks, Jennie Love. I really enjoyed meeting you! And I feel really good about this Philly-grown bouquet – no packaging, no shipping, no floral foam – spread the love!

hydrangea blues

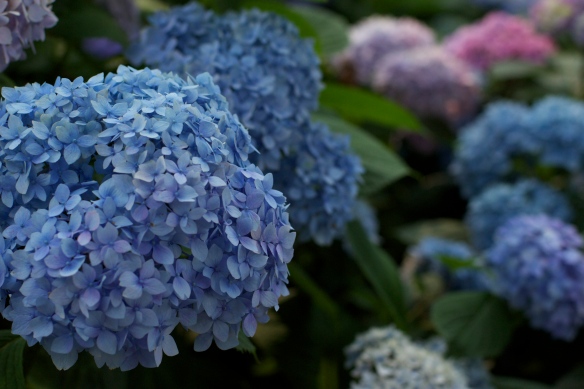
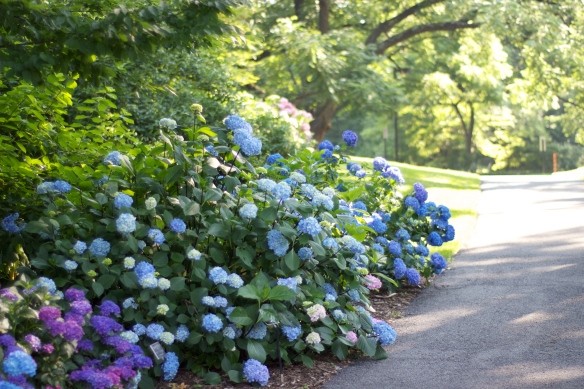
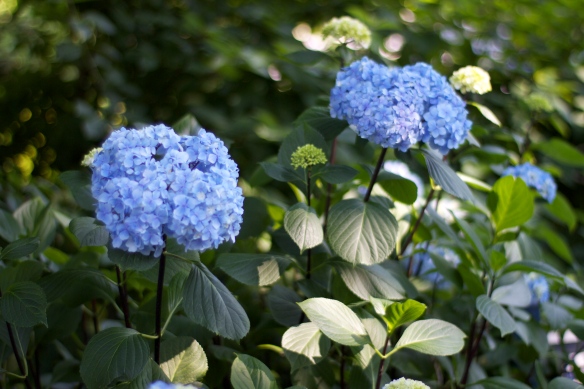
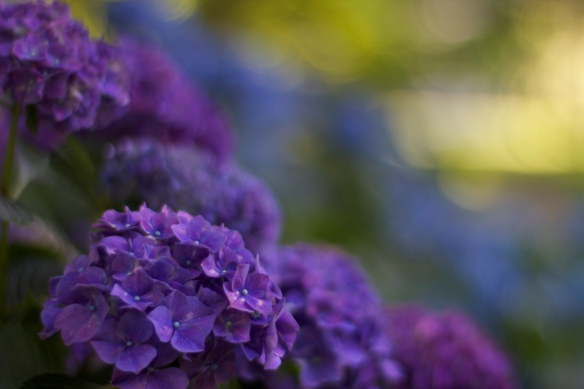
My small world has been vibrating with blue lately…the blue of the hydrangea.   In the little town of Swarthmore, the sky-colored puffs are so prolific they must be predicting the end of the world with their abundance of blossom.  We’re surely going out in style!

Hydrangea macrophylla ‘Penny Mac’ – flowers on both old and new growth

A stroll through the Hydrangea Collection at the Scott Arboretum will leave you reeling in disbelief at nature’s ability to create shades so cerulean.  Actually, their color can vary depending on the soil’s acidity…alkaline soil (pH>7) produces pink flowers, while acidic soil (pH<7) produces blue flowers.  We must be having quite an acidic year.

H. macrophylla ‘Nigra’ has lovely dark stems

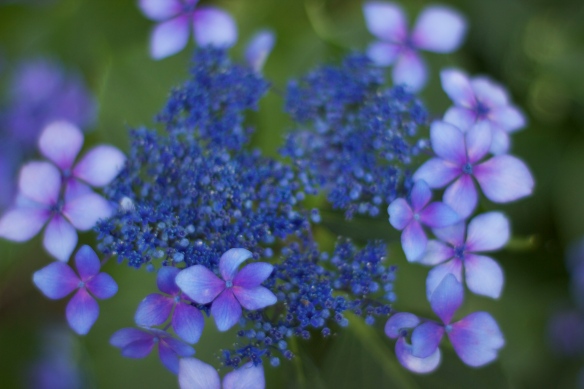
H. macrophylla, one of the most common species of Hydrangea, can have two different forms of flowers – either hortensia, the mophead, ball-shaped form; or lace-cap which is flat topped.

‘Claudia’ has a lace-cap form.

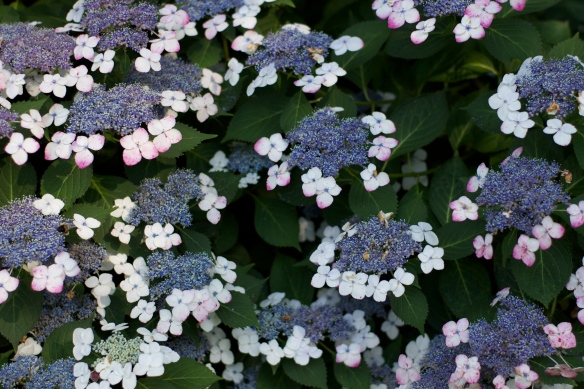
H. serrata – Another lace-cap form: the smaller darker flowers in the center are fertile, while the outer more showy flowers (actually sepals) are infertile.  The bees know the difference.

Most hydrangeas like dappled shade and well drained loamy soil.  Hydrangea macrophylla blooms from late June through August, and prefers part shade and moist soil.    It flowers on the previous season’s growth and should be pruned immediately after flowers have faded in late summer or early fall.  (Unlike H. arborescens and H. paniculata – prune those in late winter or early spring, they flower on the current year’s growth.)  Here’s more on pruning, from Fine Gardening.

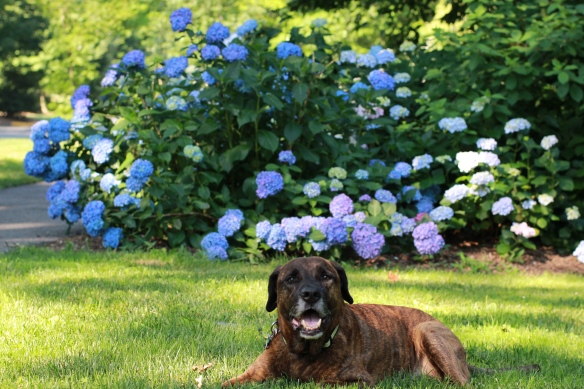
Larry enjoys a moment of relaxation

‘Glowing Embers’ also called ‘Alpengluhen’

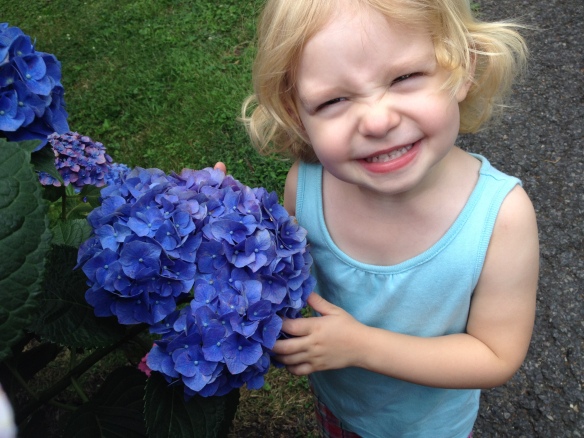
These blooms are as big as my niece June’s head!

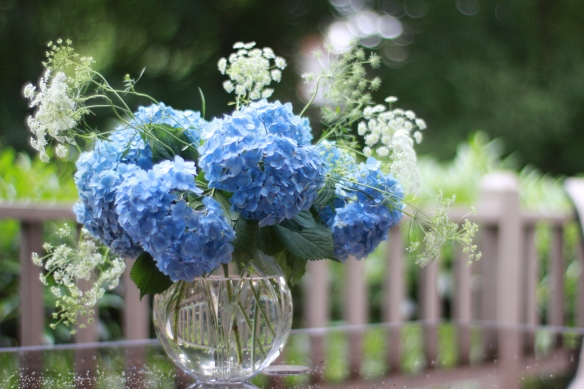
Finally, hydrangeas make wonderful cut flowers.  They can last for weeks if their stems are re-cut and the water is changed frequently.  For my birthday, I created this simple arrangement using Hugh and Juliet’s blue macrophylla hydrangea (thanks guys!) and some of the Ammi majus from my garden.

flowers by valerie

Last week I had the pleasure of helping a friend out with her Prom Flower orders.  Since I’ve never really done bouquets and boutonnieres in the traditional sense I wanted to see how they’re created firsthand, and so Valerie let me observe (and play a little) in exchange for some pictures of her designs, which we hope someday grace her glorious website.

Valerie McLaughlin, in her floral studio

Valerie McLaughlin is a freelance floral designer working out of her home in Wallingford, PA, where she lives with her five sons and husband.  The flower business suits her, adding a bit of femininity to an otherwise masculine household.  Even Rudy the dog is a boy.  Her home is a friendly, warm place, where neighbors and friends constantly stop by, and everyone knows each other.  And when it comes to pricing, there really is no such thing as a ‘stranger rate’ with her.

Bouquet with bling and matching boutonniere

Valerie creates custom arrangements within a budget.  Sometimes the only direction given is the color of the dress the bouquet is to match, and that can be a challenge.  Her designs reflect her own joy and passion for living.

A successful pairing, don’t you think? – photo courtesy of Jackie Massey Cormican

Gerber Bouquet with Bling

Matching cute boutonniere

One of my favorites, love the ribbon color (it’s the Martha in me)

When the kids start stopping by to pick up their flowers for the big night, that’s when Valerie really shines, instructing them on floral details and cautioning them to have a good time but to ‘be careful.’

Boys get special instruction on how to present flowers to their dates.

Valerie is also preparing for her AIFD test this summer in Miami.  The American Institute of Floral Designers is a “non-profit organization dedicated to promoting the art of floral design as a professional career,” and once you’re a member, you belong to an elite group of talented people who are devoted to the industry (membership also costs a pretty penny.) Lucky for Valerie, she knows AIFD members like Jane Godshalk and Tim Farrell, of Farrell’s Florist, who are willing to judge her test designs and coach her for the big day.  I wish her all the best of luck this July as she heads to Miami to spend 4 hours creating 5 designs. You can do it, Val!

revel – my first paid floral gig!

I got hired to help out for a few days down in Atlantic City, NJ for a big job – a 1000 person benefit at the new casino, Revel, through Nancy Saam Flowers.  (My teacher and friend Jane does a lot of freelance work for Nancy, and gave my name to her a while back.)

Will I survive this flower job?

Encompassing 6.3 million square feet and standing 47 stories tall, Revel is a $2.4 billion lifestyle resort on the Boardwalk in Atlantic City.

It’s an incredible building, and because everything is brand new, it literally sparkles inside and out.  In some areas, it’s lush and dark in a 70s kind of way, in others, it’s bright and modern and clean.

And good luck finding your way around!  I think I must have walked 10 miles in the course of the 3 days I was there.  Beyoncé will be singing there for the casino’s premiere opening at the end of May, and tickets to see her in Ovation Hall (where our benefit was held) are $700.  I’m not even kidding.

Marlene and I – she’s one of the top designers

The scope of this project was enormous:  under the guidance of Nancy Saam, our fearless leader, I worked with a dozen or so other designers to create 73 woodland “tablescapes” for long tables, and almost 50 six foot ‘trees’ with mini gardens on their bases for round tables.  All the plant material for these designs had to be hauled up the freight elevator and processed upon arrival.

Debbie, one of the most amazing workers EVER, with a load of viburnum on the freight elevator

Flowering crabapple gets put into buckets of water right away

Dawn processes flowers like no one else!

First we started on the long tables.  All 73 tables would take a few days to complete.

Jane shows us the tablescape design

We covered the table runners with many non-floral elements to create structure, depth, texture, and pattern:  long pieces of grape wood, loads of sheet and mood moss, spheres of many types, succulents, votives, gold artichokes and pods, and skeleton leaves.  Within these items, we also laid out pre-soaked floral foam blocks in various sized liners and covered those with moss and galax leaf. The floral foam would then be filled with a variety of cut flowers and woodland treasures closer to the event.

With the tablescape structures mainly in place, we called it a day.  One of the challenges of this job was working on a floor that needed to remain pristine.  We put down drop cloths wherever we went and there was a lot of sweeping and mopping!

Valeri and Jane do some sweeping up – Valeri’s smiles never stopped.

The next day was all about making the trees – and they were quite a construction project! For the bases, burlap was cut to fit over sleek Xmas tree stands. Long birch trunks were then placed into the stands.

We divided up into 2-person teams to duct-tape wired cages containing pre-soaked floral foam to the tops of these trunks, making them look a little like stoplights in a forest.

Jane and Mary Jo attach floral foam cages

Marlene never stops moving so she’s hard to capture. Here she’s showing me how to start my tree.

After placing a bit of lemon leaf to hide the lower mechanics, we then began designing tree top after tree top using flowering crabapple branches.   Here’s what I did over and over again: select branch, cut to length, prune off small branches by the end, and place them in the foam. It’s fun!

Del creates a tree for the woodland tables – nice bling Del!

Valerie is lost amongst the branches, smiling

Eventually, the trees start taking shape, filling out like elven lollipops.

Pat kicks butt making trees! (my tree in foreground…i got attached to all of mine.)

As we were completing the branch structures of the trees, other designers under the guidance of Armas, a designer from moda botanica in Philly, began creating the little woodland gardens at their bases.  I got to pitch in at the end, too, tucking many lovely plant treasures into wedges of foam then obscured by moss.

Fern, fiddlehead, hellebore, orchid, hydrangea, veronica, chocolate cosmos, succulents, and much more

Diane creates a magical fairyland base garden

Have I mentioned how much I love these materials and designs???

The next day, we filled in any holes on the trees, completed more woodland bases, and added more magical touches, like hanging votives filled with reindeer moss.

Trees were constantly misted to stay fresh

Then it was back to the tables, to finish the tablescapes on the tables that had been brought out to Ovation Hall.  We filled in the floral foam sections with a host of delicious plant materials such as fern, long purple fiddleheads, antique hydrangea, bunny tail, euphorbia, hellebore, white astilbe, white scabiosa, and white ranunculus.  The end result was a tablescape that any woodland nymph would be proud to lounge about on!

canopies filled with candles will be added to the tops of the ‘cages’ on the tables

Meanwhile, Jane Godshalk spent her day designing with tropicals for the cocktail area.

Greens, foxtail lily, protea, orchids and hairy cybotium fern – pow!

Designers also created 18 tall glass vases of viburnum and branches for round tables.

a long cool drink of spring beauty

Armas created many of the cocktail arrangements, which were whimsical and woodsy at the same time.

Since Jane and a lot of other very talented designers were there, I was surrounded by expertise, and although we were working hard, I also got to ask questions and learn as much as I could.  It was exhausting and exhilarating.  I didn’t get to see the final end result of our work, but today I received some pics of the event…WOW! Great job everyone!

Final long table with canopy lit up, photo courtesy of Alix Jacobs

photo courtesy of Alix Jacobs

Here’s hoping there are many more successful events like this one in my floral future!

P.S.  Most of these pics were taken after I was done for the day or on a lunch break.

unbridled bouquets – a longwood elective course

“Go beyond traditional bridal bouquets and expand your repertoire to the cutting edge,” promises the Longwood Continuing Education Course Catalog when describing Unbridled Bouquets.  Today’s class is another taught by Jane Godshalk  (and I realize it may seem like I’m stalking her, but she just happens to be a great teacher and one of the main floral instructors at Longwood, okay?)  All materials including containers are covered in the fee for this class, but we were told to bring wire cutters, a stapler, and a box to bring our stuff home in.

Students including Delphine from Belgium prep carnations for bouquet making. I'm thinking, 'carnations, boring,' but wait til you see what we made!!

There are design basics to cover in any bouquet, but since I’ve never created any type of bouquet other than hand-tied ones at the shop, I’m a clean slate for learning.  First, consider what type of style you’d like:  Decorative, Vegetative, or Form and Line.  Your typical bridal bouquet of tightly packed white roses would be considered Decorative, it’s controlled and uses a mass of materials. Something that’s more naturalistic, with a variety of material and height is Vegetative.  And then Form and Line will use less material, have strong lines, and be more dramatic.  Most of the bouquets I like seem to be a combination of styles, but I do tend to favor the vegetative look – something fresh from the garden.  At least that’s what I thought at the beginning of the class!

Decorative/Vegetative bouquet I could just die for by lovenfreshflowers.com, photo by wrenandfield.com, Aug 2011 cover of Philly's Grid magazine - gridphilly.com

Think about where this bouquet is going to live:  is it a bridal bouquet? Not today, people.  We’re going where no bouquets have gone before, because we’re unbridled.  These bouquets are for the home;  these you can bring to a wedding shower, dinner party, or birthday bash that the hostess can then just plop into their own container.  Good idea, no?

Bouquet elements to consider:

  • Balance:  Symmetrical or Asymmetrical
  • Binding Point:  it’s either high, medium, or low.
  • Stem Placement: stem can be arranged in a Radial/Spiral pattern, in a Parallel fashion, or in an Alternate pattern.
  • Flower Level: flowers are all on the same plane, or they are varied from a little to a lot.
  • Open or closed: flowers form a ring that’s open in the center, or entire bouquet is full. At least I think that’s what it means.

We each have a bunch of 20 carnations, which we’ve mostly removed the foliage from.  Next, Jane shows us how to pierce the calyxes of each flower with wire that will connect them all together. We trade a few stems with each other here and there  to get some alternate colors. (Thanks Trish!)

Piercing the carnation calyxes with copper wire

Delphine and Pat pulling their wired carnations together in hand

As we gather the wired bunches into our hands, we decide where the binding point will land.  With these long stems, I’m thinking medium to high binding point.  I am going radial, all the way, because I want my carnations to go in a spiral of varying heights; and then I’ll tuck stems of Dianthus ‘Green Trick’ and some pink rice flower within that spiral.   But other students have done many other things with theirs.  The carnations, being wired, can pretty much hold their shape exactly where you want them – imagine trying to do this with free-standing stems, how would you do it without totally losing your mind?  And carnations are one of the few flowers with a big enough calyx to pierce without destroying the whole thing.

The ever-delightful Afeefa and her more open bouquet using birch branches, tied with raffia, high binding point

Then we can choose to add a little plumosus (Asparagus fern) or bear grass depending on whether we’re feeling lacy or more formal. We also have some hypericum berry we can string through if we like.  Then we’ll twist the bunch with some chenille wire, adding whatever ribbon adornment we prefer.

Megan, who wants to go into event design, added bear grass threaded with purple bling to her bouquet

My carnation bouquet, thanks to Pat for taking the pic

Spiraling IN control - my bouquet at home

detail of my bouquet at home: Hypericum strung with copper wire separates carnation from Dianthus 'Green Trick'. A whole unnatural little world made of natural elements. Neat.

Next up, we create a bouquet that starts with a handful of Equisetum, cut to mostly the same length, and held together with a rubber band (which will eventually get covered up by something prettier.)  The stems will be arranged in a Parallel pattern, so choose stems that are straight!  Hey, did you know Equisetum is basically a living fossil? Missouri Botanical Garden says:  “Equisetum is the single surviving genus of a class of primitive vascular plants that dates back to the mid-Devonian period (350 + million years ago).” It’s not a rush, or a fern, it’s in a class of it’s own, literally.  Cool!

Equisetum bunched together will be the structure that holds the stems together for this lil bouquet

Then, simply pop stems inside the Equisetum structure and BAM! instant modern bouquet.

My bouquet with equisetum base (wrapped with copper wire)

My parallel bouquet from above: bear grass loops out of lisianthus, green eyed rose, ranunculus, freesia, and white allium

Here’s the next little cutie we did.  In this ‘bouquet’ we threaded wire through carnations again, this time to achieve stems with an Alternating pattern.  I’m sorry I didn’t get pics of what’s underneath, but I actually ended up doing most of this during lunch, since we were really packing the learning in.

My Alternate-stemmed bouquet, now on my bedside stand. Love the little green vase.

After a lunch break, we came back to find a lot of lovely colors to choose from, along with some big birch branches. Get in line for your materials and don’t be shy now!

Trish looks like a kid in a candy store!

Then we created some bouquets using Birch branches as a structure.  Those of us that were doing the more Vegetative design started by created a base structure out of wire covered in brown floral tape.   Wrap two 18 gauge flat wires to form a circle, and then attach four more wires to the circle, which then meet in the center under the hoop to form a sort of holder.  From there, add birch branches, even binding them to the wire form to get the branches to got out horizontally.

Jane shows us the birch and wire structure technique. I'm taking notes so I didn't get too many pics of this. And the drawings in my notes are incomprehensible.

For the more modern Birch bouquet, we created a structure using “Sickles” – which are bundles of birch wrapped with wire to form little crescent shapes, or sickles.   This is a technique that Jane learned from designer Gregor Lersh…who has some upcoming workshops in Germany, if you’re interested. You can make sickles out of anything that would look good bunched together – straw, bear grass, pine needles, etc.

Jane shows how to create little sickles out of birch, then shapes them into a bouquet structure, attaching them together with wire. Wire is also added to form a holder of sorts.

For both of the branch structures, greens and then flowers are simply added within the form.  My hand got way tired holding all my materials in place while I created my Vegetative bouquet. Guess I’ve got to do some hand strengthening exercises!

Here, Jane adds materials to the sickle form

My completed birch bouquet in container. Very rustic.

So you see you probably could not achieve the same effect with the branches if you had just placed them into the container without foam.   The wire structure made it easy to just poke stuff in, and then you hold it in place with your hand.  At the end, it’s very important to finish it off with greens in order to cover the wire mechanic.  Then, wire with chenille wire to wrap it all together at the end.

Jane shows us another bouquet that utilizes straws - very colorful! Great for a baby shower??

Did you think we were done yet? No, this is Unbridled Bouquets, we still have one more bouquet to make! We were at a breakneck speed at this point, and the creative juices were flowing.  Jane showed us how to staple straws onto a wire, then create a structure like the birch branch one for this fun bouquet.  Then poke your materials in, with hydrangea using up a lot of real estate it’s a quick one!

Stephanie's straw bouquet...cool!

Isn't the Anthurium lovely in this student's creation?

I, unfortunately, had a terrible stapler (was it made for Barbie?) whose staples were ill-fitting, so I didn’t create the straw hedgehog.  Instead I wired bits of light green straw onto copper wire, which I then attached to a wire bouquet structure.  I then added a bunch of Apidistra leaf (folded and stapled,) Hydrangea, Anthurium, and Dianthus ‘Green Trick’ for a little Tim-Burton-meets-Martha-Stewart action.

I'm calling this my "East Hampton" bouquet.

At home.

After a day of making bouquets (five in total!) our cheeks are flushed with productivity and pride; and maybe, just maybe, we feel a little on the unbridled side.   We have boxes full of beauty to take home!

Stephanie on her way home. Hope to see you soon!