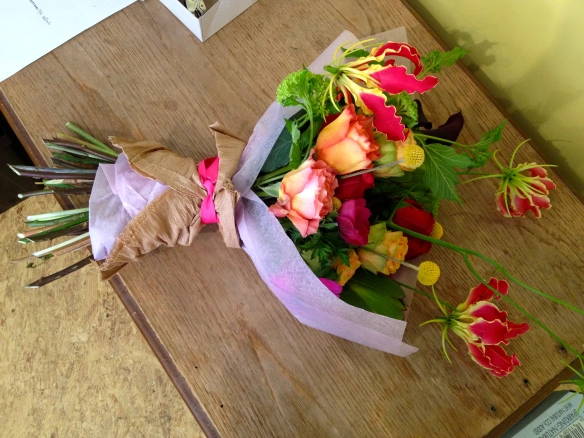
eco-friendly

I try to employ eco-friendly practices when creating floral designs.  But what does that mean?  You might think that the very act of arranging flowers would be considered “green,” or eco-friendly.  But there are many elements of the floral industry to consider if you want to feel good about creating beauty with the treasures of nature you’re bringing into your home.

Today, we have an abundance of choice at our fingertips.  From the tiniest of flowers like lily of the valley and delicate white stephanotis, to dinner plate-sized dahlias the color of sunsets, and huge garden roses that resemble peonies, the diversity and array in the floral kingdom are literally endless.  Exotics and tropical flowers and foliage are readily available. We can get orchids, carnations, mums and lilies anytime of the year.   The choices are downright dizzying.

The floral choices at our fingertips are endless

You might pick up a store bought bouquet and have no idea where your flowers came from:  in fact, 60% of the flowers sold in the U.S were actually grown outside of the U.S.  Transporting flowers from Holland or Ecuador requires not only the jet fuel to travel, but also a great deal of packaging to protect your glorious buds and blooms.

60% of the flowers sold in the U.S were actually grown outside of the U.S

On top of that, these flowers may have been grown in a country where regulations on the use of various pesticides are looser than ours in the U.S.; where workers are exposed to harmful chemicals, as are the many people who handle the flowers as they make their long journey from grower to auction house to wholesaler to retailer to you.  Additionally, the flowers themselves may be out of season, difficult to grow, and require energy-draining practices to force them into bloom.

Don’t be dismayed, because they are many ways to avoid these imported, chemical-saturated blooms, and practice eco-friendly floral design.  First, consider what’s in your yard or garden.  If there’s not much there, and you have the space, start your own cutting garden. Seeds are cheap!  Companies like Seedsavers in Decorah, Iowa, offer organic, non-GMO heirloom varieties of a great number of flowers great for home arranging.  There are many seed companies with excellent cut flower choices for the home grower.  This year I started a cutting garden and I plan to grow even more this year!

Grow your own flowers from seed using companies like Seedsavers Exchange
Simple design I created using hydrangea from yard and Queen Anne’s lace grown from seed

If you must purchase cut flowers, try to source them from local growers who practice sustainable growing methods.  If you’re in the Philly area, check out Love n Fresh Flowers, run by Jennie Love Also check out Kate Sparks of Lilies and Lavender. Local florists like falls flowers run green businesses, where they source as many locally grown flowers as possible, and recycle just about every scrap of anything used in the store.  These are just a few of my eco heroes.

Country bouquet I designed using flowers grown by Jennie Love, in NW Philly

If you buy cut flowers from your local grocery store, inquire as to their origin, and seek out stores who sell sustainably grown cut flowers such as Whole Foods and Trader Joe’s.  Additionally, try to buy cut flowers that are in season.

Whole Foods sells locally grown seasonal blooms

When arranging flowers, I try to avoid using floral foam – it’s not biodegradable and contains formaldehyde which can cause health issues over time.  Instead, use fresh clean water and sustainable floral mechanics like branches to hold up your stems.

Use branches to hold stems upright instead of floral foam – design I created at Longwood under the guidance of instructor Jane Godshalk (branches used in this fashion was her idea)
Bunch up curly willow and put it into your container, then add floral stems

Other ‘green’ mechanics that can support floral materials include the use of sand, or fashioning a grid made from tape that’s affixed to the top of your container.  I had fun cutting up lemons and using them in the design below – they not only provide a place for stems but also acts as a decorative element when viewed through glass containers.

Use colorful fruits to hold stems upright

There are many other floral design techniques which can be considered eco-friendly – such as using less material, a principle that is found throughout many schools of Ikebana.  For example, it’s easy to create unique arrangements by grouping smaller vases together and only using one or two stems in each.  Or, it can make quite a powerful design statement to see one or two bold sunflower stems in a clean glass vase.

glass test tubes filled with spring stems
Peicha of falls flowers uses many small containers in this unique centerpiece design
Green Tip: use many small bottles with one bloom each for impact

And finally, when your flowers have faded, be sure to compost them!

Design using spring shrub blooms

spread the love

I’m referring to Jennie Love, of course! She’s the Eco-Queen of cut flowers, and the owner of Love ‘n Fresh Flowers – “a petite, sustainably managed, urban flower farm and full service event floral design studio in Philadelphia dedicated to creating fresh textural arrangements exclusively with locally grown flowers.” She is really doing it right, growing everything herself and utilizing those organically grown materials to create stunning designs! Please read her page on “Why Local,” it explains why sourcing local floral materials is the right choice in this global trade, and she says it better than I could…

I’ve been dying to meet Jennie for some time. Here she finally is in her cute vintage apron! I’m holding the hand-tied bouquet I made in class.

Today, she is our teacher for a Floral Fun class at Longwood Gardens, where we’ll be creating a hand-tied bouquet; and she should feel right at home here because Jennie got her training in both growing and floral design at Longwood.

hand tied bouquets from spring months – Jennie Love’s designs – photo courtesy of Love ‘n Fresh Flowers

Jennie Love spring design, photo courtesy of Love ‘n Fresh Flowers

Why create a hand-tied bouquet? They are very fast to make, they eliminate the need for carcinogenic floral foam, and they’re lovely in their loose, organic, country garden feel. They make a great simple gift, too, and it’s easy to create one out of the flowers right from your own garden, especially when you have great plants to work with and a teacher like Jennie to show you how.

Marigold ‘Jedi Orange’ gets very tall

Jennie has brought freshly harvested materials from her farm, and as you can see, these flowers are vibrating with health and beauty. She has two acres in the Roxborough section of Philly, where everything is grown organically – no chemical ever touches her sweet blooms. “But watch out for bugs and spiders,” she warns.

Jennie’s buckets of goodness

Here’s our plant list for the class – it’s also a good guide for easy to grow cut flowers. Jennie uses Renee’s Garden seeds and Johnny’s Selected Seeds in her garden. (And then I bet she saves seeds – I didn’t ask, but she just seems like a seedsaver to me!)

  • Hydrangea ‘Little Lamb’ a Pee Gee Hydrangea to be cut within the first year
  • Zinnia ‘Benary Series’ – easy to direct sow
  • Marigold ‘Jedi Orange’ – good variety for cutting, get very tall (6′!!)
  • Celosia or Cockscomb- small light purple variety…can’t remember name
  • Foxtail Grass or Setaria – grows by roadside, don’t be shy to collect it yourself, it will lend great drama to your bouquet
  • Baptisia – perennial shrub – great texture, blue-green foliage can add tendril effect, this time of year nice pods too
  • Caryopteris ‘Longwood Blue’ – perennial shrub – how appropriate, and gorgeous
  • Queen Anne’s Lace, Ammi majus ‘Green Mist’
  • Dill ‘Bouquet’ – grows extra big flower heads – I love this!
  • Gomphrena ‘Audray Series’ – cute cute cute little strawberry heads “like twinkling stars” within the framework of a bouquet
  • Bronze fennel
  • False sunflower, Heliopsis helianthoides

Snow-on-the-Mountain, or Euphorbia marginata, emits a milky sap that when cut can cause dermatitis. We are given gloves in case we want to work with this – so gorgeous!

We begin by stripping the leaves and side stems off of all our materials, and making neat, organized piles of each material. To start the hand-tied bouquet, Jennie recommends taking foliage/flower that will create the inner column – in this case we use hydrangea. The first set of stems is to be kept straight, but as you add to your hand-tied, you should be constantly turning the whole bouquet and then adding your sets of stems at an angle, and it will eventually look like a spiral of stems, beautiful. We hold the stems in a relaxed manner in our non-dominant hands, pinching the index or middle finger and thumb together loosely to keep our angles intact.

As you build your hand-tied bouquet, keep turning and adding stems at an angle. As you build bigger, the angles will get more dramatic!

After the first set of stems, add sets of stems to develop texture and contrast. A zinnia or two here, some filler flower or foliage there. Do a 1/4 turn after each set of stems to create fullness and a balanced design. Here, Jennie apologizes for sounding like a hippy, as she advises us to really just “let the flowers speak to you.” You can add things to the center by dropping them down into the bouquet if you feel it needs more of something. “Don’t be afraid to get wild,” she imparts, adding her foxtail grass which erupts in green flame from the bouquet, which is growing ever larger, fuller, and more beautiful by the minute. Yes, she makes it look easy. That’s because hand-tieds are the bulk of what she does. She does many, many weddings (I think she said she’s already done 72 in this year alone?!) and these bouquets are central to her work. She’s developed the hand strength to whip right through them, and her eye guides the design as she goes.

Hand tied bouquets look good in round mouthed containers. No square vases please.

Then, when you’re all done, take the rubber band you have cleverly put around your wrist and work it around your stems. Cut stems evenly and at the height you want – measure against your container before you cut, and leave a bit longer so you can always cut more. Once inside the container, you can fuss and let things breathe a bit. So, how did we do?

Julie’s design is gorgeous and sits upright on it’s own after completion! Balance is perfection!

Kevin had no problem with his design, great job!

The next morning, I find a container for mine and a little patch of morning light to set it in.

My hand tied bouquet loosened up in a metal pitcher. Zinnia, baptisia foliage and pod, dill, foxtail grass, gomphrena, celosia, hydrangea, caroypteris, fennel, queen anne’s lace…

Thanks, Jennie Love. I really enjoyed meeting you! And I feel really good about this Philly-grown bouquet – no packaging, no shipping, no floral foam – spread the love!

day two – basic floral design I at longwood

I was eager for class #2, possibly because I felt a little more confident after the previous weeks of floral experience at the shop, and because it seemed we’d only scratched the surface during class #1.  There’s so much to learn when you’re dealing with plants, and that’s part of the reason I like it.  I never want to run out of new things to learn.

We are encouraged to make a little sketch before we begin, this is mine.

While waiting for the rest of the class to show, a few students and the teacher were discussing the upcoming Longwood lecture on Sustainable Floral Design.  Someone wondered about the lecturer, Jane Clark, and because I had been researching this topic, and her, I piped up that she had once had a shop called Fleurish which was no longer in business.  Our teacher’s immediate reply was, “that’s because you can’t do sustainable flowers.  Is organic impossible? To be competitive, yes it is.”  She went on to say that if you’re bidding against a non-sustainable florists, their prices are always going to be lower.  Organic flowers cost much more. But..isn’t there a market (maybe small, yes) of people who want “green” flowers, who don’t want the flowers at their wedding flown in from Columbia, dripping with pesticide? This will be a big topic for me, I think, and I’m just starting to research how others approach it.

Locally grown arrangement created by Jennie Love, photo courtesy of lovenfreshflowers.com

Some just grow their own flowers and are done with it.  You have to admire that approach, and that’s why someday I want to meet Jennie Love, proprietor of Love ‘n Fresh Flowers.  She grows her own flowers in an urban location, which she sells through local stores and a Flower CSA, and also creates unique floral designs for events such as “eco-lovely weddings.” She’s doing a Floral Fun class at Longwood in the summer I hope to attend.

Arrangement in shape of Hogarth's Curve of Beauty

Ok, back to class.  We discussed the Shape of floral arrangements.  They can be round, horizontal, crescent, vertical, oval, symmetrical and asymmetrical triangle, fan, Hogarth (curve of beauty,) or parallel systems.  Gosh, I hope I never have to make a Hogarth arrangement…too hard!  We talked about Balance, Proportion and Scale within the context of these shapes, and then moved on to the flower and foliage forms.

Lily is example of a Form Flower - distinctive shape - this has been blooming for 2 wks

For example, line Flowers are linear in shape, and create height in an arrangement.  Like Delphinium, Snapdragon, etc.  Form flowers have distinctive shapes which add interest to a design: like Gerbera, Amaryllis, Lily.  Mass flowers are solitary flowers with a single round head like Roses, Carnations.  Filler flowers – Baby’s breath, Waxflower, Queen Anne’s Lace.  And then the Renegade flower is one which may be used as more than one type or just doesn’t fit into any category, like Bird of Paradise.

Florida Ruscus is 'mass foliage' hiding the mechanics, baker fern is filler and adds a dainty edging

Similarly, foliage has its’ forms as well.  Linear like spiral eucalyptus, flax, or some grasses.  Form foliage has an interesting shape or texture, color or pattern, like papyrus, monstera leaves, caladium.  Mass foliage adds bulk and covers the mechanics of an arrangement, like pittosporum, huckleberry, camellia, leatherleaf.  Filler foliage is smaller in scale and sometimes wispy, like fern, boxwood, ivy.

After the greens, Jane adds stock flower - the "line flower" always goes first

For this class, we were to make a round arrangement, or a “Roundy Moundy” using line, form, and filler flowers in a Revere bowl.  Ours were not real silver, mind you.  Roundy Moundies are “the most useful” shape for arranging, says Jane.  Also, the “Golden Rule” of floral design is that your flowers are 2/3 of the design, and your container is 1/3.  We started off with Oasis, again (but this time, Jane admitted that you should use floral foam “sparingly,” as it’s not recyclable) making sure that the floral foam actually rose ABOVE the lip of the container a bit.  This gives you the ability to point stems at a downward angle to hang over the container, achieving a fullness and roundness.  Next, we created our base of greens.  Then we added our line flower or Stock in this case.  On top of the Ruscus and Fern, here’s what each of us had to work with:  6 Stock, 10 roses, 4 carnation, 3 Waxflower or Baby’s Breath, 3 Pussywillow for accent if wanted.

After form flowers (roses+carnations) and filler (waxflower,) Jane adds pussy willows for accent

And…GO! I went into a MAJOR trance while arranging this time – sorry Melissa if I seemed out of it while you were chatting me up.  I was in the zone.  Once again, everyone had such unique designs given that we all had the same material, and I’m just mesmerized by this expression.  Here are some of the lovely results:

line of roundy moundies

the "cupcake"

purple pride

afeefa's rocks again

melissa's! nice!

airy one by pat


my roundy moundy - i bunched flowers instead of spacing them perfectly

Oh, wait there’s one more.  Our classes are enlivened by Betty’s presence.  She is the class “loudmouth,” (her word,) and always has a funny comment to make.  During this class she had us all laughing by creating new “technical terms” like ‘big ol honking flower’ to refer to the Stock we were using.  She’s a hoot – and talking to her in the parking lot I found out she’s a landscape gardener who lives in DE.  I got an invite back to her place to talk Cutting Gardens!  Sometime soon, I’ll have to do that.

these arrangements look way different in daylight i noticed - VIVA BETTY !!