how to create a hand-wired bouquet

During Longwood’s Comprehensive Wedding Design class we made boutonnieres, corsages, and flower girl pomanders…but it was the bouquets, oh the bouquets, that were the best and most rewarding to create.  I’ve made my fair share of bouquets of course, but had never learned to do a hand-wired one.   The hand-wiring technique is the “gold standard” for creating a bridal bouquet, according to teacher Nancy Gingrich Shenk, an old pro in the wedding biz.  Hand wiring the stem of each flower allows you almost perfect control over stem placement and makes the bouquet lighter and easier to handle.  Creating a symmetrical and rounded bouquet is that much simpler using this technique.  I found myself enjoying this new skill and the resulting design very much!

the lovely juliet with hand wired bouquet

the lovely Juliet models my hand wired bouquet- isn’t she a gorgeous bride?

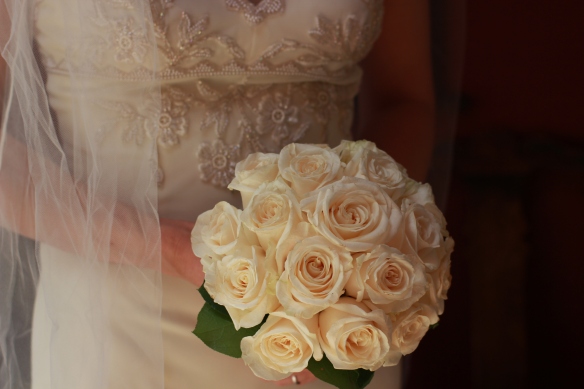
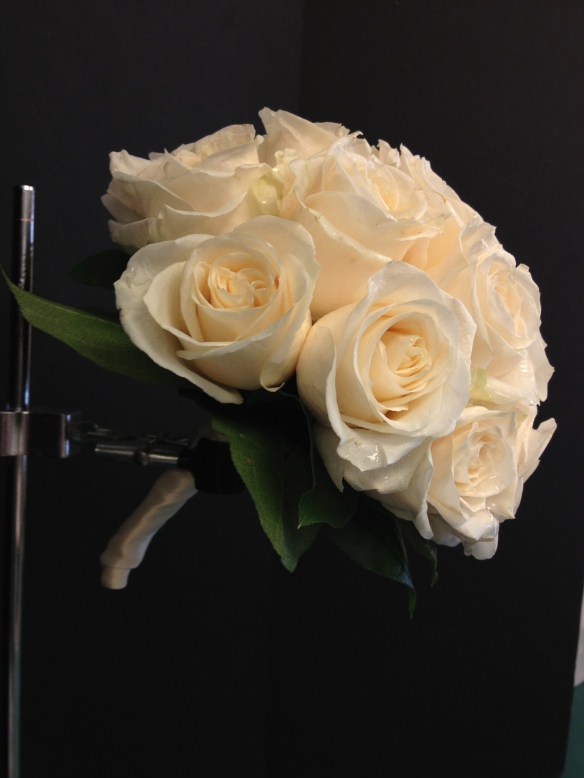
My 'gold standard' hand-wired bouquet with cream roses at the peak of their perfection

My ‘gold standard’ hand-wired bouquet with cream colored roses at the peak of their perfection

To create a hand-wired bouquet like the one above, start with the proper materials and tools, including wire, floral tape, about 20 roses, some lemon leaf or other foliage, ribbon and pins (for the handle,) pruners or snips, wire cutters and scissors.

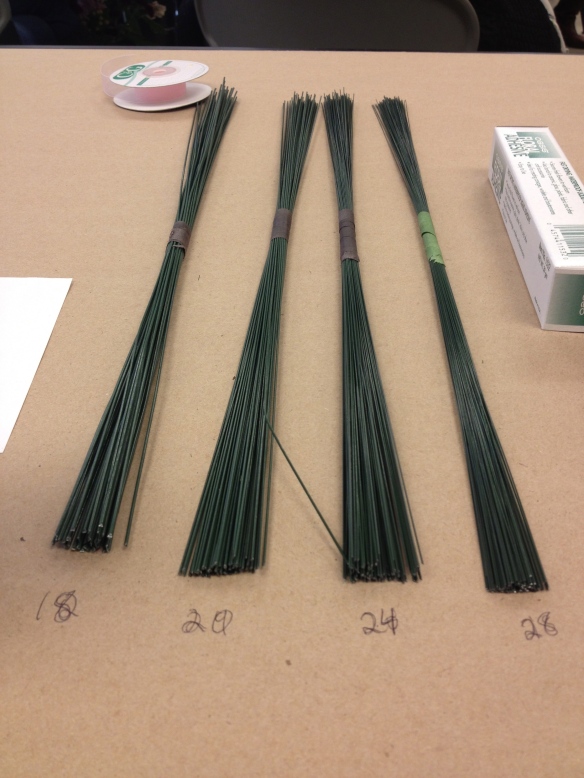
18-28 gauge wire, 18 is the largest diameter, 28 the smallest.  24 is the workhorse in floral design

18-28 gauge wire, 18 is the largest diameter, 28 the smallest. 24 is the workhorse in floral design

The correct gauge wire to use is heavy enough to replace the natural stem and hold the head upright, but not too heavy to add extra weight to the finished design.  (So as you do your wiring, hold the flower just by the wire, and if the whole thing falls over, your wire is too light!) 24 gauge is the “workhorse” in floral design, but for this bouquet I used 20 gauge, just a little thicker.

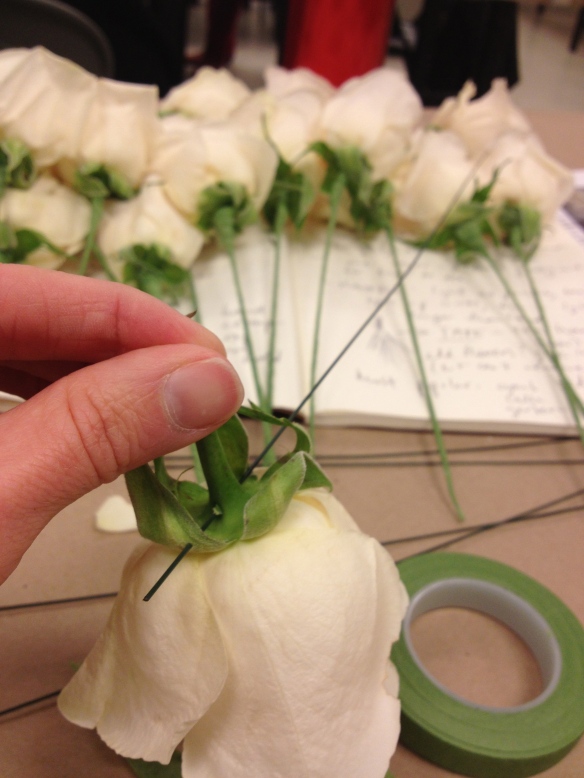
Pass the wire through the calyx, fold over and wrap in floral tape

Pass the wire through the calyx, fold over and wrap in floral tape

To wire a flower, start by breaking off it’s stem, leaving only on inch.  Insert the wire through the flower’s calyx, the green bulbous part that meets the bottom of the flower, pull the wire through a bit, and then fold it over.  Then wrap the whole new wired stem in light green floral tape.  (Take the end of the floral tape in your left hand, attach it to the top of the stem and wind it down on a diagonal with your right hand. Floral tape is not sticky on it’s own, but it sticks to itself when pressure is applied.)  During the wiring/taping process, be careful to handle the actual flower as little as possible to avoid bruising. TIP: White flowers bruise more easily

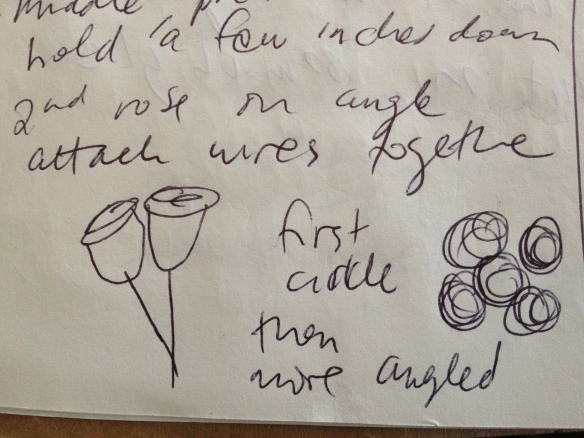
notes on angling stems

Wiring and taping is a laborious and time consuming process, but it makes the next step easier.  Select your most beautiful flower – this will be at the very center of your bouquet.  Hold it by the stem a few inches down, and so the flower is facing the ceiling.  Take your second flower and angle it’s face towards the wall, snugging it up against the first flower.  Bend the wires so they are both in the same line, pinched together by your fingers a few inches down from the calyxes.  Then turn the whole thing (I went clockwise,) put your third flower on an angle facing the wall again, bend the wire, turn again.  Do this until you have that first circle of flowers around flower number one.
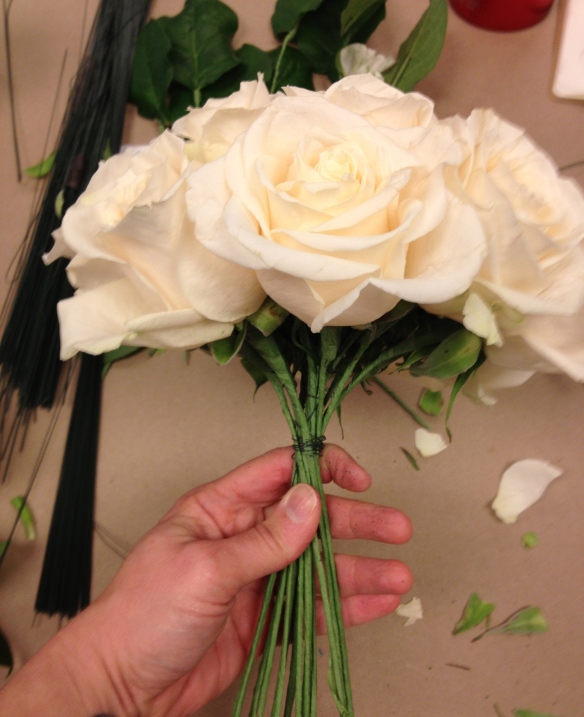
Place each stem at an angle to the center flower and turn.  Wire as you go to give your hand a break.

Place each stem at an angle to the center flower and turn. Wire as you go to give your hand a break.

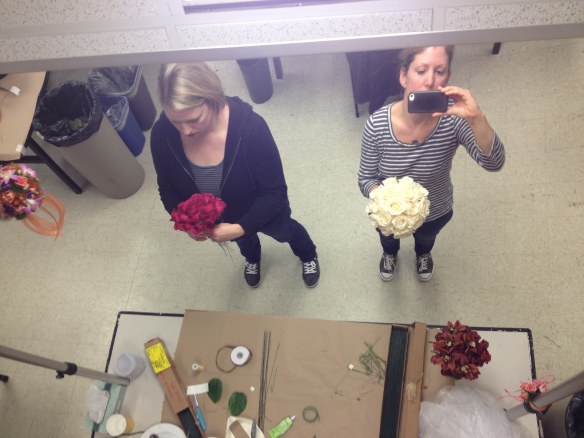
If your hand is tired, wrap the stems with wire at the pinch point.  The next set of flowers will be even more angled away from flower number one, so that if you left them when placed, the wire stems would almost be perpendicular to flower number one.  But you are tucking each wire stem straight down to be with the rest of the bunch.  As you place flowers, you can use a mirror to make sure your bouquet is symmetrical.  It’s important to remember that this bouquet must look good from every angle!

Here a fellow classmate and I check to see if our bouquets are symmetrical in the mirror

Here a fellow classmate and I check to see if our bouquets are symmetrical in the mirror

After you’ve secured your wires together with another wire, add some wired and taped lemon leaf to the bottom of the bouquet.  One layer of leaves will be ‘shiny side up’ so that it looks good from above, and the next layer will be ‘shiny side down’ so that the bride sees the prettiest part as she holds the back of the bouquet.  Then, cut out some of the tape-covered wires with your wirecutters.  This will minimize the weight of the finished design.  Wrap the whole thing in another layer of floral tape, add a ribbon and pins and voila!
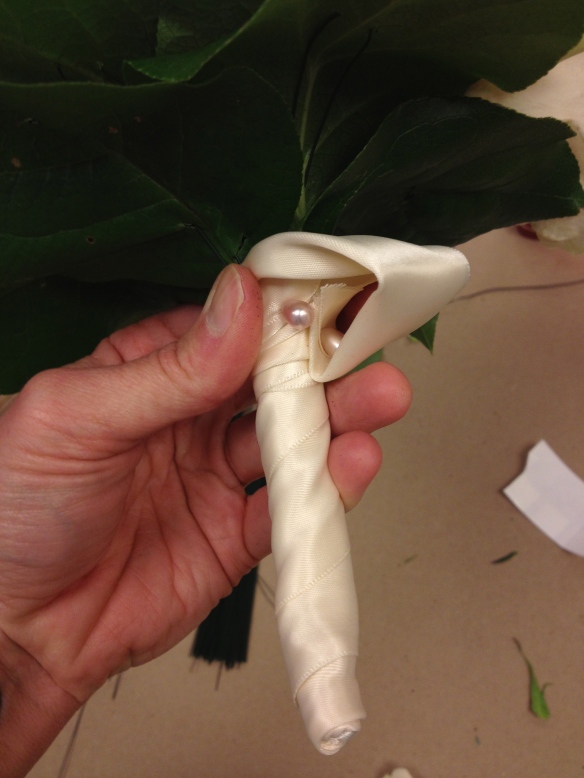
Add a layer of leaves and a pretty ribbon to finish off the underside of the bouquet.

Add a layer of leaves and a pretty ribbon to finish off the underside of the bouquet.  The “thumbholder” here is for the bride to tuck her ‘something old’ hankie into!

My hand wired bouquet displayed in an old chemistry holder to see the form

My hand wired bouquet displayed in an old chemistry holder to see the form

Some of the other students in the class made excellent bouquets.  I regret not having taken more pictures!
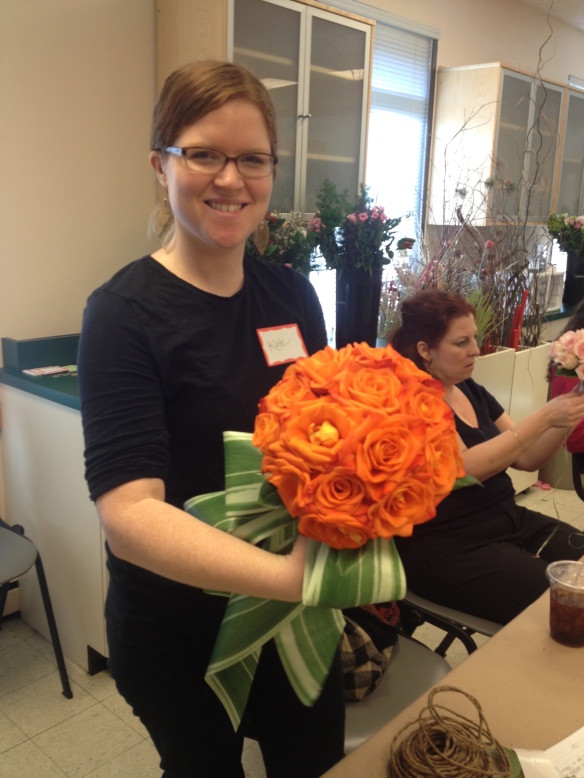
Kate's bouquet was bold and modern with a touch of a garden feel

Kate’s bouquet was bold and modern with a touch of a garden feel

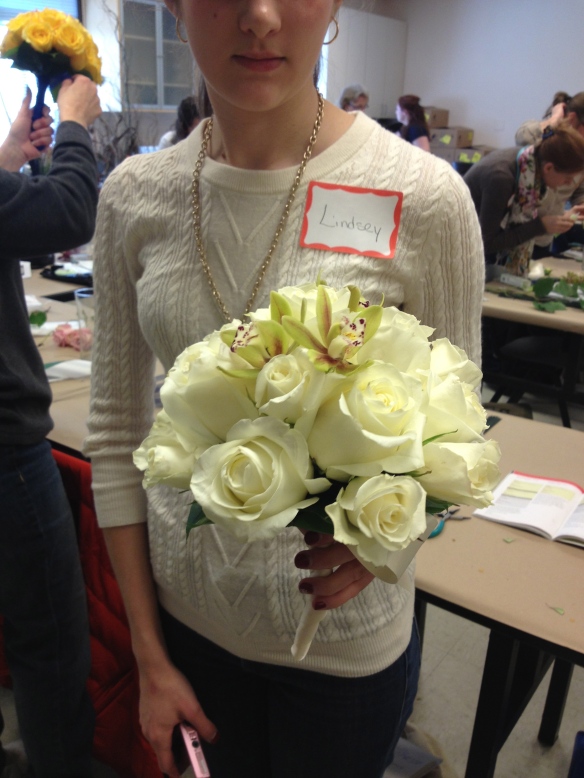
Lindsey tucked a few cymbidium orchids into her bouquet.  Her roses were of different sizes, creating a romantic 'fresh from the garden' feel.

Lindsey tucked a few cymbidium orchids into her bouquet. Her roses were of different sizes, creating a romantic ‘fresh from the garden’ feel.

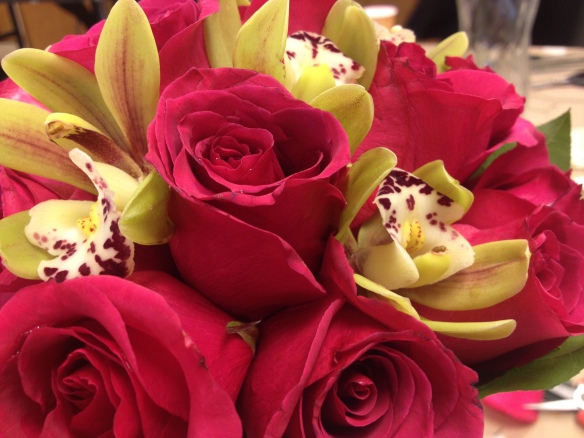
Fuschia roses combined with chartreuse cymbidium orchids - wild and modern!

Fuschia roses combined with chartreuse cymbidium orchids – wild and modern!

There was so much presented in this course, I couldn’t possibly cover it in one blog post.  All in all it was one of the best courses I’ve had at Longwood, infused with the personality of our teacher, who really has “seen it all” when it comes to the wedding business.  She told us countless stories of brides and their families gone wild, and when we got into discussing the business side of things, revealed that when she worked with some particularly difficult clients, she slapped on a “10% Bitch Charge” to the bill!

Coming up soon- hand tied and cascading bouquets!

notes from an autumn gone wild

Autumn is a second spring when every leaf is a flower.  ~Albert Camus

packing up the car to the gills for a fall wedding w peicha

I would rather sit on a pumpkin, and have it all to myself, than be crowded on a velvet cushion. ~ Henry David Thoreau

pumpkin scouting at linvilla

Delicious autumn!  My very soul is wedded to it, and if I were a bird I would fly about the earth seeking the successive autumns.  ~George Eliot

wreath by peicha of falls flowers

The fall has been a busy one, with big changes in my personal life, a scary family illness, my very first independent floral job, and competing at a national sporting event. I’ve also been working with Peicha of falls flowers on the weekends, helping her do wedding designs, and it’s really been very eye-opening and fun.

Peicha creates a bridal bouquet using garden roses, white dahlias, lady’s mantle, hydrangea, and eryngium

This particular wedding reception was in a bride’s home, which made it very special.  Here bride Gillian is holding her bouquet.  She was calm and happy, and totally stunning!

I had the most excellent time creating a garland for the railing in the foyer using a multitude of beautiful materials, like amaranth, dahlia, eryngium, roses, hydrangea, kiwi vine, and more.  They are little bowers or bundles of flowers that I wired together, then attached to the leaf garland which we wound with large ribbon.

This was so fun to make!

Check out the falls flower blog post on this beautiful wedding!  Somehow a picture of me doing disco got included.  Cuz you should be having fun in life.

I’ve also been back at Longwood Gardens, taking floral design classes in order to complete my certificate.  I was so excited to finally take a class from the impeccably organized Cres Motzi…this class was Creating a Statement – Grand Designs. In this class Cres really showed us some great ideas especially for how the mechanics of large arrangements work.

Cres Motzi creates a grid using tape over the mouth of this large glass container, then adds branches

It’s great to create these large arrangements – but how on earth do you transport them? Cres had a good idea about using 2 milk crates, with the bottom cut out of one and then zip tied together to transport this big guy.

Cres adds greens, rose hips and kale. it’s getting grander by the minute!

When it comes our turn to play, we are arranged in groups of 3 since there are 2 large designs to make.  I was more than lucky to find myself alongside Melissa, a wonderful person I met back at Lilies and Lavender.  This year is a very exciting one for her as she creates a floral business at her home.  More developments on this to come, because obviously we get along really well.

melissa is in my group creating some grand designs

melissa and i having fun together

Our Grand Design – atriplex, italian ruscus, amaranth, hydrangea, peach stock, leucodendron, safflower, alstromeria, etc

Okay, so the Grand design we created had an intended recipient – my dad at the hospital.  He was having issues with his innards and would require surgery a few days later.  But after really looking at the above design I felt that it was too funereal.  So, I ripped it apart, and using other materials both from the garden and from the extra flowers we got at class, I created this little fall basket full of love.  I wasn’t able to snap a great picture of it, too much in a hurry to see my dad.

‘get well’ basket for dad – roses, lilies, nandina berries, atriplex, hydrangea, stock, amaranth, some anemone from the garden (oh these don’t last by the way), fennel seed from garden, alstro, and grass flower heads

After he recovered and was on his way out of the hospital, I was glad to hear that he gave the basket to his excellent team of nurses as a thank you! (Next, I created floral awards for a sporting ceremony…that need to be blogged in their own separate post coming right up.)

Surrounded by flowers…a good thing to be

Through all of the craziness of moving, worrying about my dad, driving all over tarnation, flowers have kept me sane.  I believe that creating/designing with flowers is part of my recipe for personal success.  I am somewhere between avocation and vocation…where will this path lead?

magic at cairnwood

I spent the day helping Peicha Chang of falls flowers, and my what a lovely day it was.  We set up for a wedding at Cairnwood, a magical place that beckons you to “experience the grandeur of the Gilded Age.”

This country estate in Bryn Athyn, 16 miles from center city Philadelphia, was constructed in 1895 and has been designated a National Historic Landmark.  Looks like a great place to get married!

mason jars filled with blooms cap the end of every other row

rustic chandelier is hung in the gnarled conifer, with roses in place of candles

Inside the estate, we had 14 tables to cover with centerpiece “collections” in three different rooms, a mantle to hang with vintage bottles filled with buds, a cake cupboard to strew with loose flowers, and a greeting table to bedeck with more vintage bottles filled with blooms.  The palette features grays and creams and peachy pinks, which echo the colors in some of the rooms of Cairnwood.

Peicha’s centerpiece collections include the clever use of succulents as table number holders

the mantle, covered with old pictures, is hung with vintage bottles filled with buds

a glimpse of the bride

Juliet roses, peachy stock, white anemones, brunia and succulents on display

I couldn’t help myself, while taking pictures of the bouquets wrapped and ready to go, I had to capture the bridesmaid’s room.  People are so interesting.

bridesmaids getting ready

awaiting fresh cakes

groomsman with boutonniere

I am feeling a little like a maidservant in Downton Abbey at this point, trying to be silent and unobtrusive and graceful.  Peicha infuses the day with positivity and humor.

On our way out, we discover a great photo op…the very gorgeous bride and groom!  Best wishes to you both for a beautiful life together.

Bridal bouquet designed by Peicha