
During Longwood’s Comprehensive Wedding Design class we made boutonnieres, corsages, and flower girl pomanders…but it was the bouquets, oh the bouquets, that were the best and most rewarding to create. I’ve made my fair share of bouquets of course, but had never learned to do a hand-wired one. The hand-wiring technique is the “gold standard” for creating a bridal bouquet, according to teacher Nancy Gingrich Shenk, an old pro in the wedding biz. Hand wiring the stem of each flower allows you almost perfect control over stem placement and makes the bouquet lighter and easier to handle. Creating a symmetrical and rounded bouquet is that much simpler using this technique. I found myself enjoying this new skill and the resulting design very much!

the lovely Juliet models my hand wired bouquet- isn’t she a gorgeous bride?
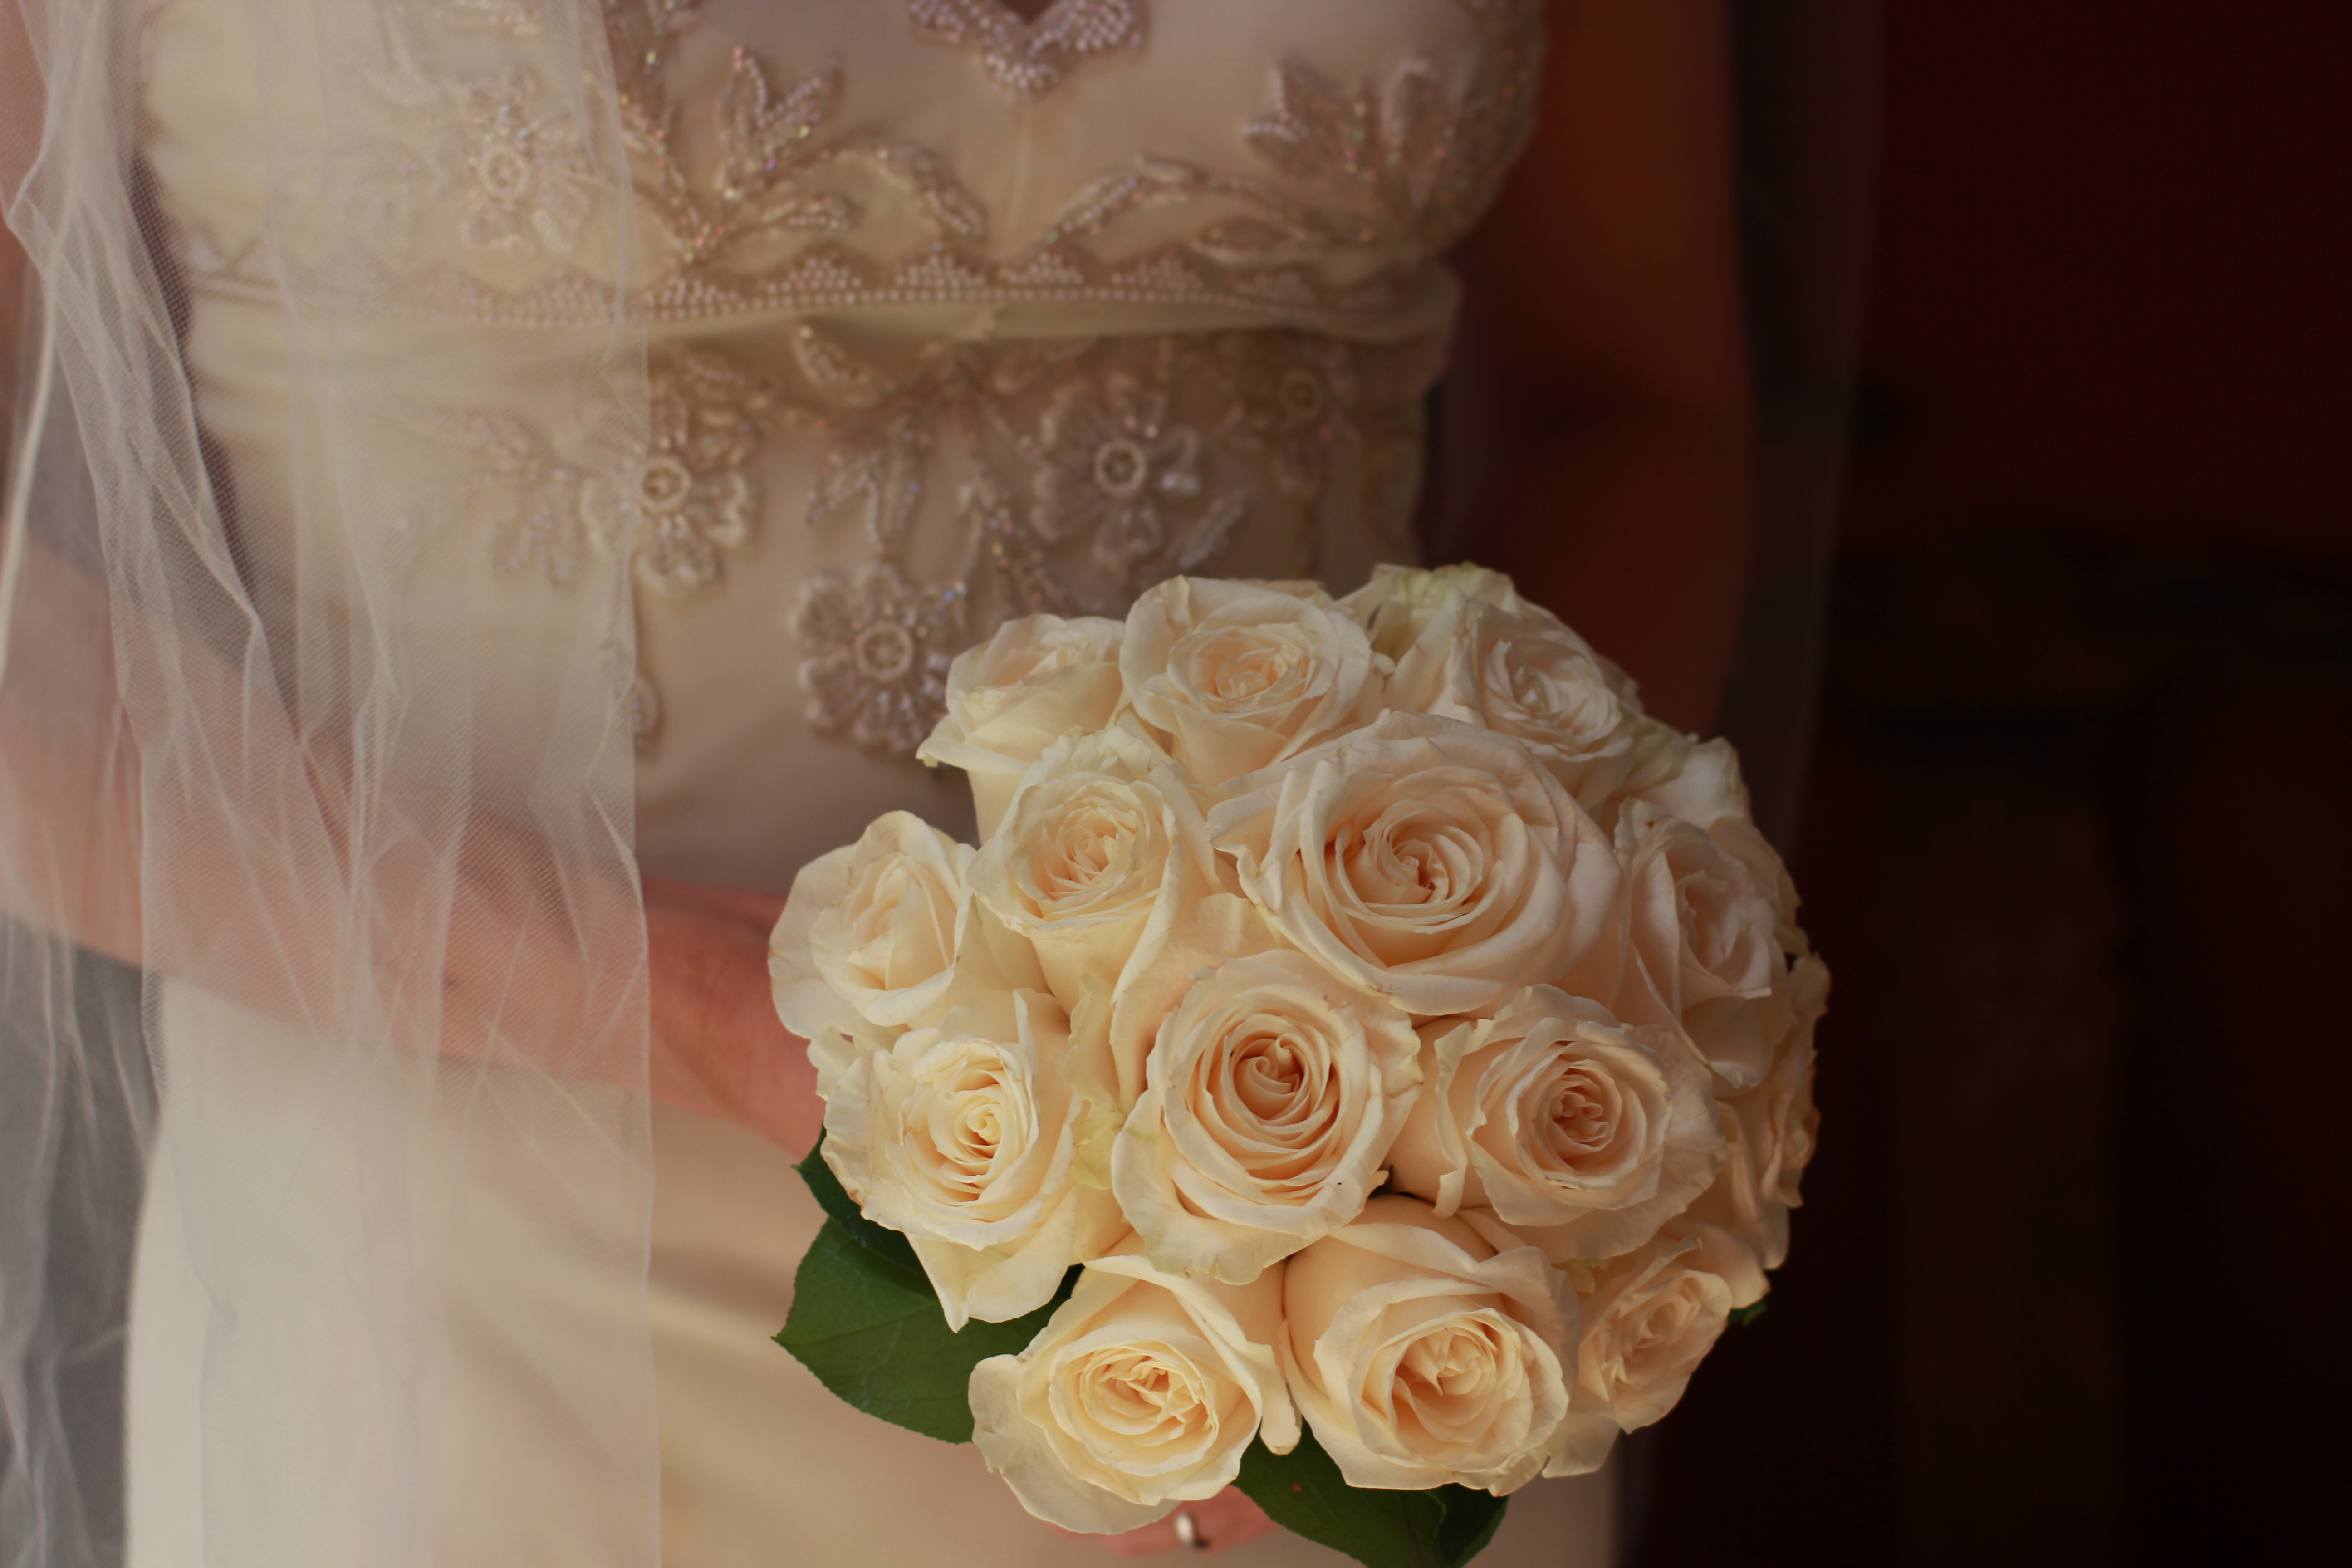
My ‘gold standard’ hand-wired bouquet with cream colored roses at the peak of their perfection
To create a hand-wired bouquet like the one above, start with the proper materials and tools, including wire, floral tape, about 20 roses, some lemon leaf or other foliage, ribbon and pins (for the handle,) pruners or snips, wire cutters and scissors.
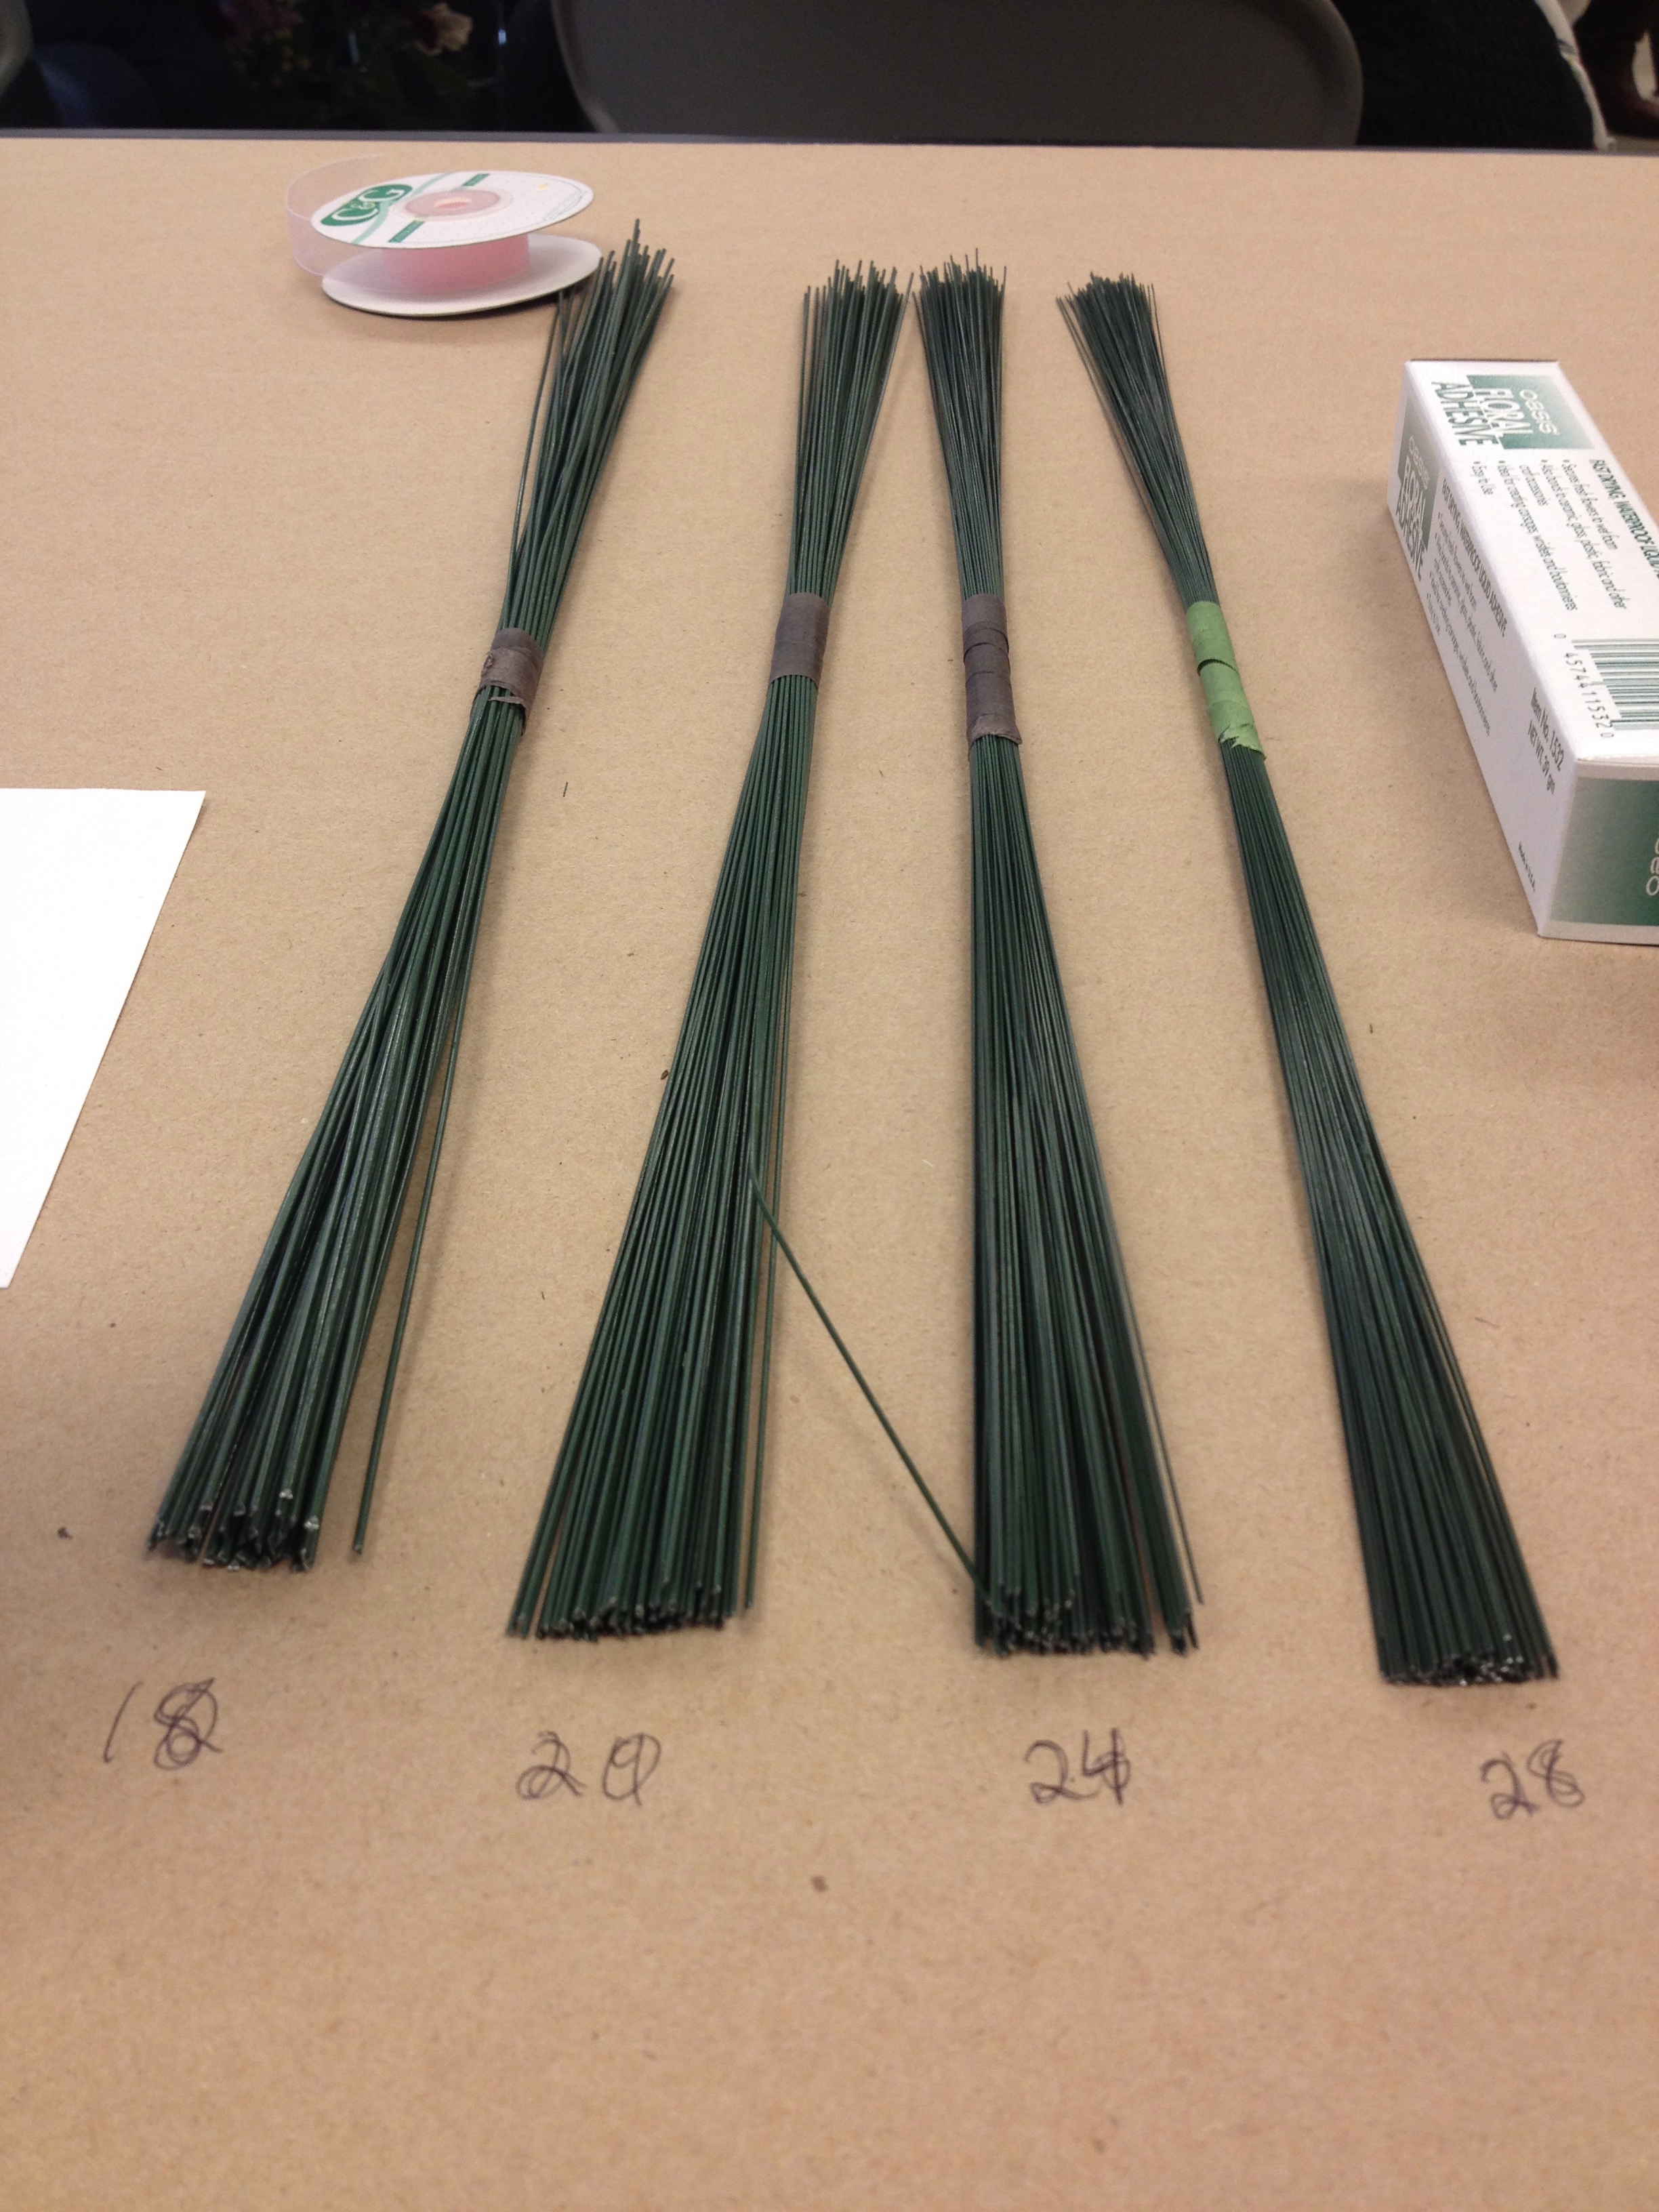
18-28 gauge wire, 18 is the largest diameter, 28 the smallest. 24 is the workhorse in floral design
The correct gauge wire to use is heavy enough to replace the natural stem and hold the head upright, but not too heavy to add extra weight to the finished design. (So as you do your wiring, hold the flower just by the wire, and if the whole thing falls over, your wire is too light!) 24 gauge is the “workhorse” in floral design, but for this bouquet I used 20 gauge, just a little thicker.
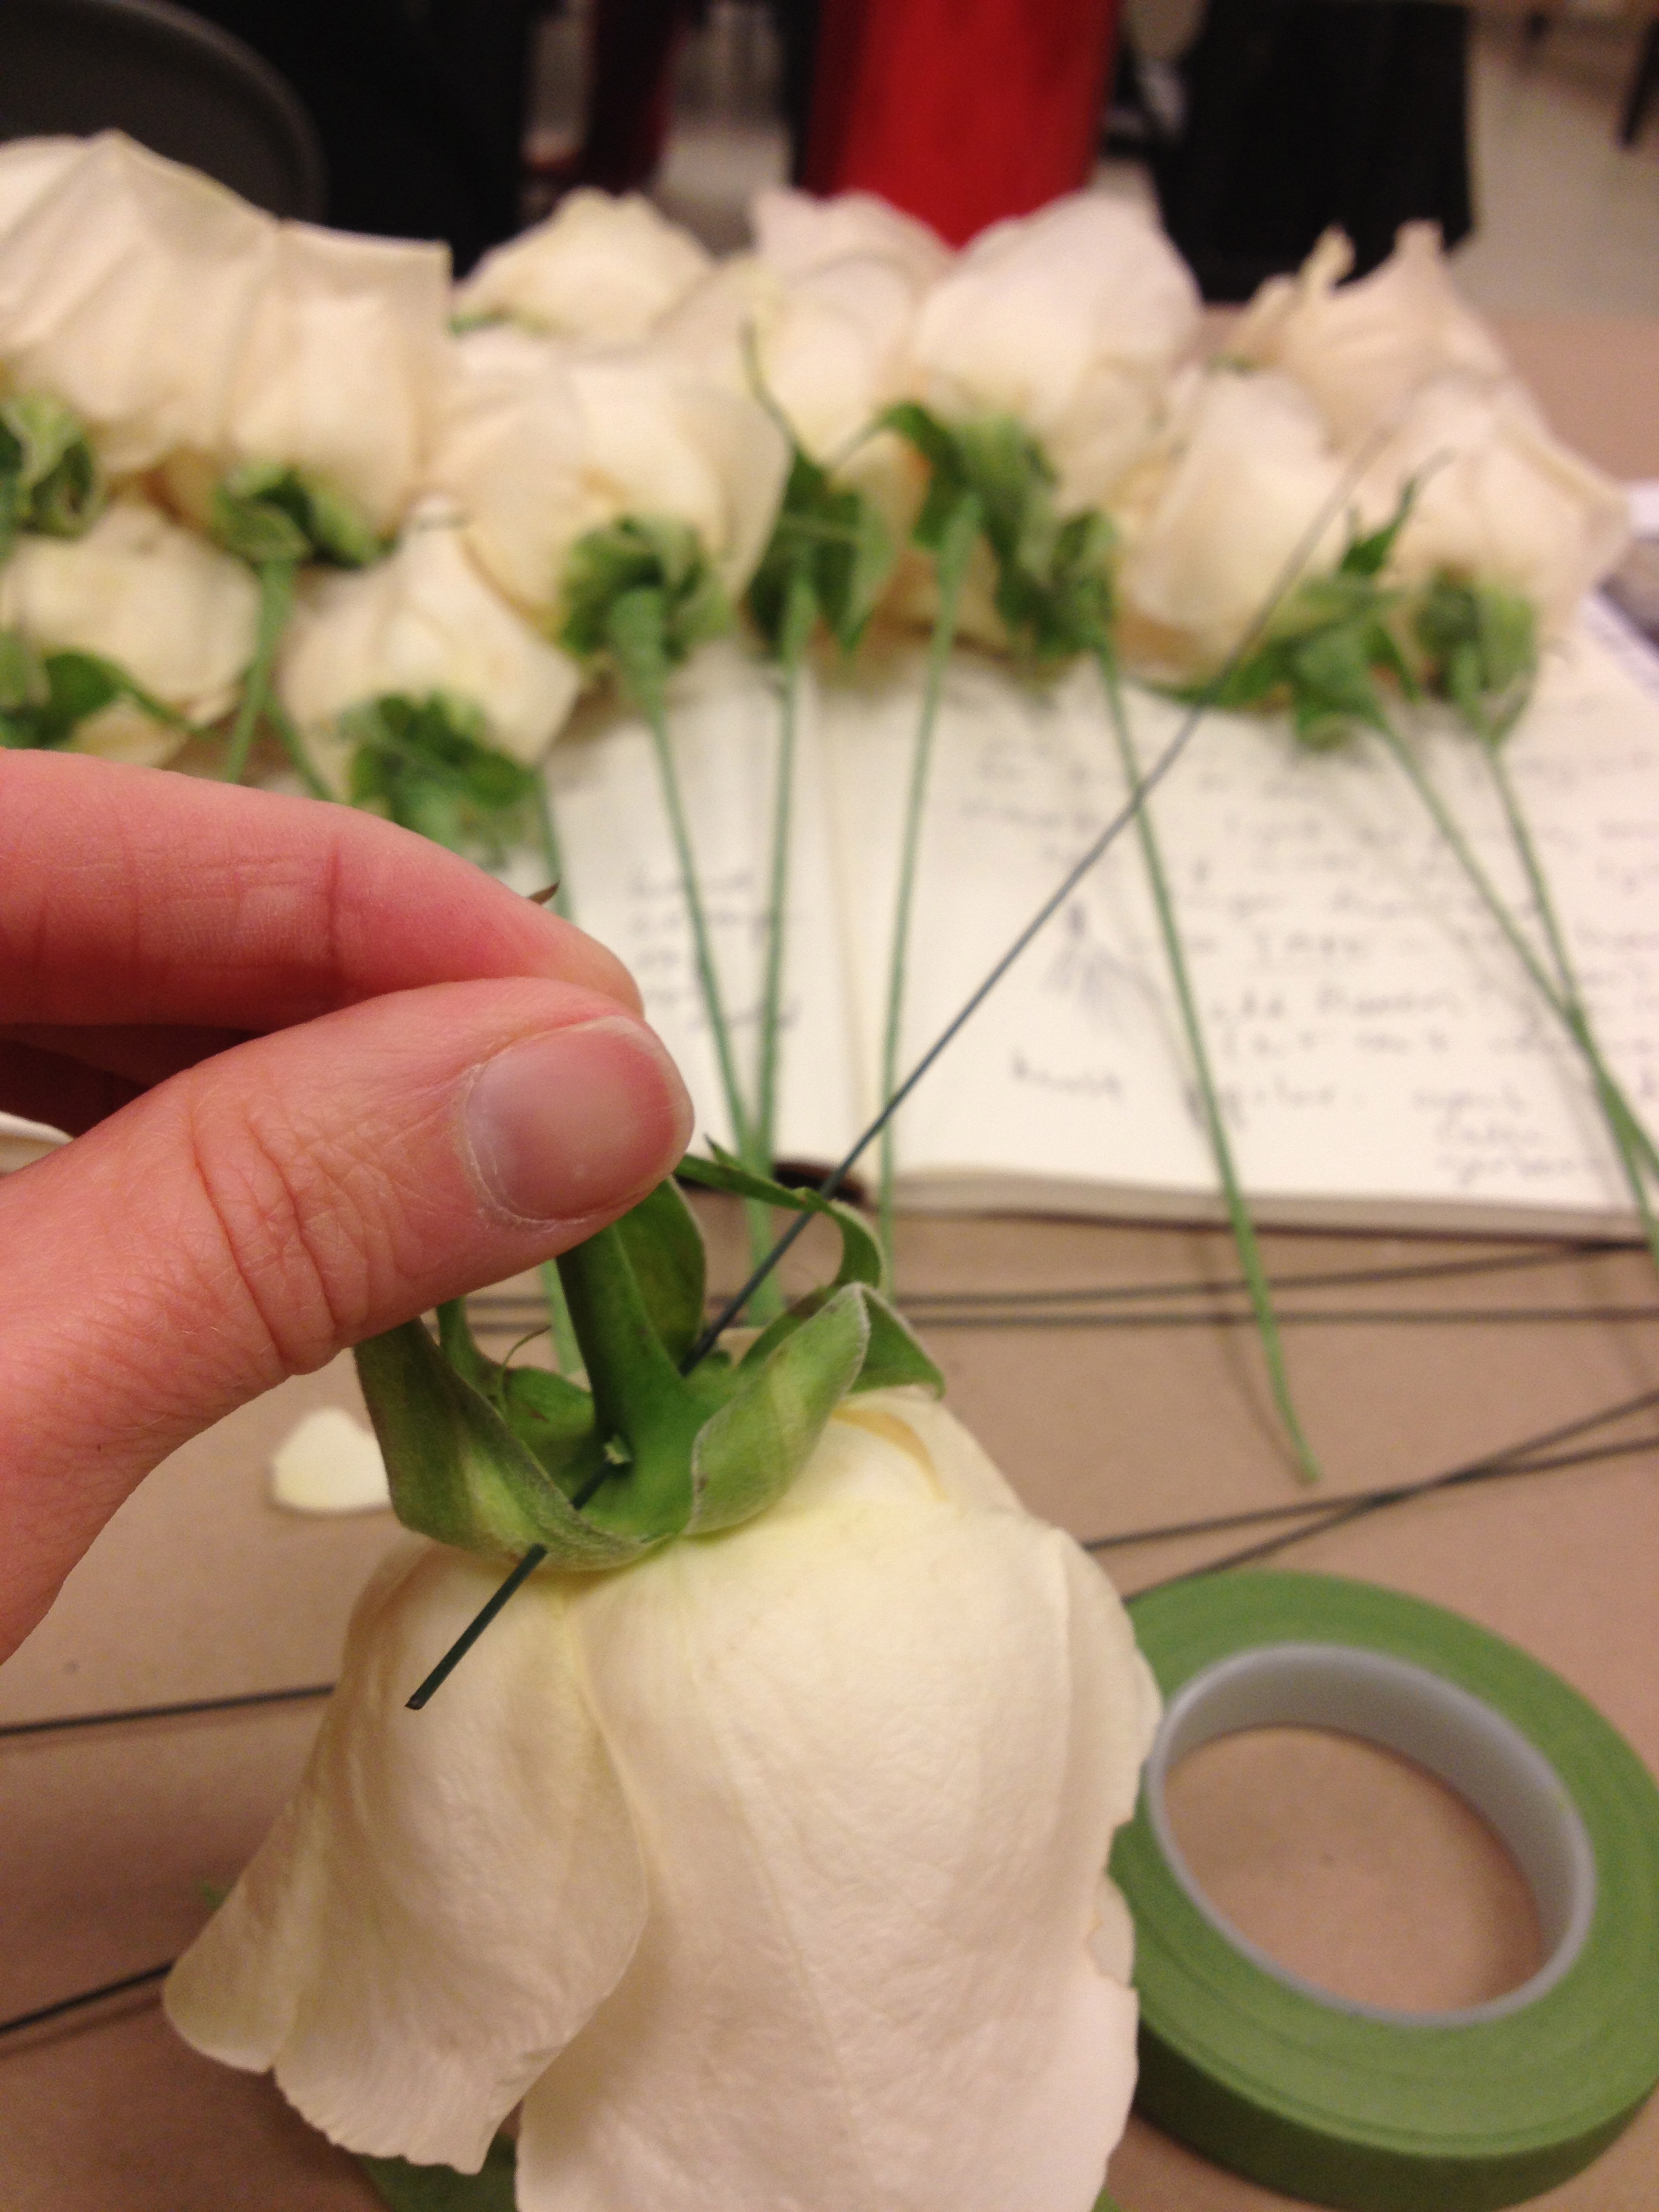
Pass the wire through the calyx, fold over and wrap in floral tape
To wire a flower, start by breaking off it’s stem, leaving only on inch. Insert the wire through the flower’s calyx, the green bulbous part that meets the bottom of the flower, pull the wire through a bit, and then fold it over. Then wrap the whole new wired stem in light green floral tape. (Take the end of the floral tape in your left hand, attach it to the top of the stem and wind it down on a diagonal with your right hand. Floral tape is not sticky on it’s own, but it sticks to itself when pressure is applied.) During the wiring/taping process, be careful to handle the actual flower as little as possible to avoid bruising. TIP: White flowers bruise more easily
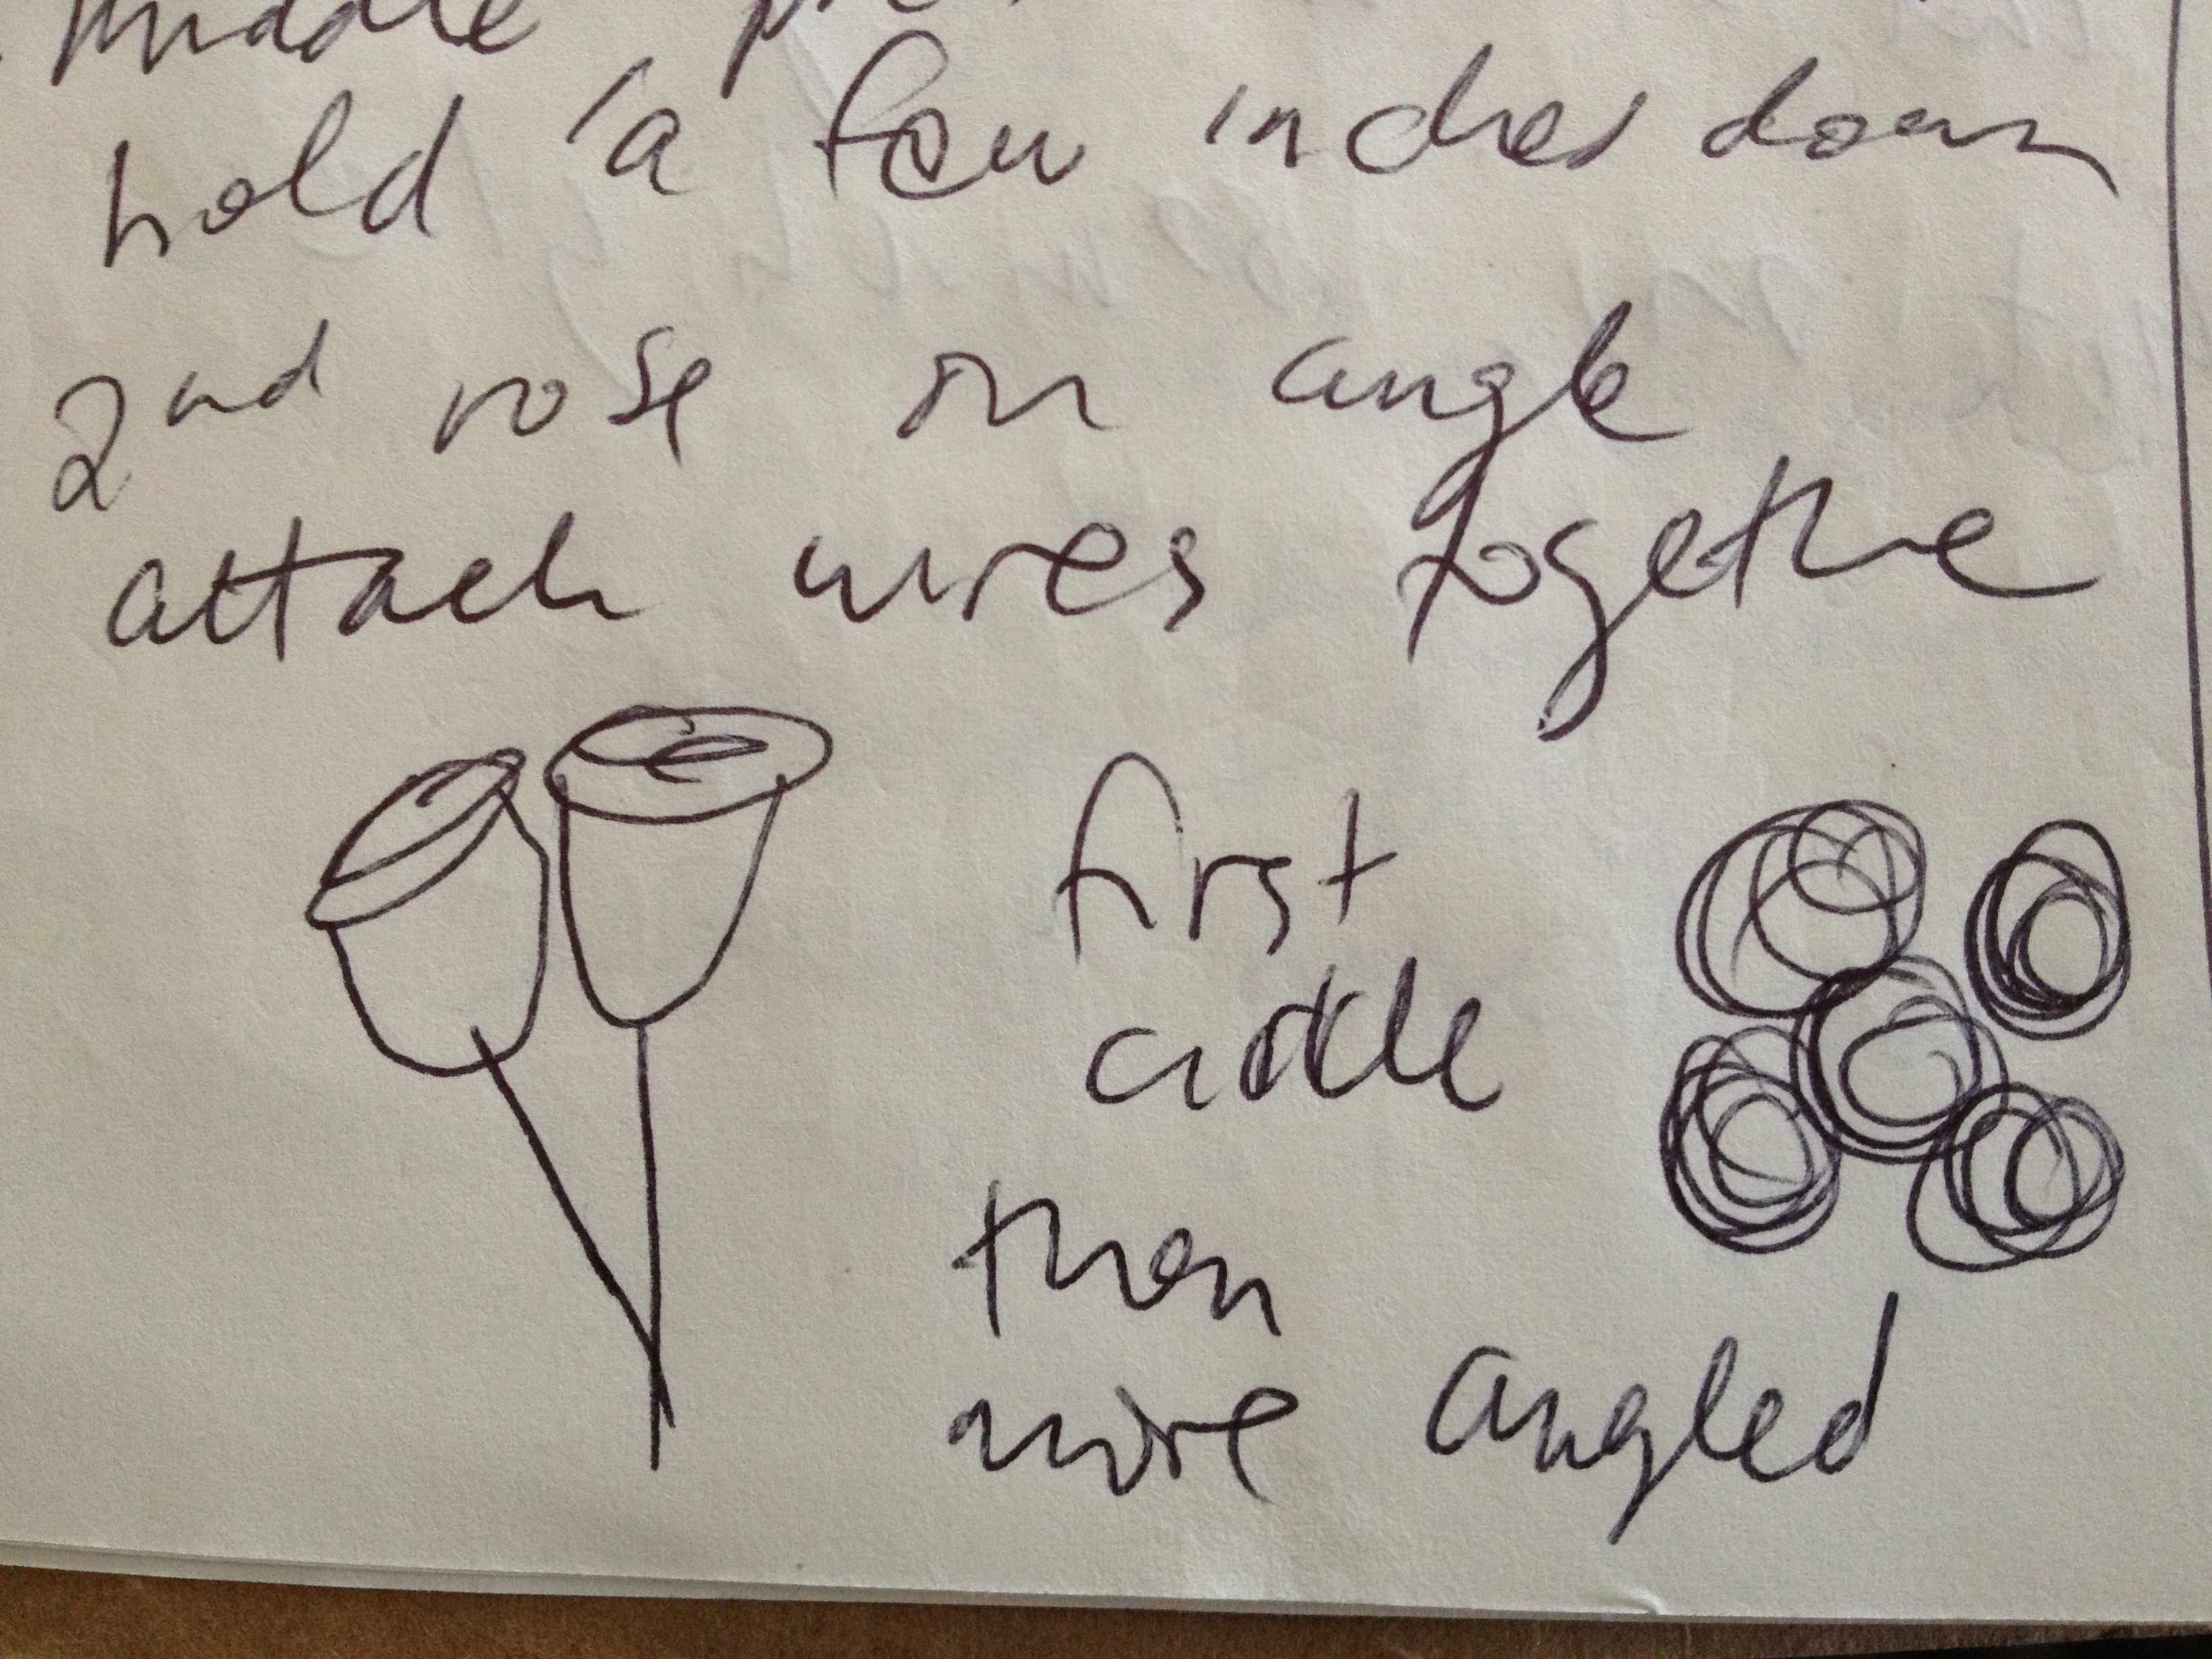
Wiring and taping is a laborious and time consuming process, but it makes the next step easier. Select your most beautiful flower – this will be at the very center of your bouquet. Hold it by the stem a few inches down, and so the flower is facing the ceiling. Take your second flower and angle it’s face towards the wall, snugging it up against the first flower. Bend the wires so they are both in the same line, pinched together by your fingers a few inches down from the calyxes. Then turn the whole thing (I went clockwise,) put your third flower on an angle facing the wall again, bend the wire, turn again. Do this until you have that first circle of flowers around flower number one.

Place each stem at an angle to the center flower and turn. Wire as you go to give your hand a break.
If your hand is tired, wrap the stems with wire at the pinch point. The next set of flowers will be even more angled away from flower number one, so that if you left them when placed, the wire stems would almost be perpendicular to flower number one. But you are tucking each wire stem straight down to be with the rest of the bunch. As you place flowers, you can use a mirror to make sure your bouquet is symmetrical. It’s important to remember that this bouquet must look good from every angle!

Here a fellow classmate and I check to see if our bouquets are symmetrical in the mirror
After you’ve secured your wires together with another wire, add some wired and taped lemon leaf to the bottom of the bouquet. One layer of leaves will be ‘shiny side up’ so that it looks good from above, and the next layer will be ‘shiny side down’ so that the bride sees the prettiest part as she holds the back of the bouquet. Then, cut out some of the tape-covered wires with your wirecutters. This will minimize the weight of the finished design. Wrap the whole thing in another layer of floral tape, add a ribbon and pins and voila!

Add a layer of leaves and a pretty ribbon to finish off the underside of the bouquet. The “thumbholder” here is for the bride to tuck her ‘something old’ hankie into!

My hand wired bouquet displayed in an old chemistry holder to see the form
Some of the other students in the class made excellent bouquets. I regret not having taken more pictures!

Kate’s bouquet was bold and modern with a touch of a garden feel

Lindsey tucked a few cymbidium orchids into her bouquet. Her roses were of different sizes, creating a romantic ‘fresh from the garden’ feel.

Fuschia roses combined with chartreuse cymbidium orchids – wild and modern!
There was so much presented in this course, I couldn’t possibly cover it in one blog post. All in all it was one of the best courses I’ve had at Longwood, infused with the personality of our teacher, who really has “seen it all” when it comes to the wedding business. She told us countless stories of brides and their families gone wild, and when we got into discussing the business side of things, revealed that when she worked with some particularly difficult clients, she slapped on a “10% Bitch Charge” to the bill!
Coming up soon- hand tied and cascading bouquets!


